Adobe Pagemaker - Master Pages | 12th Computer Applications : Chapter 2 : An Introduction to Adobe Pagemaker
Chapter: 12th Computer Applications : Chapter 2 : An Introduction to Adobe Pagemaker
Master Pages
Master
Pages
Any text or object that you place on the master
page will appear on all the document pages to which the master is applied. It
shortens the amount of time because you don’t have to create the same objects
repeatedly on subsequent pages.
Master Pages commonly contain repeating logos, page
numbers, headers, and footers. They also contain nonprinting layout guides,
such as column guides, ruler guides, and margin guides.
A master item cannot be selected on a document
page.
You can create, modify, and delete objects on
master pages just like any other objects, but you must do so from the master
pages themselves.
At the lower left corner of a document
(publication) window you can find an icon which represents the master pages.
The letters L and R (L denotes left and R denotes right) mark the master page
icon for facing pages. A single -sided publication icon is marked by an R
alone. Refer Figure 2.58

1. Inserting Page Numbers in Master Pages
To make
page numbers appear on every page
1. Click on Master Pages icon.
2. Then click on Text Tool. Now the cursor changes
to I - beam.
3. Then Click on the left Master page where you
want to put the page number.
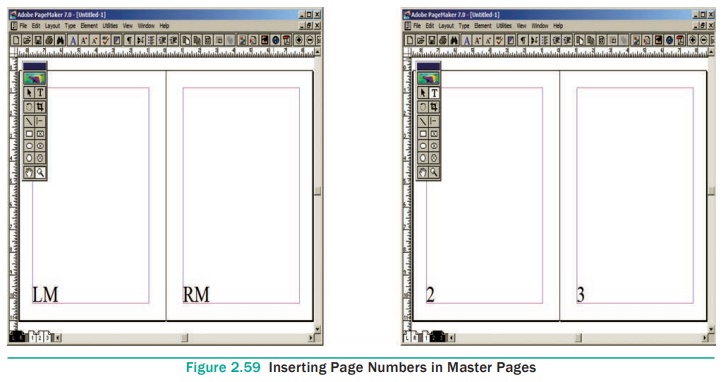
4. Press Ctrl + Alt + P.
5. The page number displays as ‘LM’ on the left
master page.
6. Similarly click on the right Master page where
you want to put the page number.
7. Press Ctrl + Alt + P.
8. The page number displays as ‘RM’ on the right
master page, but will appear correctly on the actual pages. Refer Figure 2.59
2. Hiding Master Items
To make the master items invisible on a particular
page, switch to the appropriate page, then choose View > Display Master items
(which is usually ticked). Refer Fig 2.60

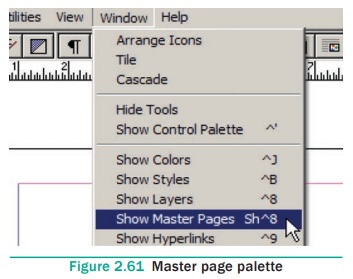
3. Showing Master Page Palette
Master Pages palette organize all the command you
will need to work with Master Pages. Refer Figure 2.61 and 2.62 To show Master
Page Palette
1. Choose Windows>
Show Master Pages in the menu
bar. The Master Pages Palette appears.

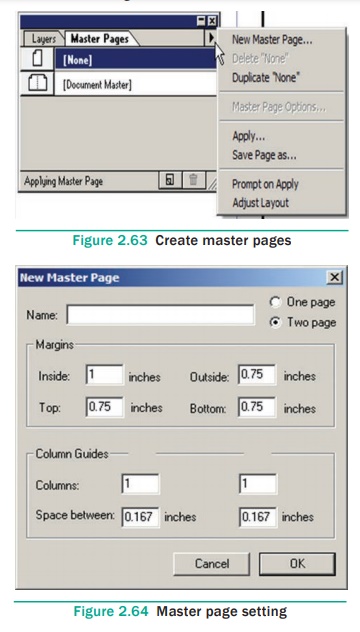
4. Creating Master Pages
By default, all Pagemaker documents have a Master
Page already created ‘Document Master’. But sometimes you will require more than one Master Page.
You can set up multiple master pages for any
publication, each page containing a specific combination of headers, footers,
page numbers, frames, and other elements that you want to use over and over.
When you create a new Master Page, you will be
asked to name the new Master page and set its margins and column guides.
To create
a new Master Page
1. Click the New
Master Page icon in the Master Pages palette. The New Master Page dialog box
appears.
2. Enter the name of the new master page in the Name field.
3. Make the appropriate changes in the Margins and
Column Guides fields.
4. Click on OK. A new Master Page appears in the
Master Pages palette. Refer Figure 2.63 and 2.64
Related Topics