Adobe Pagemaker - Drawing | 12th Computer Applications : Chapter 2 : An Introduction to Adobe Pagemaker
Chapter: 12th Computer Applications : Chapter 2 : An Introduction to Adobe Pagemaker
Drawing
Drawing
There are so many drawing tools in PageMaker. Line tool, Rectangle tool, Ellipse tool and Polygon tool are four main
drawing tools.
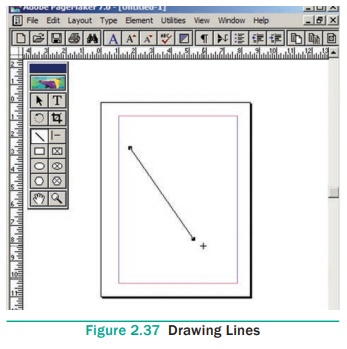
1. Drawing Lines
PageMaker has two Line tools. The first one creates
a straight line at any orientation. The second is a constrained Line tool that
draws only at increments of 45 degrees. You can change the property of tools by
double-clicking on them. Refer Figure 2.37 to Figure 2.40
To draw a line
1. Select the Line tool from the toolbox. The
cursor changes to a crosshair.
2. Click and drag on the screen to draw your line.
As you drag, a line appears.
3. Release the mouse button and the line will be
drawn and selected, with sizing handles on either end.
Resize the line by clicking and dragging the
handles, if necessary.
To draw a
Dotted line
1. Double click the Line tool from the toolbox. A Custom
Stroke dialogue box appears.

2. Select the required Stroke style in the drop-down list box.
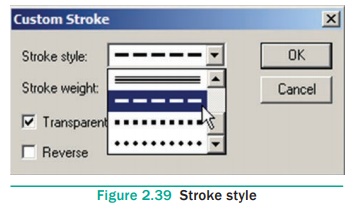
3. Then click OK button. Now the cursor changes to
a crosshair.
4. Click and drag on the screen to draw your dotted
line. As you drag, the line appears.
5. Release the mouse button and the line will be
drawn and selected, with sizing handles on either end. Resize the line by
clicking and dragging the handles, if necessary.

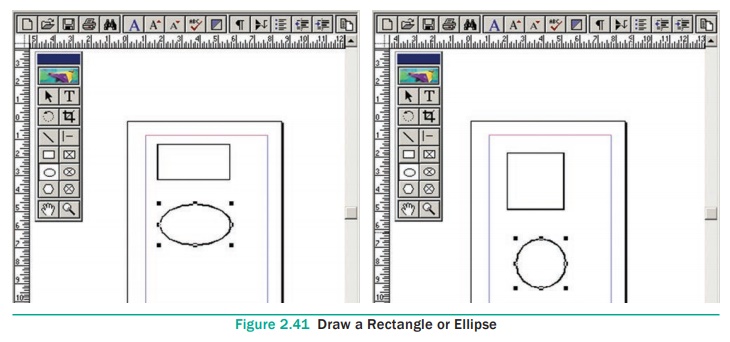
2. Drawing Rectangles or Ellipses
You can also draw rectangles and ellipses shapes by
using the same technique as used in line drawing. Refer Figure 2.41 and 2.42
1. To draw a rectangle or ellipse: Click on the Rectangle or Ellipse tool from the
toolbox.
The cursor changes to a crosshair.
2. Click and drag anywhere on the screen. As you drag,
a rectangle or ellipse appears.
3. Release the mouse button when the rectangle or
ellipse is of the desired size.
Press the Shift
key while you’re drawing to constrain the shape to a square or circle.
Drawing a
Rounded Corner Rectangle
To draw a rounded-corner rectangle:
1. Double-click
the Rectangle tool in the toolbox.
The Rounded
Corners dialog box appears.
2. Choose a corner setting from the preset shapes.
3. Click on OK. The cursor changes to a crosshair.
4. Click and drag anywhere on the screen.
5. Release the mouse button when the rectangle is
the desired size.
Press the Shift key as you draw to constrain the
shape to a rounded-corner square.

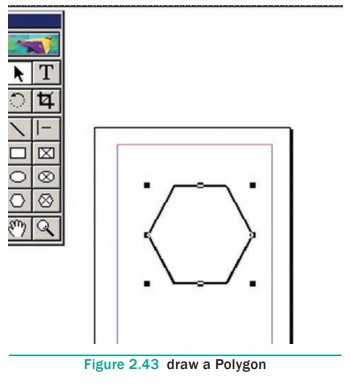
3. Drawing Polygon
To draw a
Polygon
1. Click on the Polygon tool from the toolbox.
The cursor changes to a crosshair.
2. Click and drag anywhere on the screen. As you
drag, a Polygon appears.
3. Release the mouse button when the Polygon is of
the desired size. Refer Figure 2.43
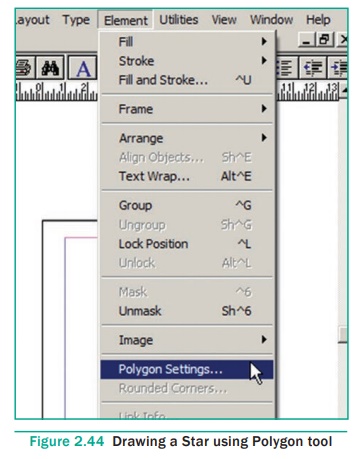
4. Drawing a Star using Polygon tool
To draw a
Star
1. Click on the Polygon tool from the toolbox.
The cursor changes to a crosshair.
2. Click and drag anywhere on the screen. As you
drag, a Polygon appears.
3. Release the mouse button when the Polygon is of
the desired size.
4. Choose Element > Polygon Settings in the menu
bar.
Now Polygon Settings dialogue box appears.
5. Type 5 in the Number of sides text box.
6. Type 50% in Star inset textbox.
7. Click OK. Now the required star appears on the
screen. Refer Figure 2.44 - 2.46

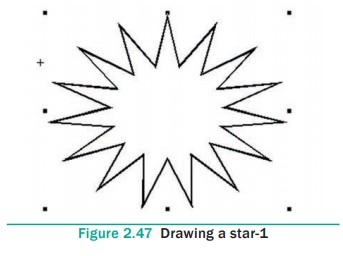
Drawing a
star with given number of sides and required inset
1. The value of ‘Star inset’ is 50% The number of
sides is 15
The result of the star shape is shown Figure 2.47.
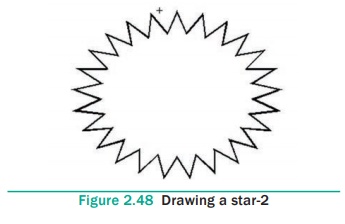
2. The value of ‘Star inset’ is 25% The number of
sides is 25
The result of the star shape is shown Figure 2.48.
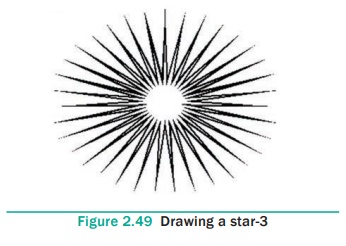
3. The value of ‘Star inset’ is 35%
The number of sides is 70
The result of the star shape is shown Figure 2.49.
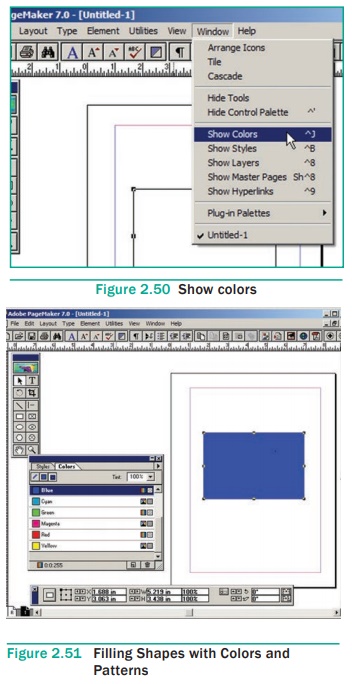
5. Filling Shapes with Colors and Patterns
Filling
Rectangle with colour
1. Draw a rectangle using Rectangle tool.
2. Select the rectangle.
3. Choose Window
> Show colors in the menu bar. (or) Press Ctrl + J Now Colors palette appears.
4. Click on the required colour from the Colors
Palette.
5. The rectangle will be filled with the colour.
Refer Figure 2.50 and 2.51
Related Topics