Word Processor Basics ( OpenOffice Writer) - Formatting Word Processor Table | 11th Computer Science : Chapter 6 : Word Processor Basics ( OpenOffice Writer)
Chapter: 11th Computer Science : Chapter 6 : Word Processor Basics ( OpenOffice Writer)
Formatting Word Processor Table
Formatting table
Formatting a table involves
formatting of the table layout,
formatting of the table text,
adjusting the size of the table, its position on the page, adding or removing rows or columns, merging and splitting cells, changing borders and the background.

1. Inserting rows and columns
To insert rows or columns inside a
table:
1. Place the insertion pointer in
the row or in the column where you would like to add new rows or columns and right-click.
2. Choose Row ->Insert – to insert a row or Column -> Insert
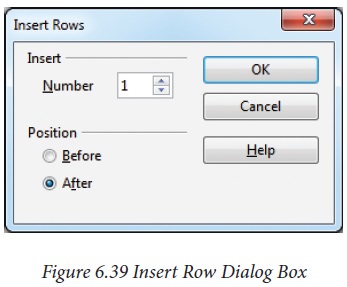
– to insert a column. A dialog box will appear, from which you can select the
number of rows or columns to insert. You can also set the position of the new
rows or columns to Before
or After as shown in Figure - 6.39.
3. Click OK to close the dialog
box.

2. Deleting rows and columns
To delete rows or columns inside a
table:
· Place the insertion pointer in the
row or column to be deleted and right-click.
· Choose Row -> Delete – to delete a row or Column -> Delete–
to delete a column.
· The selected row / column is
deleted.
3. Merging and Splitting cells
To merge a group of cells:
· Select the cells to merge.
· Right click and choose Cell -> Merge or choose Table -> Merge Cells from the menu bar.
To split a cell:
· Place the insertion pointer inside
the cell.
· Right click and choose Cell -> Split, or choose Table -> Split Cells from the menu bar.
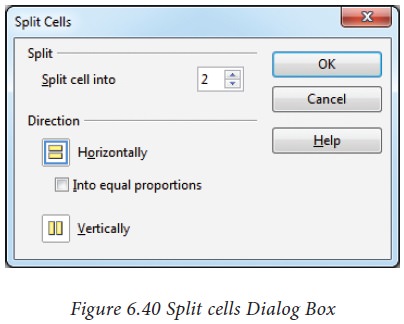
· Select the direction of the split,
horizontally (for rows), or vertically (for columns), as well as the total
number of cells to create.
· The dialog box on Figure 6.40
displays the split cells.

Related Topics