CorelDRAW 2018 - Drawing Shapes | 12th Computer Technology : Chapter 3 : CorelDRAW 2018
Chapter: 12th Computer Technology : Chapter 3 : CorelDRAW 2018
Drawing Shapes
DRAWING SHAPES
CorelDRAW has different shape tools that you use to create
ellipse(including circles), rectangle (including squares), polygons, stars and
some basic shapes.
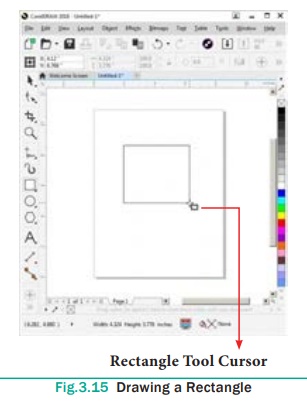
Drawing rectangles and squares
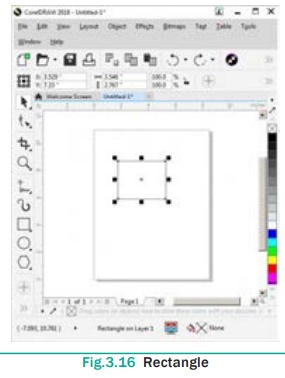
Drawing a Rectangle
1.
To draw a rectangle, select the Rectangle tool in the toolbox. The
mouse pointer changed to a crosshair with a small rectangle beneath it.
2.
Click and drag anywhere in the drawing area. As you drag, a
rectangle appears.
3.
Release the mouse button when the rectangle is of the desired
size.
4.
Now a rectangle will appear on the screen.
As you click and drag using the cursor, you’ll also notice that
the Status bar and Property bar show coordinates, width, and height properties
detailing your new object’s shape.
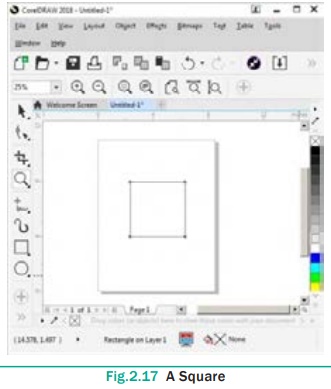
Drawing a Square
1. To draw a square, select the Rectangle tool in the toolbox. The
mouse pointer changes to a crosshair with a small rectangle beneath it.
2. Click on anywhere in the drawing area and hold down the Ctrl
key while dragging the mouse pointer.
3. Release the mouse button where you like the end of the square.
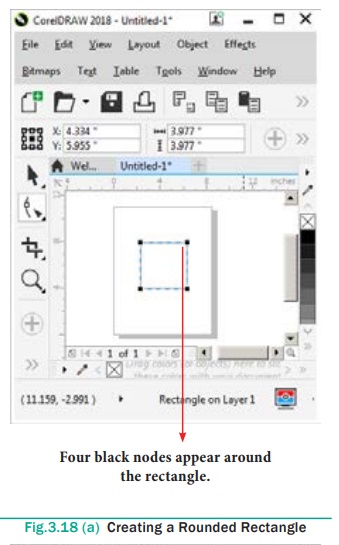
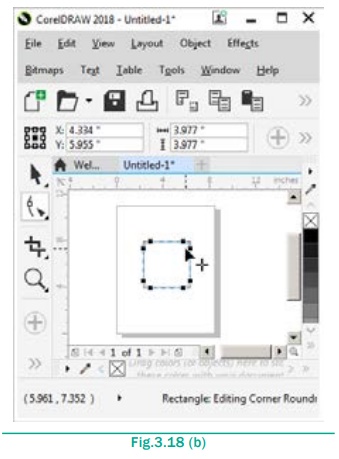
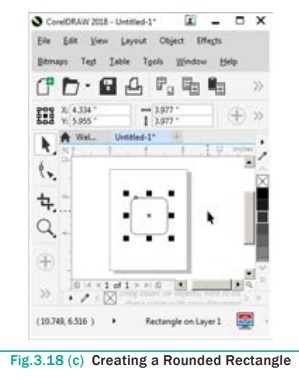
Creating a Rounded Rectangle
After drawing a rectangle, you can optionally round its corners.
You can round all corners at once or choose the ones you want to round. Corners
can be slightly rounded to create a softening effect or very rounded, almost
changing the rectangle into a circle.
To round the corners of a rectangle:
1. In the toolbox, select the Shape Tool icon from the
Shape Tool layout or press F10 key.
2. Select the rectangle you wish to round. Four black nodes appear
around the rectangle.
3. To set the same rounding for all corners make sure that all nodes
are selected (black) and then drag any node. See Figures 3.18(a)-3.18(c)
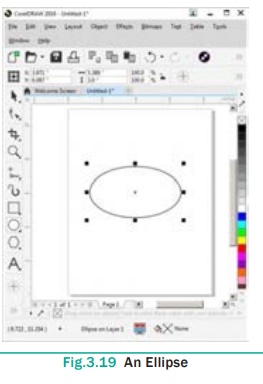
Creating ellipses
1. To draw an ellipse (also known as an oval), select the Ellipse
tool in the toolbox. The mouse pointer changes to a crosshair with a small
ellipse beneath it.
2. Click on anywhere in the drawing area and drag the mouse
pointer.
3. Release the mouse button where you like the end of the ellipse.
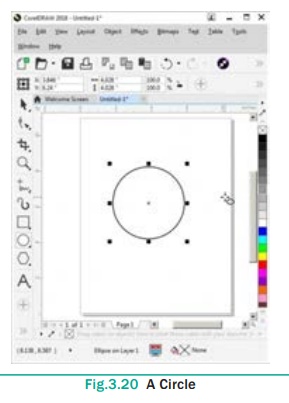
Creating Circles
1. To draw a circle, select the Ellipse tool in the
toolbox. The mouse pointer changes to a crosshair with a small ellipse
beneath it.
2. Click on anywhere in the drawing area and hold down the Ctrl
key while dragging the mouse pointer.
3. Release the mouse button where you like the end of the circle.
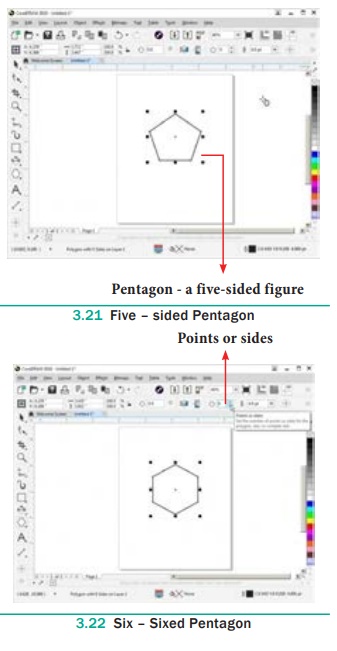
Creating Polygons
1. To draw a polygon (also known as pentagon: a five-sided
figure), select the Polygon tool in the toolbox. The mouse pointer
changes to a cross-hair with a small polygon beneath it.
2. Click on anywhere in the drawing area and drag the mouse
pointer.
3. Release the mouse button where you like the end of the polygon.
4. To increase the number of sides of your polygon, select the
polygon you have drawn using the Pick tool.
5. Place the mouse pointer on the Number of Points on Polygon text
box and type the number of sides you like for you polygon.
You can also set the number of sides for your polygon and then
draw it.
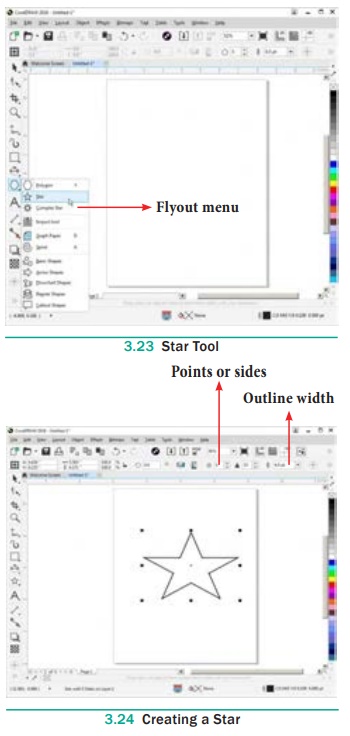
Creating Stars
Polygon tool has a small arrow in the lower- right corner of the
tool. That little arrow indicates that this tool has a flyout.
To draw a star,
1. Click on the Polygon tool and hold down the mouse key. A flyout
menu will appear showing you other tools.
2. Click on the Star tool from the flyout menu.
3. Click on anywhere in the drawing area and drag the mouse
pointer.
4. Release the mouse button where you would like the end of the star.
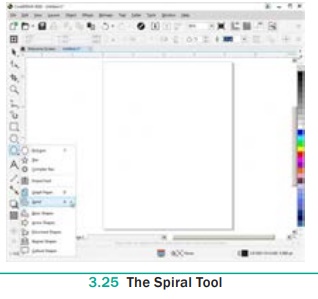
Drawing Spirals
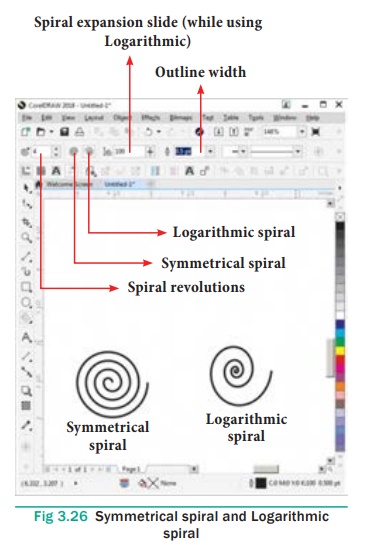
There are two types of spirals. They are
1. Symmetrical spiral
2. Logarithmic spiral.
A Symmetrical spiral expands evenly so that the distance between
each revolution is equal. A Logarithmic spiral expands with increasingly larger
distances between revolutions.
You can draw spirals of different sizes with Spiral tool.
To draw a spiral,
1.
Click and hold the Polygon tool. A flyout menu will appear.
2.
Click on the Spiral tool from the flyout menu.
3.
Now you should type a value in the Spiral revolutions box on the
property bar to set the number of full-circle revolutions to appear in the new
spiral object.
4.
Next, click one of the following buttons on the property bar:
a. Symmetrical spiral
b. Logarithmic spiral
If you want to change the amount by which the spiral expands as it
moves outward, move the Spiral expansion slide.
5.
Drag diagonally in the drawing window until the spiral is the
required size.
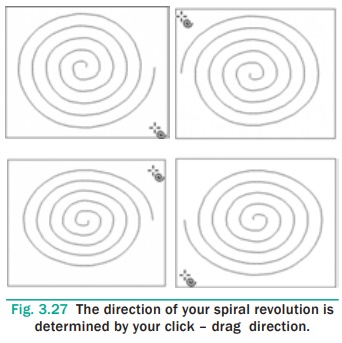
The objects you can create may have between 1 to 100 revolution,
each of which is equal to one complete rotation around its center point. The
direction of the revolutions is set according to the click and drag action
during creation of the initial shape, as shown below.

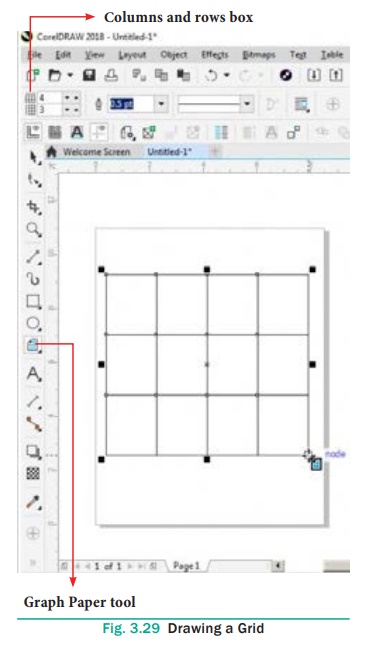
Drawing Grids
Using Graph Paper tool, you can draw a grid and set the number of
rows and columns. A grid is a grouped set of rectangles that you can break
apart.
To draw a grid,
1.
Click and hold the Polygon tool. A flyout menu will appear.
2.
Select the Graph Paper tool from the flyout menu.
3.
Now type values in the top and bottom portions of the Columns and
rows box on the property bar.
The value you type in the top portion of the Columns and rows box
specifies the number of columns; the value you type in the bottom portion
specifies the number of rows.
4.
Click on anywhere in the drawing area where you want the grid to
appear.
5.
Drag diagonally to draw the required grid.
If you want to draw the grid from its center point outward, hold
down Shift key as you drag; if you want to draw a grid with
square cells, hold down Ctrl key as you drag.
Drawing in Freehand mode
Drawing a straight line
To draw a straight line
1. Click the Freehand tool (or) press F5 in the keyboard.
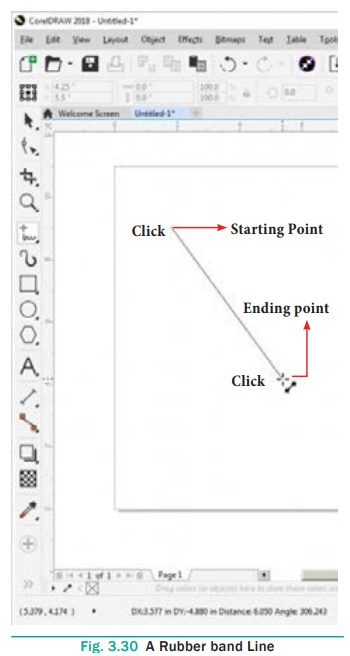
2. Move the cursor to where you want the line to start and click
once.
3. Move the cursor towards the position for the endpoint.
You will notice a “rubberband” line, which follows your
cursor.
4. Release the mouse button where you like to end the line. The
line will be drawn.
5. If you want to draw a second straight line connected to the
first, continue with Freehand tool, and click again on the endpoint of the last
segment.
6. Move the cursor to draw the second segment. Click once when you
have the desired second segment positioned correctly. Repeat steps 5 and 6 to
draw as many segments as require.
Remember that you must click at two points - the beginning and end
of the segment.
Adding arrowheads to lines
To add arrowhead to a line
1. Using the Freehand tool draw a line.
2. Select the line.
3. Click the drop-down button on the End Arrowhead Selector on the
Property tool bar.
Then click the desired arrow tip. Now the line appears with an
arrow.
4. You can set the line style, width, and the colour of the line
using the Properties bar.

Related Topics