Chapter: Java The Complete Reference : Introducing GUI Programming with Swing : Introducing Swing
A Simple Swing Application
A
Simple Swing Application
Swing programs differ from
both the console-based programs and the AWT-based programs shown earlier in
this book. For example, they use a different set of components and a different
container hierarchy than does the AWT. Swing programs also have special
requirements that relate to threading. The best way to understand the structure
of a Swing program is to work through an example. There are two types of Java
programs in which Swing is typically used. The first is a desktop application.
The second is the applet. This section shows how to create
a Swing application. The
creation of a Swing applet is described later in this chapter. Although quite
short, the following program shows one way to write a Swing
application. In the process,
it demonstrates several key features of Swing. It uses two Swing components: JFrame and JLabel. JFrame is the
top-level container that is commonly used for Swing applications. JLabel is the Swing component that
creates a label, which is a component that displays information. The label is
Swing’s simplest component because
it is passive. That is, a
label does not respond to user input. It just displays output. The program uses
a JFrame container to hold an
instance of a JLabel. The label
displays a short text message.
// A simple Swing application.
import javax.swing.*;
class SwingDemo {
SwingDemo() {
// Create a new JFrame container.
JFrame jfrm = new JFrame("A Simple Swing
Application");
Give the frame an initial size.
jfrm.setSize(275, 100);
Terminate the program when the user closes the application.
jfrm.setDefaultCloseOperation(JFrame.EXIT_ON_CLOSE);
Create a text-based label.
JLabel jlab = new JLabel(" Swing means
powerful GUIs.");
Add the label to the content pane.
jfrm.add(jlab);
Display the frame. jfrm.setVisible(true);
}
public static void main(String args[]) {
// Create the frame on the event dispatching
thread.
SwingUtilities.invokeLater(new Runnable() {
public void run() { new SwingDemo();
}
});
}
}
Swing programs are compiled
and run in the same way as other Java applications. Thus, to compile this
program, you can use this command line:
javac SwingDemo.java
To run the program, use this
command line:
java SwingDemo
When the program is run, it
will produce a window similar to that shown in Figure 31-1. Because the SwingDemo program illustrates several
core Swing concepts, we will
examine it carefully, line by
line. The program begins by importing javax.swing.
As mentioned, this package contains the components and models defined by Swing.
For example, javax.swing defines
classes that implement labels, buttons, text controls, and menus. It will be
included in all programs that use Swing.
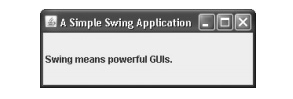
Figure
31-1 The window produced by the SwingDemo program
Next, the program declares
the SwingDemo class and a
constructor for that class. The constructor is where most of the action of the
program occurs. It begins by creating a JFrame,
using this line of code:
JFrame jfrm = new JFrame("A Simple Swing
Application");
This creates a container
called jfrm that defines a
rectangular window complete with a title bar; close, minimize, maximize, and
restore buttons; and a system menu. Thus, it creates a standard, top-level
window. The title of the window is passed to the constructor.
Next, the window is sized
using this statement:
jfrm.setSize(275, 100);
The setSize( ) method (which is inherited by JFrame from the AWT class Component)
sets the dimensions of the window, which are specified in pixels. Its general
form is shown here:
void setSize(int width, int height)
In this example, the width of
the window is set to 275 and the height is set to 100.
By default, when a top-level
window is closed (such as when the user clicks the close box), the window is
removed from the screen, but the application is not terminated. While this
default behavior is useful in some situations, it is not what is needed for
most applications. Instead, you will usually want the entire application to
terminate when its top-level window is closed. There are a couple of ways to achieve
this. The easiest way is to call setDefaultCloseOperation(
), as the program does:
jfrm.setDefaultCloseOperation(JFrame.EXIT_ON_CLOSE);
After this call executes,
closing the window causes the entire application to terminate. The general form
of setDefaultCloseOperation( ) is
shown here:
void
setDefaultCloseOperation(int what)
The value passed in what determines what happens when the
window is closed. There are several other options in addition to JFrame.EXIT_ON_CLOSE. They are shown
here:
DISPOSE_ON_CLOSE
HIDE_ON_CLOSE
DO_NOTHING_ON_CLOSE
Their names reflect their
actions. These constants are declared in WindowConstants,
which is an interface declared in javax.swing
that is implemented by JFrame.
The next line of code creates
a Swing JLabel component:
JLabel jlab = new JLabel(" Swing means
powerful GUIs.");
JLabel is the simplest and easiest-to-use component because it does not
accept user input. It simply
displays information, which can consist of text, an icon, or a combination of
the two. The label created by the program contains only text, which is passed
to its constructor.
The next line of code adds
the label to the content pane of the frame:
jfrm.add(jlab);
As explained earlier, all
top-level containers have a content pane in which components are stored. Thus,
to add a component to a frame, you must add it to the frame’s content pane.
This is accomplished by calling add( )
on the JFrame reference (jfrm in this case). The general form of
add( ) is shown here:
Component add(Component comp)
The add( ) method is inherited by JFrame
from the AWT class Container.
By default, the content pane
associated with a JFrame uses border
layout. The version of add( ) just
shown adds the label to the center location. Other versions of add( ) enable you to specify one of the
border regions. When a component is added to the center, its size is adjusted
automatically to fit the size of the center.
Before continuing, an
important historical point needs to be made. Prior to JDK 5, when adding a
component to the content pane, you could not invoke the add( ) method directly on a JFrame
instance. Instead, you needed to call add(
) on the content pane of the JFrame object.
The content pane can be obtained by calling
getContentPane( ) on a JFrame instance.
The getContentPane( ) method is
shown here:
Container getContentPane( )
It returns a Container reference to the content
pane. The add( ) method was then
called on that reference to add a component to a content pane. Thus, in the
past, you had to use the following statement to add jlab to jfrm:
jfrm.getContentPane().add(jlab); // old-style
Here, getContentPane( ) first obtains a reference to content pane, and
then add( ) adds the component to
the container linked to this pane. This same procedure was also required to
invoke remove( ) to remove a
component and setLayout( ) to set
the layout manager for the content pane. You will see explicit calls to getContentPane( ) frequently throughout
pre-5.0 code. Today, the use of getContentPane(
) is no longer necessary. You can simply call add( ), remove( ), and setLayout( ) directly on JFrame because these methods have been
changed so that they operate on the content pane automatically.
The last statement in the SwingDemo constructor causes the window
to become visible:
jfrm.setVisible(true);
The setVisible( ) method is inherited from the AWT Component class. If its argument is true, the window will be displayed. Otherwise, it will be hidden.
By default, a JFrame is invisible,
so setVisible(true) must be called
to show it.
Inside main( ), a SwingDemo
object is created, which causes the window and the label to be displayed.
Notice that the SwingDemo
constructor is invoked using these lines of code:
SwingUtilities.invokeLater(new Runnable() {
public void run() {
new SwingDemo();
}
});
This sequence causes a SwingDemo object to be created on the event dispatching thread rather than on
the main thread of the application. Here’s why. In general, Swing programs are
event-driven. For example, when a user interacts with a component, an event is
generated. An event is passed to the application by calling an event handler
defined by the application. However, the handler is executed on the event
dispatching thread provided by Swing and not on the main thread of the
application. Thus, although event handlers are defined by your program, they
are called on a thread that was not created by your program.
To avoid problems (including
the potential for deadlock), all Swing GUI components must be created and
updated from the event dispatching thread, not the main thread of the
application. However, main( ) is
executed on the main thread. Thus, main(
) cannot directly instantiate a SwingDemo
object. Instead, it must create a Runnable
object that executes on the event dispatching thread and have this object
create the GUI.
To enable the GUI code to be
created on the event dispatching thread, you must use one of two methods that
are defined by the SwingUtilities
class. These methods are invokeLater( ) and invokeAndWait( ). They are shown here:
static void
invokeLater(Runnable obj)
static void
invokeAndWait(Runnable obj)
throws InterruptedException,
InvocationTargetException
Here, obj is a Runnable object
that will have its run( ) method
called by the event dispatching thread. The difference between the two methods
is that invokeLater( ) returns
immediately, but invokeAndWait( )
waits until obj.run( ) returns. You
can use one of these methods to call a method that constructs the GUI for your
Swing application, or whenever you need to modify the state of the GUI from
code not executed by the event dispatching thread. You will normally want to
use invokeLater( ), as the preceding
program does. However, when constructing the initial GUI for an applet, you
will need to use invokeAndWait( ).
Related Topics