CorelDRAW 2018 - Working with Objects | 12th Computer Technology : Chapter 3 : CorelDRAW 2018
Chapter: 12th Computer Technology : Chapter 3 : CorelDRAW 2018
Working with Objects
Working with Objects
Selecting Objects
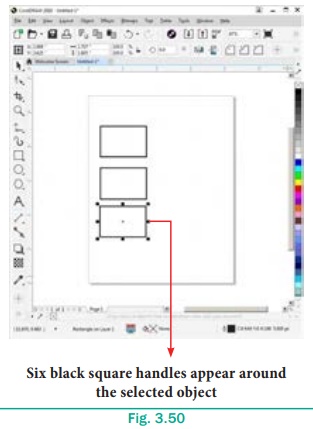
The drawings you made with tools are objects. To select any
object, place your mouse pointer on that object and click on it.
Sometimes when your Drawing window gets crowded with objects, it
can be hard to select an object using the Pick tool. So at that time you can
select object using the keyboard’s Tab key.
Selecting objects with the Tab key
To select objects using the Tab key:
1. First create at least three objects (there can be as many
objects as you like) using the Rectangle tool.
2. Press the spacebar to select the Pick tool.
3. Then press Tab key until a selection box appears around
the object you want to select. When you press Tab key, it selects an object,
starting with the first object created and moving towards the last object.
If you press Shift + Tab, it selects an object, starting
with the first object created and moving towards the last object created.
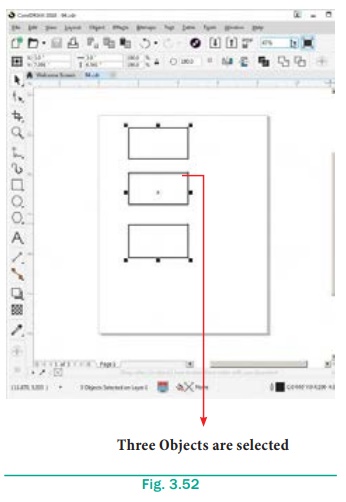
Selecting multiple objects
With the Pick tool, you can select more objects at a time. You can
select multiple objects with the Pick tool in two ways:
1. Hold down the Shift key, and click on each object that
you want to select.
You can select as many objects as you have in your Drawing window
in this way.
2. You can even deselect objects that have been selected by
holding down the Shift Key and clicking on them.
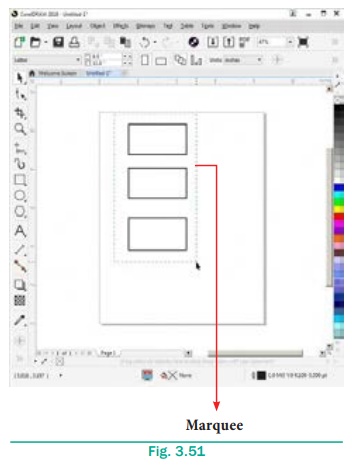
You can also select more objects than one at a time by using the
Pick tool to draw a marquee (rectangle) around the objects. Only those objects
that are completely encompassed by the marquee that you draw with the Pick tool
will be selected.
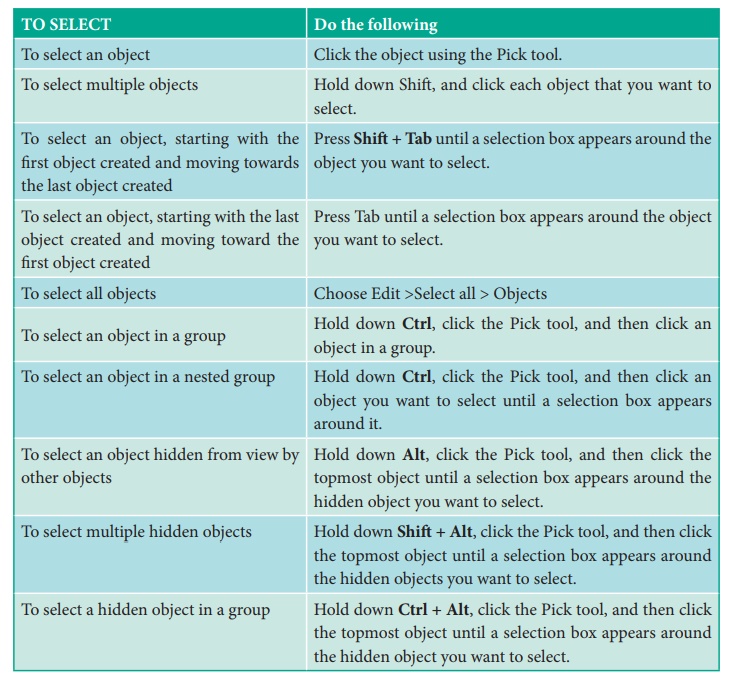
Deselecting Objects
Deselecting a single object
To deselect an object,
·
Click anywhere that is not an outline or high lighting box /
marker. In other words, click any white space. (or)
·
Press the Esc key.
The highlighting box disappears, indicating that no objects are
selected.
Deselecting multiple objects
To deselect multiple objects, click any white space. All selected
objects become deselected.
Deselecting a single object in a group
To deselect a single object among multiple selected objects, hold
down Shift key and click the object.
Moving Objects
You can move objects by dragging them with the mouse, by nudging
them with the arrow keys on your keyboard.
Moving objects using mouse.
To move an object using the mouse
1. Select the object using the Pick tool.
2. Depress the mouse while pointing to a spot on the object’s
outline, or within a filled area of an object. A dotted highlighting box
appears.
3. Drag it to the desired location.
4. Release the mouse when the object is positioned correctly.
Moving objects in increments by nudging
The cursor keys on your keyboard allow you to move or nudge
selected objects in the direction indicated by the arrow on the key.
Copying Objects
Objects can be copied using the Duplicate and Clone
commands in the Edit menu. You can also use the Windows Clipboard.
Copying
CorelDraw provides several ways to create copies of selected
objects.
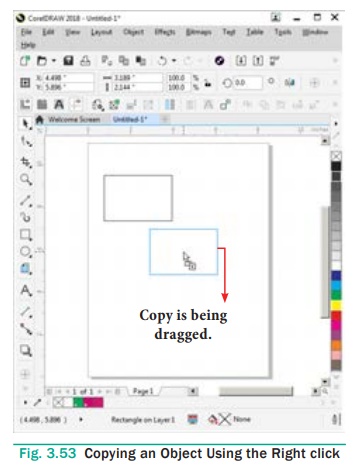
1. Using the Right click
Click your right mouse button while transforming, rotating, or
moving an object with the Pick tool to create a copy on the fly. The object
currently being dragged becomes the copy, leaving the original object
unchanged. The small + symbol beside the cursor indicates that a copy has been
created.
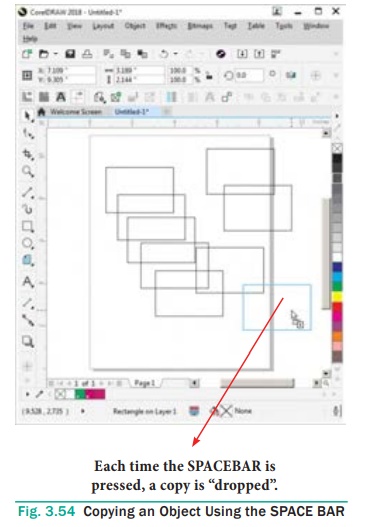
2. Using the SPACEBAR
Press the SPACEBAR while transforming, rotating, or moving an
object with the Pick tool to create a copy. Doing this causes a copy to be
created in situ, meaning a copy is ‘dropped’ each time the SPACEBAR is pressed.
Pressing and holding the SPACEBAR causes your key-repeat action to create
multiple copies so as long as the SPACEBAR is held, which in turn creates
multiple copies in quick succession.
3. Pressing Numeric + Key
Pressing the + key on your numeric keypad creates a copy of the
selected object in exactly the same position as (and arranged in front of) the
original.
After pressing the + key, the copy becomes the selected object.
You may create as many copies as you want using this method, but be aware that
each additional copy will hide the original ( or the copy) behind it.
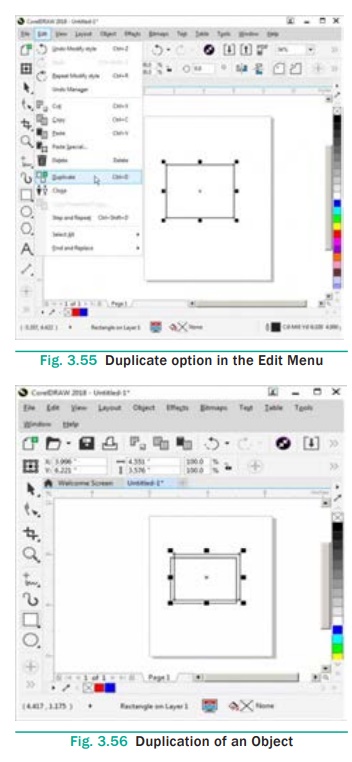
Duplication objects
To create a copy of a selected object,
Choose Edit > Duplicate from the menu bar (or) press Ctrl
+ D in the keyboard.
The copy will be offset slightly to the upper right of the
original and placed on top as shown below. The new copy is automatically
selected.
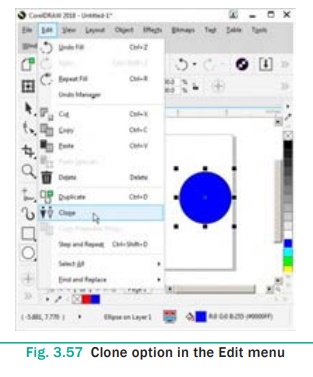
Cloning Objects
To create a clone of a selected object, Choose Edit > Clone
from the menu bar.
The clone will be offset slightly to the upper right of the
original and placed on top as shown below. The new copy is automatically
selected.
Cloning differs from duplication in that most changes made to the
original object(the “master”) are automatically applied to the clone.
For example, if you change the original’s fill, the clone’s fill
changes as well.
Deleting Objects
To delete an object,
1. Select the object.
2. Choose Edit > Delete in the menu bar (or) press the Del
/ Delete Key in the keyboard.
To retrieve a deleted object, you must use the Undo command or
press Ctrl + Z.
Grouping and Ungrouping objects
When you group two or more objects using Group Objects command,
they are treated as a single unit.
A group behaves as if it were a single unit, meaning any changes
made to a group affects all objects in the group.
You can break a grouped object into its component objects by
ungrouping it. This is useful when you need to make changes to some of the
individual objects that comprise a grouped object.
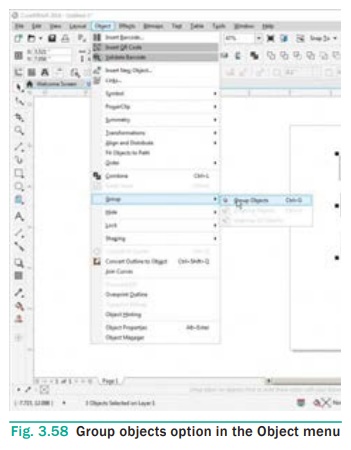
To create a group object
1. Select the objects with the Pick tool. (To select multiple
objects hold down Shift key while selecting them.)
2. Choose Object > Group > Group Objects (or) Press Ctrl
+ G. The selected objects will be grouped as a single object.
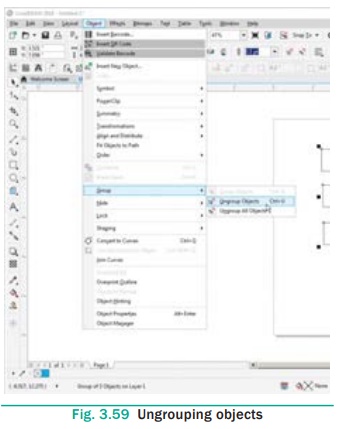
Ungrouping
Ungrouping a group breaks the relationship among the objects.
To ungroup a group object
1. Select the grouped object using the Pick tool.
2. Choose Object > Group > Ungroup Objects on the
menu Bar. (or) Press Ctrl + U in the key board (or) Click on the
Ungroup Objects button on the Property Bar.
The grouped object will break into its component objects.
Since any selection of objects can be grouped, you can easily make
groups of groups. Groups within groups are called “nested” groups.
To ungroup a nested groups
1. Select the nested groups using the Pick tool.
2. Choose Object > Group > Ungroup All Objects on the
menu Bar. (or) Click on the Ungroup All Objects button on the Property Bar.
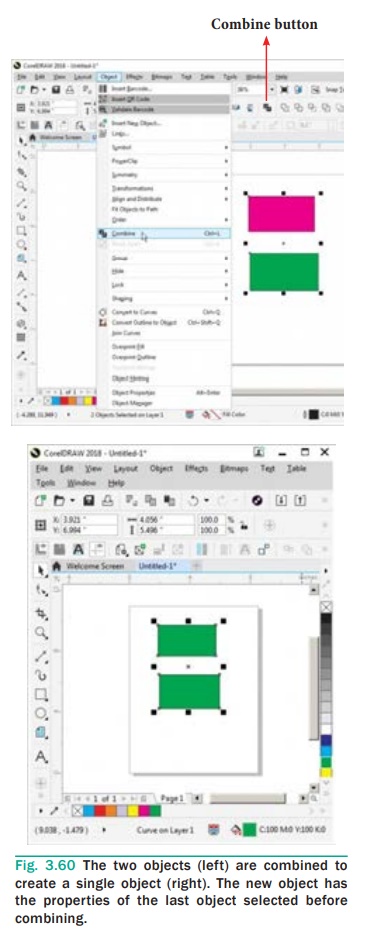
Combining Objects
You can combine two or more objects using Combine command.
Combine command combines two or more objects and creates a single
object with common fill and outline attributes.
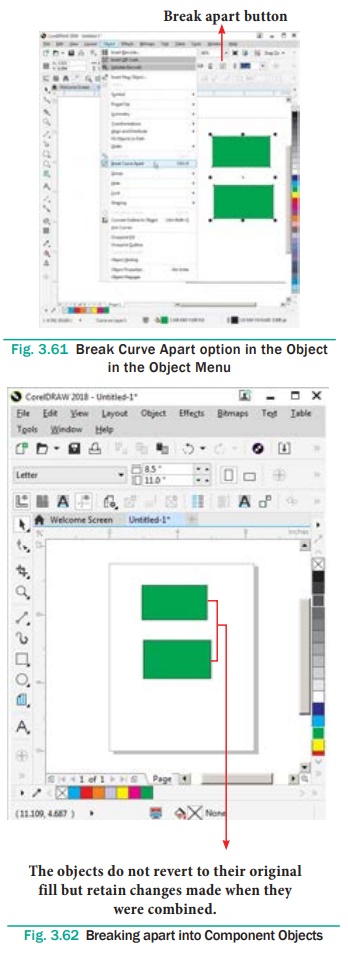
Combining objects is different from grouping them. Combining
objects actually transforms the objects that are combined. Combined objects can
be broken apart. However, the objects do not revert to their original shape and
fill but retain changes made when they were combined.
To Combine objects:
1. Select the objects with the Pick tool. (To select
multiple objects hold down Shift key while selecting them.)
2. Choose Object > Combine (or) Press Ctrl + L.
The selected objects will be grouped as a single object.
To break apart a combined object
1. Select a combined object with the Pick tool.
2. Choose Object > Break Curve Apart (or) Press Ctrl
+ K. The combined object will break apart into component objects.
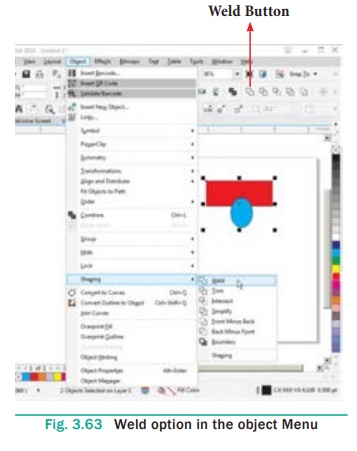
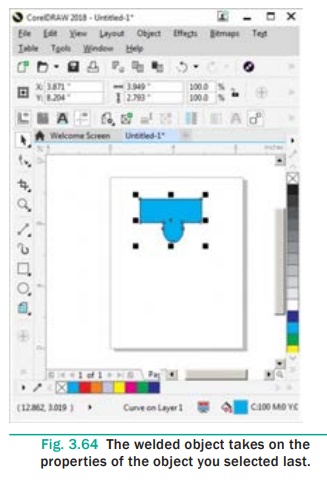
Welding objects
By welding you can create irregular shapes. The welded objects
take on the outline and fill of the object that was selected last. Welded
objects can revert to their original individual objects only by using the Undo
button.
To weld objects using Property Bar
1.
Select the objects with the Pick tool by holding the Shift
key.
2.
Choose Object > Shaping > Weld in the menu bar (or)
Click on Weld button on the Property bar.
3.
The objects will be welded and will become a single outline
object.
If the marquee selected the objects when welding using the
Property Bar, the welded object assumes the outline and the fill properties of
the bottom -most selected object. If you use multiple selection, the welded
object takes on the properties of the object you selected last.
Related Topics