Adobe InDesign CC 2019 - Working with Objects | 12th Computer Technology : Chapter 2 : Adobe InDesign CC 2019
Chapter: 12th Computer Technology : Chapter 2 : Adobe InDesign CC 2019
Working with Objects
Working with Objects
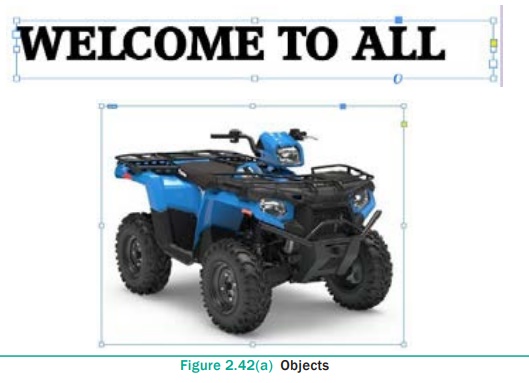
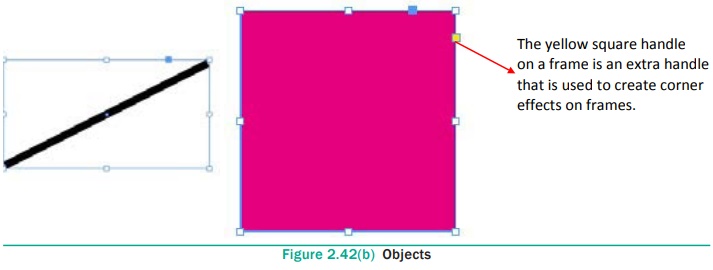
Objects are text or graphic elements— images, blocks of color and
even simple lines—that are placed in an InDesign document. All objects in
InDesign are in frames. When you select an object’s frame, its handles become
highlighted, as shown in Figure 2.42.
When working with InDesign, there are many types of objects that
you can add to your document pages. Graphics such as photos and illustrations
are one type; other types include shapes, lines, text boxes, Microsoft Excel
charts, and Microsoft Word tables. You can modify objects in InDesign using
many tools, panels, and menu commands. For example, you can scale an object,
rotate an object, or add color to it. You can group it with other objects, or
change its transparency or location on the page.
1. Creating an Object
Sometimes the only type of object you need for your publication is
a simple shape. Shapes can add visual interest to a document and serve as a
background for text. The tools for creating shapes include the Rectangle,
Ellipse, and Polygon tools. To select a shape tool, click and hold down the
mouse button on the Rectangle tool (or currently selected shape tool) on the
Tools panel, and then select the shape tool you want to use. With a shape tool
selected, you can create a shape manually by dragging in the document, or you
can click in the document to open the shape’s dialog box and define its
settings. You use the Swatches panel to add color to the fill and stroke
(border) of your shape, and the Stroke panel to change the weight (thickness)
and style of the stroke.
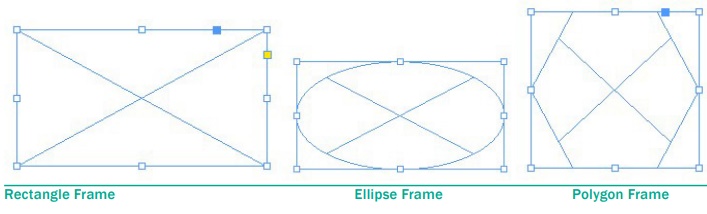
2. Creating Graphic Frame
Graphic frame can hold graphic content. You can distinguish a text
frame from a normal graphic frame because the graphic frames display a
non-printing ‘X’ in their centres.
Graphic frames are used to import pictures of other software
programs.
In InDesign, all imported images are contained within graphic
frames. The Tools panel contains three tools for drawing graphic frames.
1. Ellipse Frame - This
tool lets you create oval and round frames.
Rectangle Frame - This tool lets you create rectangular and square
frames.
Polygon Frame - This tool lets you create equilateral polygons
frames.
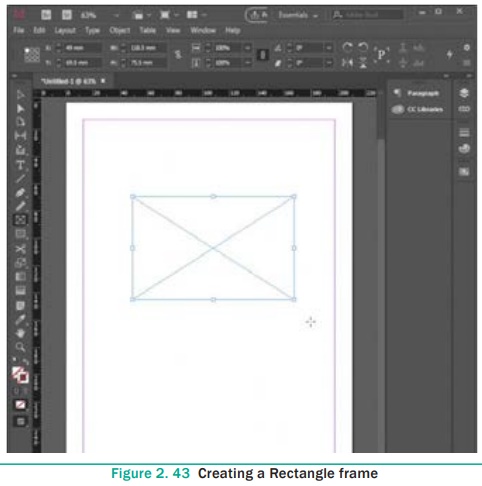
To create a Rectangle frame
1. Click on the Rectangle Frame tool in the Tools panel (or) Press
F in the keyboard.
2. Position the Rectangle Frame tool pointer on the page.
3. Drag to create a rectangle frame that is approximately the size
and shape you want, then release the mouse button.
When you release the mouse button after creating a Rectangle
frame, the frame you created is active. If the Selection tool was previously
selected, the frame is displayed within its bounding box, which contains eight
resizing handles, which help you to change the shape or size of the bounding
box or the frame.
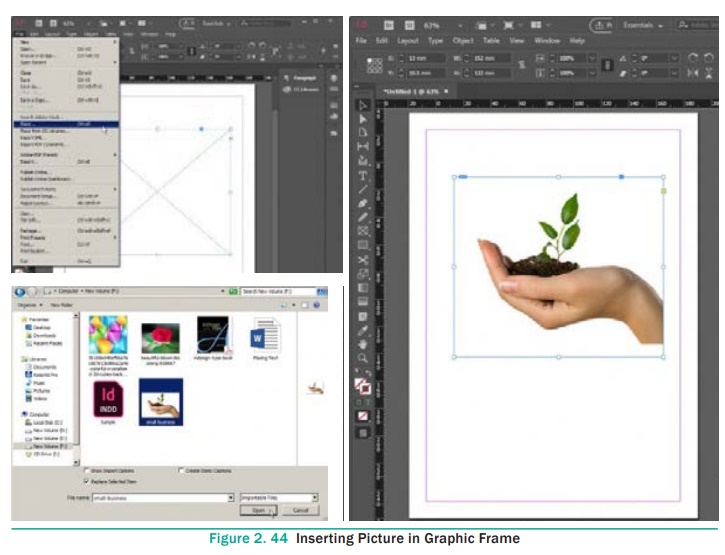
3. Inserting Picture in Graphic Frame
Graphic frames are used to import pictures of other software
programs. You can insert the picture in the frame.
1. Make a graphic frame.
2. Choose File > Place in the menu. The Place
dialog box appears.
3. Locate and select the picture you want to insert the frame.
4. Click on Open.
The picture will appear in the graphic frame.
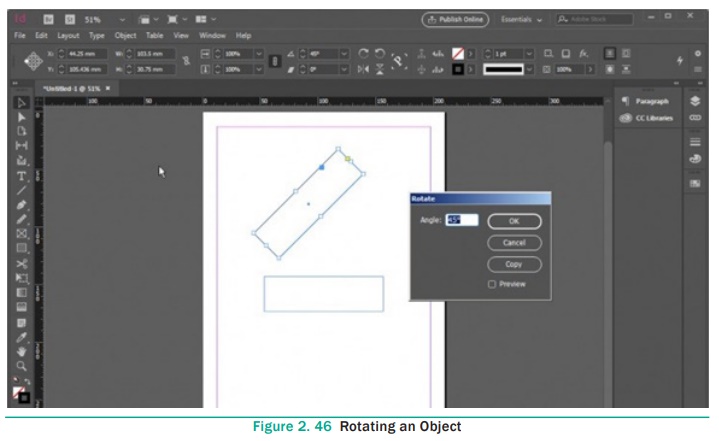
4. Transforming an Object
Transform is a term used to describe the act of moving an object,
scaling it, skewing it, or rotating it. You can do all of the above in the
Transform or Control panels.
When you transform something, you change its appearance. For
example, you can rotate an object 45º or scale an object 50% to make it half
its original size. The Transform commands in InDesign include Move, Scale,
Rotate, Shear, and Flip. You can also transform objects using buttons on the
Transform panel or the Control panel. You can change the width and height of an
object and its location on the page. Before you transform an object, you choose
a reference point from which to transform it. This point is called the point of
origin, and it is the point of the selected object that remains fixed during
the transformation.
Transformation Basics
There are many ways to transform an object in InDesign. Select the
object using the Selection tool, then:
·
Drag a selection handle to scale the object (but not necessarily
the contents of that object).
·
Select a transformation tool from the Tools panel, set the center
of transformation (if necessary), and drag the tool.
· Display the Transform panel or Control panel and enter values in the panel field corresponding to the transformation you want to apply—or choose a preset value from the pop-up menu associated with that field.
·
Choose one of the “preset” rotation or reflection options from the
Transform panel menu or Control panel menu.

·
Double-click one of the transformation tools in the Toolbox to
display the corresponding transform dialog box (double-click the Rotate tool,
for example, to display the Rotation dialog box).
·
Select the Free Transform tool, and drag the tool around the
object.
·
Press keyboard shortcuts.
There’s no “right” or “best” way to do transformations—you can
experiment with the different methods and see which you like best. We change
methods depending on the situation (and our mood).
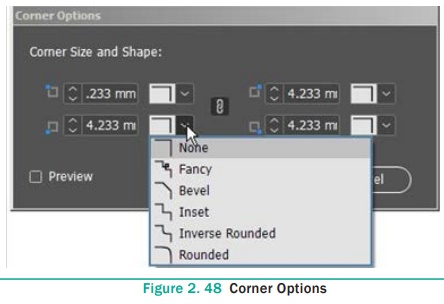
Modifying Corners and Strokes
In InDesign, you can modify the corners of a rectangular shape
using the Corner Options dialog box, which offers five types of corners,
such as Rounded and Beveled. Like most dialog boxes, you can preview the
settings applied to the selected object before closing the dialog box. To
better see the changes made to corners, a thick stroke is recommended. You change
the weight of a stroke on the Stroke panel.
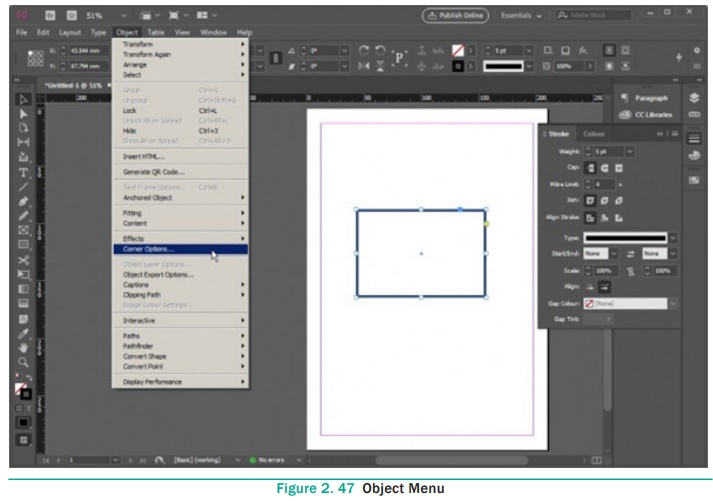
To modify the corner of a Rectangle
1. Draw a rectangle and select it.
2. Change the weight of the stroke in the Stroke panel.
3. Choose Object > Corner Options menu. Corner
options dialog box appears.
4. Give suitable Corner Size and shape in it.
Related Topics