Adobe InDesign CC 2019 - Using the Tools Panel | 12th Computer Technology : Chapter 2 : Adobe InDesign CC 2019
Chapter: 12th Computer Technology : Chapter 2 : Adobe InDesign CC 2019
Using the Tools Panel
Using the Tools Panel
Selection Tool (![]() )
)
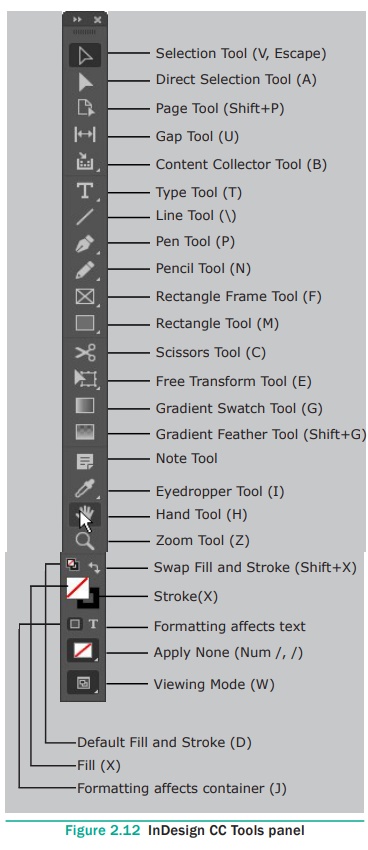
Selection tool is used to select objects or groups of objects. Press V in the keyboard to select the Selection tool (when the cursor is not in text). When any other tool is selected in the Tools panel, you can temporarily switch to the Selection tool by holding down Ctrl.
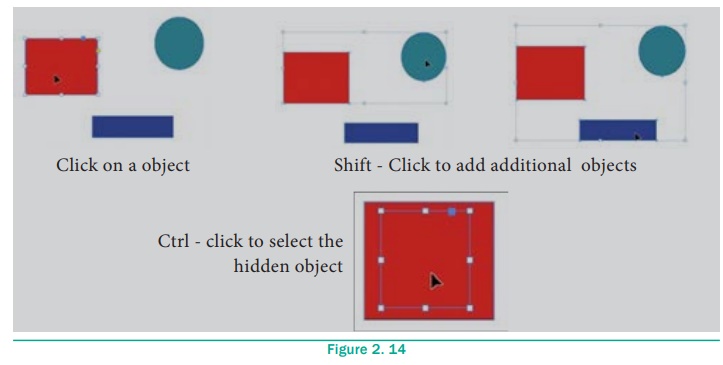
You can Shift-click to add additional objects to your
selection or remove objects from an existing selection.
Ctrl-clicking allows you to select objects hidden under other objects,
which is an invaluable technique when you’re working with crowded layouts.
Direct Selection Tool (![]() )
)
The Direct Selection tool(press A) is used to select single object
out of a group (several individual objects grouped together with the Object,
Group command) or to select one or more points on a path of a single object.
Page Tool (![]() )
)
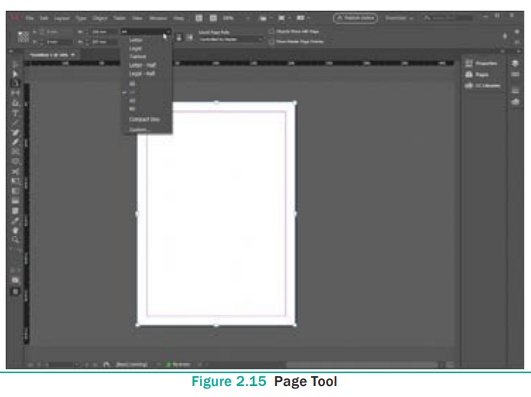
The Page tool is used for creating different page sizes within a document. To create a different page size, press Shift+P to select the Page tool, and click the page in the layout to select it. Then use the options in the Control page to change the page layout.
Gap Tool (![]() )
)
The Gap tool is used to adjust the spacing between objects. Press U
to select the Gap tool, place the pointer between objects, and drag to change
the gap between aligned objects. Shift- drag to move the gap between
only the two nearest objects; Ctrl-drag to resize the gap instead of
moving it; Alt-drag to move the gap and objects in the same direction. Ctrl+Alt-drag
to resize the gap and move the objects. Adding the Shift key to any
combination affects only the two nearest objects.

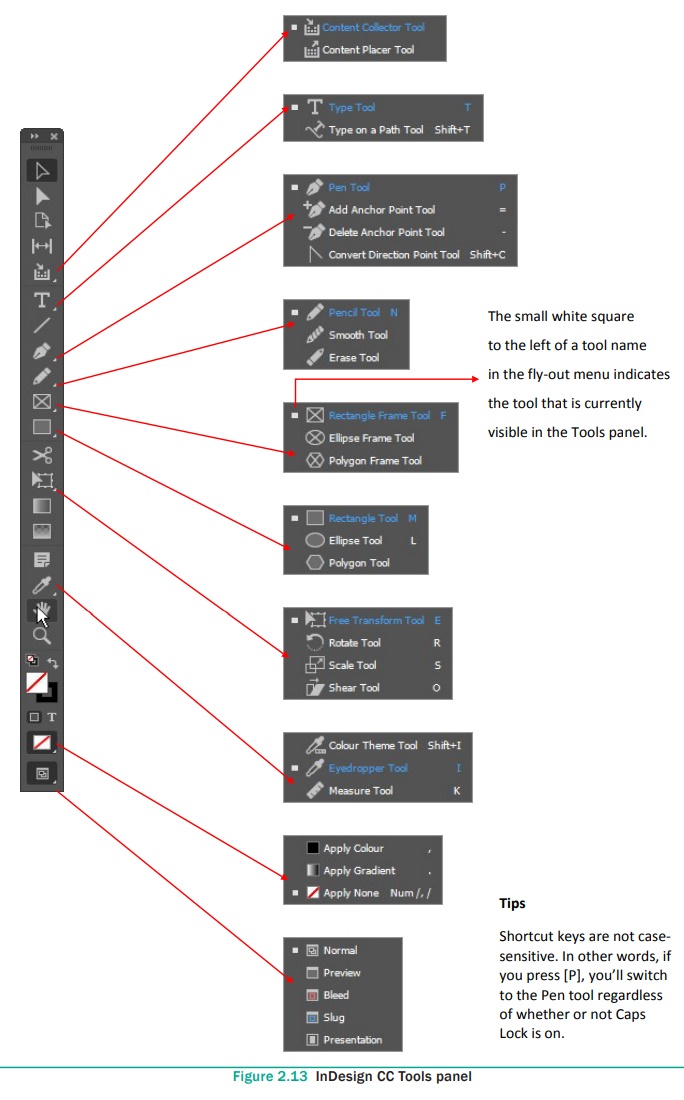
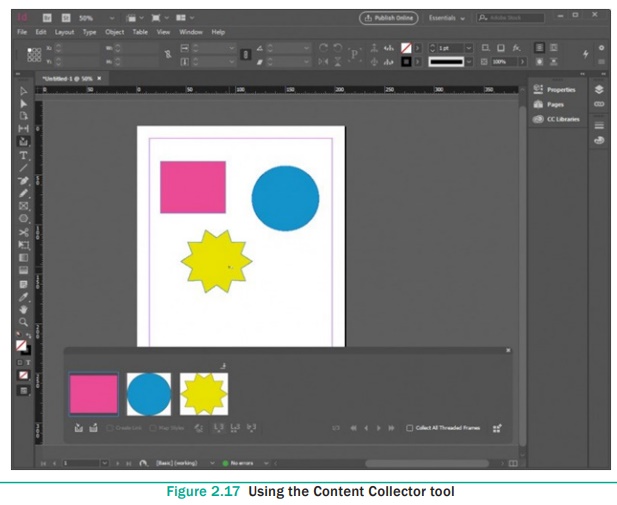
Content Collector Tool (![]() )
)
When you select the Content Collector tool, click objects or
stories to add them to the Content Conveyor at the bottom of the screen. You
can then use the Content Placer Tool to copy and link these objects from the
Content Conveyer into another layout or document. Press B to switch
between the Content Collector and Content Placer tools.
Type Tool ![]()
The Type tool is used to enter and edit text. To create a text
frame, select the Type tool and drag the tool in the document window. To select
the Type tool, press T . When you have the Selection or Direct
Select tool chosen in the Tool panel, you can switch to the Type tool automatically
by double-clicking any text frame. InDesign places the text cursor as close as
possible to where you double-clicked.
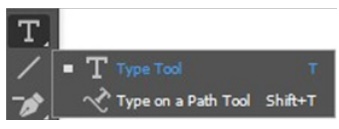
Path Type Tool (![]() )
)
The Path Type tool is used to enter and edit text on a path (Adobe
calls this the “Type on a Path” tool). To add text on a path, select the Path
Type tool and click the tool on a path. A flashing text insertion point (or
text cursor) appears on the path. At this point, text you enter will flow along
the path. To select the Path Type tool, press Shift +T.
Note Tool (![]() )
)
You use the Note tool to add non-printing notes to text. Click the
Note tool in text, and InDesign will display a window you can use to enter the
text of the note, or to jump to the next or previous notes in the document.
Pen Tool (![]() )
)
The Pen tool is used to draw paths containing both straight and
curved line segments (that is, paths containing both curve and corner points).
Press P to select the Pen tool. Click and drag to create a series of connecting
points that result in a custom drawn line or shape.
Under the Pen tool, you’ll find the Add Anchor Point tool, the
Delete Anchor Point tool, and the Convert Direction Point tool.
Add Anchor Point tool (![]() )
)
When you click the Add Anchor Point tool on a selected path,
InDesign adds a point at that location on the path.
Delete Anchor Point tool (![]() )
)
When you click the Delete Anchor Point tool on a point on a
selected path, InDesign deletes it.
Convert Direction Point tool (![]() )
)
When you click the Convert Direction Point tool on a point on a
selected path, InDesign converts the point to the other kind of point—if the
point you click is a corner point, InDesign converts it to a curve point; if
it’s a curve point, InDesign converts it to a corner point. You can also use
the Convert Direction Point tool to adjust the direction handles of a point.

Pencil Tool (![]() )
)
The Pencil tool (press N) is used to sketch free form paths. As
you drag, it creates a path that follows the cursor, automatically placing
points and adjusting control handles as it does so.
If you don’t like something about a path you’ve drawn using the
Pencil tool, you can adjust it using any of InDesign’s other drawing tools. You
might want to start with the other tools that share the same space in the Tools
panel: the Smooth tool and the Eraser tool.
Smooth Tool (![]() )
)
First select a path and then drag the Smooth tool over it. It’ll
get smoother. Not smooth enough yet? Drag again. As you drag the Smooth tool,
it adjusts the points and control handles that define the path to create a
smoother transition from one line segment to another. It often removes points
during this process. If you continue to repeat the smoothing process, we think
you’ll eventually end up with a simple curve between two points.
Eraser Tool (![]() )
)
The Eraser tool erases line segments and points. To use the Eraser
tool, select a path, then drag the eraser tool over part of the path. It splits
the path and removes
Line Tool (![]() )
)
The Line tool is used to draw straight lines— paths containing two
corner points. If you hold down Shift as you drag the Line tool, the
lines you draw will be constrained to 0-, 45-, and 90-degree angles. Press \
(backslash) to select the Line tool.
Ellipse Tool (![]() )
)
The Ellipse tool draws ovals and circles. To draw an oval, click
and drag. To draw a circle, press the Shift key while dragging.
Rectangle Tool (![]() )
)
The Rectangle tool draws both rectangles and squares. To draw a
rectangle, click and drag. To constrain that rectangle to a square, press the Shift
key while dragging (be sure to keep it pressed until you release the mouse
button).
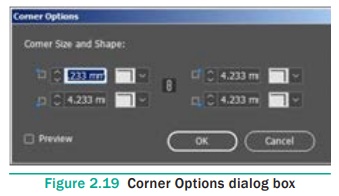
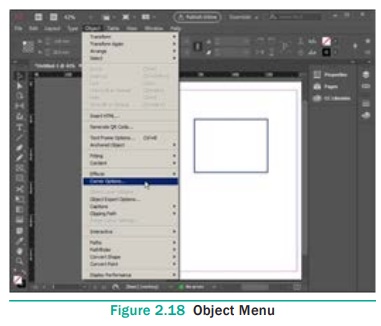
If you need a rectangle with rounded corners, draw the rectangle using the Rectangle tool, then choose Corner Options from the Object menu to display the Corner Options dialog box. The Corner options dialog box provides a variety of other corner shapes.
Polygon Tool
The Polygon tool is used to draw equilateral polygons, such as
pentagons, hexagons, and dodecagons. Polygons are closed geometric objects that
have at least three sides; they are equilateral if all sides are the same
length.
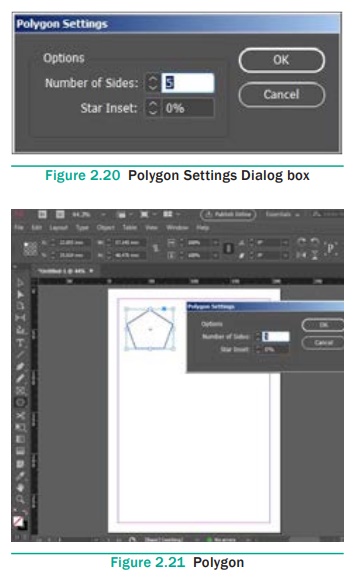
The Polygon tool is also used to draw stars. To draw a star,
double-click on the Polygon tool in the Tools panel. The Polygon Settings
dialog box appears (see Figure 2.20) . You can enter the number of sides you
want in the Number of Sides field. If you want the polygon to be a star
polygon, enter a percentage (from 0 to 99 percent) in the Star Inset field. If
you don’t want the polygon to be a star polygon, enter 100 percent in the Star
Inset field.
Related Topics