OpenOffice Impress - Parts of the main Impress window | 11th Computer Science : Chapter 8 : Presentation-Basics (OpenOffice Impress)
Chapter: 11th Computer Science : Chapter 8 : Presentation-Basics (OpenOffice Impress)
Parts of the main Impress window
Parts of the main Impress window
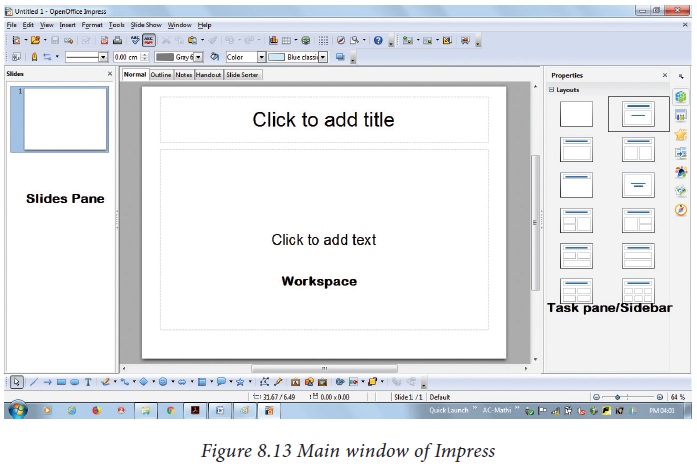
The main Impress window (Figure
8.13) has three parts: the Slides pane, the Workspace and the Task pane.
Additionally, several toolbars can be displayed or hidden during the creation
of a presentation.
1. Slides pane
·
The
Slides pane contains thumbnail picturesoftheslidesinyourpresentation, in the
order of our insertion of slides.
·
Clicking
a slide in this pane selects it and places it in the Workspace. While it is
there, you can apply any changes that are desired to that particular slide.
Several additional operations can
be performed on one or more slides in the Slides pane:
·
Add
new slides at any place within the presentation after the first slide.
·
Mark a
slide as hidden so that it will not be shown as part of the slide show.
·
Delete a slide from the presentation if it is
no longer needed.
·
Rename
a slide.
·
Copy
or move the contents of one slide to another (copy and paste, or cut and paste,
respectively).
It is also possible to perform the
following operations, other than using the Slides pane.
·
Change
the slide transition following the selected slide or after each slide in a
group of slides.
·
Change
the sequence of slides in the presentation.
• Change the slide design. (A
window opens allowing you to load your own design.)
• Change slide layout for a group
of slides simultaneously. (This requires using the Layouts section of the Tasks
pane.)
2. Tasks pane
The Tasks pane has five sections:
2.1. Master Pages
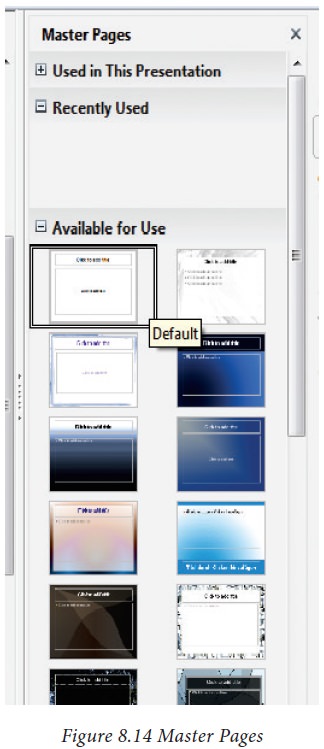
You define the page style for your
presentation using Master Pages. Impress contains pre-packaged Master Pages
(slide masters). One of them by default is blank, and the rest have a specific
background. (Figure 8.14)
2.2. Layout
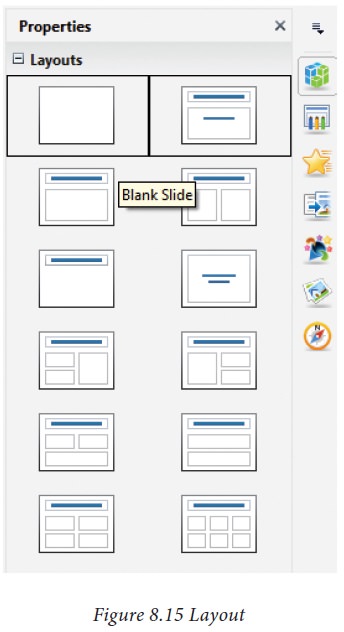
Pre-packaged layouts are shown.
You can choose the one that you want, use it as it is or modify it to suit your
own requirements. At present, it is not possible to create custom layouts.
(Figure 8.15).
2.3. Table Design
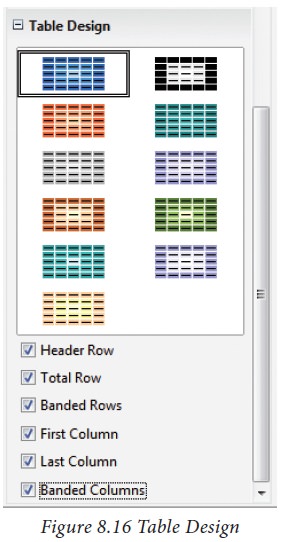
Standard table styles are provided
in this pane. You can further modify the appearance of a table with the
selections to show or hide specific rows and columns, or to apply a banded
appearance to the rows and columns. (Figure 8.16)
2.4. Custom Animation
A variety of animations for
selected elements of a slide are listed here. Animation can be added to
selected elements of a slide and it can also be changed or removed later.
(Figure 8.17).

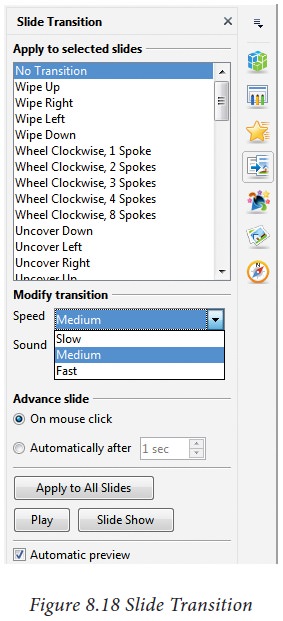
2.5. Slide Transition
Transitions are available,
including No Transition. You can
select the transition speed (slow,
medium, fast). You can also choose between an automatic or manual transition, and
how long you want the selected slide to be shown (automatic transition only).
(Figure 8.18).
Related Topics