OpenOffice Impress - Inserting images - presentation | 11th Computer Science : Chapter 8 : Presentation-Basics (OpenOffice Impress)
Chapter: 11th Computer Science : Chapter 8 : Presentation-Basics (OpenOffice Impress)
Inserting images - presentation
In order to insert an image in OpenOffice Impress, place the cursor in the place where you want the image to be inserted.
Inserting images
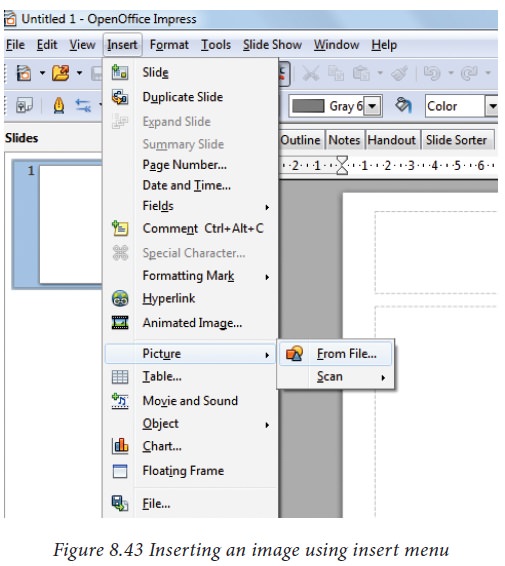
In order to insert an image in
OpenOffice Impress, place the cursor in the place where you want the image to
be inserted. Then, Click Insert -> select Picture ->
From File option from
the Insert menu. Figure 8.44.
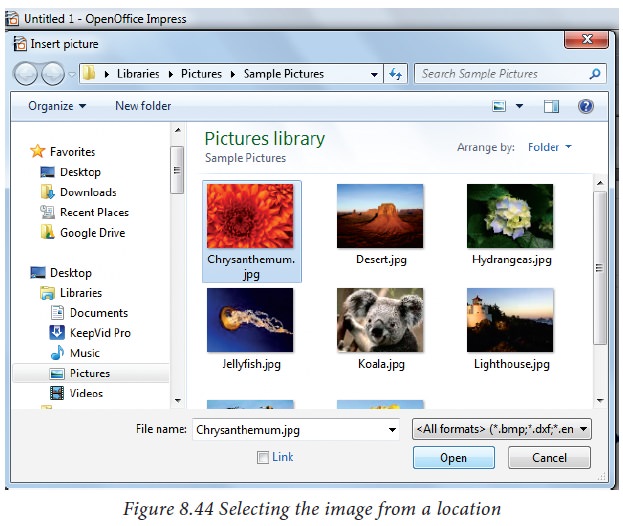
OpenOffice Impress will display
the dialog box, where you can select the image from the specific location and
select open. The image will be inserted in the specified location. Figure 8.44.

Tags : OpenOffice Impress , 11th Computer Science : Chapter 8 : Presentation-Basics (OpenOffice Impress)
Study Material, Lecturing Notes, Assignment, Reference, Wiki description explanation, brief detail
11th Computer Science : Chapter 8 : Presentation-Basics (OpenOffice Impress) : Inserting images - presentation | OpenOffice Impress
Related Topics
11th Computer Science : Chapter 8 : Presentation-Basics (OpenOffice Impress)