Chapter: Java The Complete Reference : Introducing GUI Programming with JavaFX : Exploring JavaFX Controls
Using Image and ImageView - JavaFX
Using
Image and ImageView
Several of JavaFX’s controls
let you include an image. For example, in addition to text, you can specify an
image in a label or a button. Furthermore, you can embed stand-alone images in
a scene directly. At the foundation for JavaFX’s support for images are two
classes: Image and ImageView. Image encapsulates the image, itself, and ImageView manages the display of an image. Both classes are
packaged in javafx.scene.image.
The Image class loads an image from either an InputStream, a URL, or a path to the image file. Image defines several constructors;
this is the one we will use:
Image(String url)
Here, url specifies a URL or a path to a file that supplies the image.
The argument is assumed to refer to a path if it does not constitute a properly
formed URL. Otherwise, the image is loaded from the URL. The examples that
follow will load images from files on the local file system. Other constructors
let you specify various options, such as the image’s width and height. One
other point: Image is not derived
from Node. Thus, it cannot, itself,
be part of a scene graph.
Once you have an Image, you will use ImageView to display it. ImageView is derived from Node, which means that it can be part
of a scene graph. ImageView defines
three constructors. The first one we will use is shown here:
ImageView(Image image)
This constructor creates an ImageView that uses image for its image.
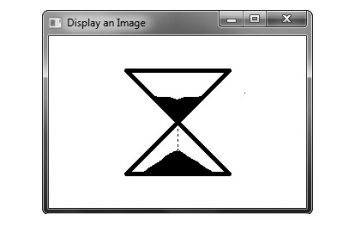
Putting the preceding
discussion into action, here is a program that loads an image of an hourglass
and displays it via ImageView. The
hourglass image is contained in a file called hourglass.png, which is assumed to be in the local directory.
// Load and display an image.
import javafx.application.*; import
javafx.scene.*; import javafx.stage.*; import javafx.scene.layout.*; import
javafx.geometry.*; import javafx.scene.image.*;
public class ImageDemo extends Application {
public static void main(String[] args) {
// Start the JavaFX application by calling
launch().
launch(args);
}
// Override the start() method.
public void start(Stage myStage) {
Give the stage a title.
myStage.setTitle("Display an Image");
//Use a FlowPane for the root node.
FlowPane rootNode = new FlowPane();
//Use center alignment.
rootNode.setAlignment(Pos.CENTER);
//Create a scene.
Scene myScene = new Scene(rootNode, 300, 200);
//Set the scene on the stage.
myStage.setScene(myScene);
//Create an image.
Image hourglass = new
Image("hourglass.png");
//Create an image view that uses the image.
ImageView hourglassIV = new
ImageView(hourglass);
//Add the image to the scene graph.
rootNode.getChildren().add(hourglassIV);
//Show the stage and its scene.
myStage.show();
}
}
Sample output from the
program is shown here:
In the program, pay close
attention to the following sequence that loads the image and then creates an ImageView that uses that image:
// Create an image.
Image hourglass = new
Image("HourGlass.png");
// Create an image view that uses the image.
ImageView hourglassIV = new
ImageView(hourglass);
As explained, an image by
itself cannot be added to the scene graph. It must first be embedded in an ImageView.
In cases in which you won’t
make further use of the image, you can specify a URL or filename when creating
an ImageView. In this case, there is
no need to explicitly create an Image.
Instead, an Image instance
containing the specified image is constructed automatically and embedded in the ImageView.
Here is the ImageView constructor
that does this:
ImageView(String url)
Here, url specifies the URL or the path to a file that contains the
image.
Adding
an Image to a Label
As explained in the previous
chapter, the Label class
encapsulates a label. It can display a text message, a graphic, or both. So
far, we have used it to display only text, but it is easy to add an image. To
do so, use this form of Label’s
constructor:
Label(String str, Node image)
Here, str specifies the text message and image specifies the image. Notice that the image is of type Node. This allows great flexibility in
the type of image added to the label, but for our purposes, the image type will
be ImageView.
Here is a program that
demonstrates a label that includes a graphic. It creates a label that displays
the string "Hourglass" and shows the image of an hourglass that is
loaded from the hourglass.png file.
// Demonstrate an image in a label.
import javafx.application.*; import
javafx.scene.*; import javafx.stage.*; import javafx.scene.layout.*; import
javafx.scene.control.*; import javafx.geometry.*; import javafx.scene.image.*;
public class LabelImageDemo extends Application
{
public static void main(String[] args) {
// Start the JavaFX application by calling
launch().
launch(args);
}
// Override the start() method.
public void start(Stage myStage) {
//Give the stage a title.
myStage.setTitle("Use an Image in a
Label");
//Use a FlowPane for the root node.
FlowPane rootNode = new FlowPane();
//Use center alignment.
rootNode.setAlignment(Pos.CENTER);
//Create a scene.
Scene myScene = new Scene(rootNode, 300, 200);
// Set the scene on the stage.
myStage.setScene(myScene);
Create an ImageView that contains the specified
image.
ImageView hourglassIV = new
ImageView("hourglass.png");
//Create a label that contains both an image
and text.
Label hourglassLabel = new
Label("Hourglass", hourglassIV);
//Add the label to the scene graph.
rootNode.getChildren().add(hourglassLabel);
//Show the stage and its scene.
myStage.show();
}
}
Here is the window produced
by the program:
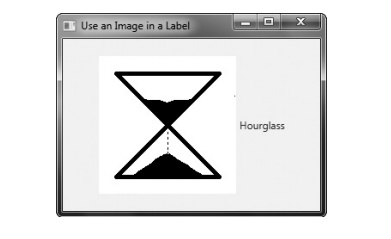
As you can see, both the
image and the text are displayed. Notice that the text is to the right of the
image. This is the default. You can change the relative positions of the image
and text by calling setContentDisplay( )
on the label. It is shown here:
final void
setContentDisplay(ContentDisplay position)
The value passed to position determines how the text and
image is displayed. It must be one of these values, which are defined by the ContentDisplay enumeration:

With the exception of TEXT_ONLY and GRAPHIC_ONLY, the values specify the location of the image. For
example, if you add this line to the preceding program:
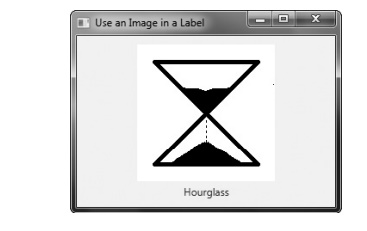
hourglassLabel.setContentDisplay(ContentDisplay.TOP);
the image of the hourglass
will be above the text, as shown here:
The other two values let you
display either just the text or just the image. This might be useful if your
application wants to use an image at some times, and not at others, for
example. (If you want only an image, you can simply display it without using a
label, as described in the previous section.)
You can also add an image to
a label after it has been constructed by using the setGraphic( ) method. It is shown here:
final void setGraphic(Node image) Here, image specifies the image to add.
Using
an Image with a Button
Button is JavaFX’s class for push buttons. The preceding chapter
introduced the Button class. There,
you saw an example of a button that contained text. Although such buttons are
common, you are not limited to this approach because you can include an image.
You can also use only the image if you choose. The procedure for adding an
image to a button is similar to that used to add an image to a label. First
obtain an ImageView of the image.
Then add it to the button. One way to add the image is to use this constructor:
Button(String str, Node image)
Here, str specifies the text that is displayed within the button and image specifies the image. You can
specify the position of the image relative to the text by using setContentDisplay( ) in the same way as
just described for Label.
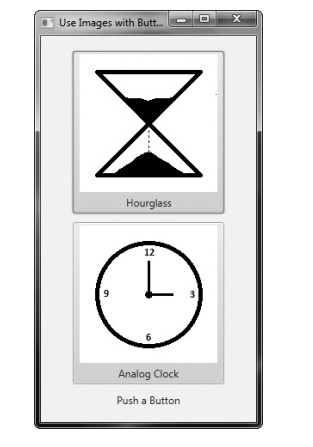
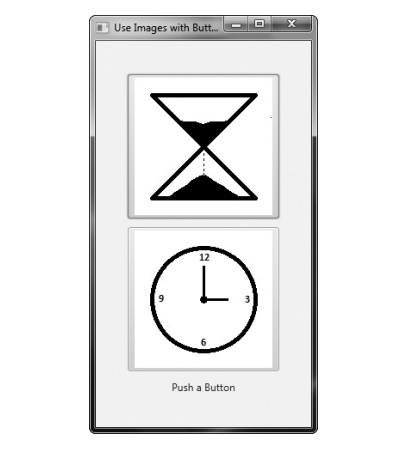
Here is an example that
displays two buttons that contain images. The first shows an hourglass. The
second shows an analog clock. When a button is pressed, the selected timepiece
is reported. Notice that the text is displayed beneath the image.
// Use an image with a button.
import javafx.application.*; import
javafx.scene.*; import javafx.stage.*; import javafx.scene.layout.*;
import javafx.scene.control.*; import
javafx.event.*;
import javafx.geometry.*; import
javafx.scene.image.*;
public class ButtonImageDemo extends
Application {
Label response;
public static void main(String[] args) {
// Start the JavaFX application by calling
launch().
launch(args);
}
// Override the start() method.
public void start(Stage myStage) {
//Give the stage a title.
myStage.setTitle("Use Images with
Buttons");
//Use a FlowPane for the root node. In this
case,
//vertical and horizontal gaps of 10.
FlowPane rootNode = new FlowPane(10, 10);
//Center the controls in the scene.
rootNode.setAlignment(Pos.CENTER);
//Create a scene.
Scene myScene = new Scene(rootNode, 250, 450);
//Set the scene on the stage.
myStage.setScene(myScene);
//Create a label.
response = new Label("Push a
Button");
// Create two image-based buttons.
Button btnHourglass
= new Button("Hourglass",
new
ImageView("hourglass.png"));
Button btnAnalogClock = new Button("Analog
Clock",
new
ImageView("analog.png"));
//Position the text under the image.
btnHourglass.setContentDisplay(ContentDisplay.TOP);
btnAnalogClock.setContentDisplay(ContentDisplay.TOP);
//Handle the action events for the hourglass
button.
btnHourglass.setOnAction(new
EventHandler<ActionEvent>() {
public void handle(ActionEvent ae) {
response.setText("Hourglass Pressed");
}
});
//Handle the action events for the analog clock
button.
btnAnalogClock.setOnAction(new
EventHandler<ActionEvent>() {
public void handle(ActionEvent ae) {
response.setText("Analog Clock Pressed");
}
});
//Add the label and buttons to the scene graph.
rootNode.getChildren().addAll(btnHourglass,
btnAnalogClock, response);
//Show the stage and its scene.
myStage.show();
}
}
The output produced by this
program is shown here:
If you want a button that
contains only the image, pass a null string for the text when constructing the
button and then call setContentDisplay(
), passing in the parameter
ContentDisplay.GRAPHIC_ONLY. For example, if you make these modifications
to the previous program, the output
will look like this:
Related Topics