Chapter: 11th Computer Technology : Chapter 13 : Presentation Advanced
Inserting text features - OpenOffice presentation
Inserting
text features
Inserting and formatting text
Pasting text
Text
may be inserted into the text box by copying it from another document and pasting
it into Impress. There are several ways to ensure consistency. These methods
are explained below.
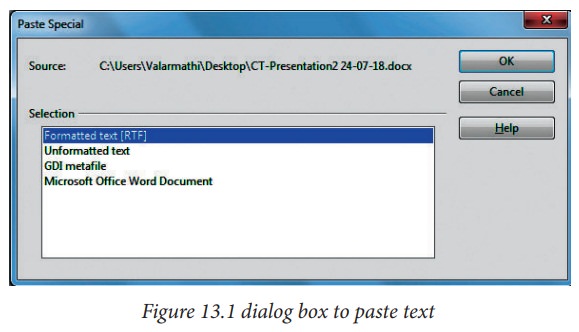
Pasting unformatted text
It
is normally good practice to paste text without formatting and apply the
formatting later. To paste without formatting, press Ctrl+Shift+V or select Unformatted
text from the dialogbox that appears (Figure
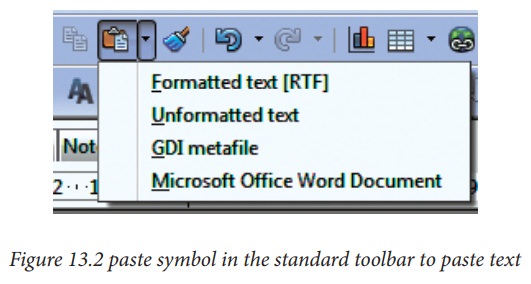
13.1), or click on the small black triangle next to the paste symbol in the
standard toolbar (Figure 13.2)and
select Unformatted text.
Formatting pasted text
If
pasting the text into an AutoLayout area, then to give the pasted text the same
look and feel of the rest of the presentation apply the appropriate out line
style to the text. To do so:
1.
Paste the text in the desired position.
2.
Select the text you have just pasted .
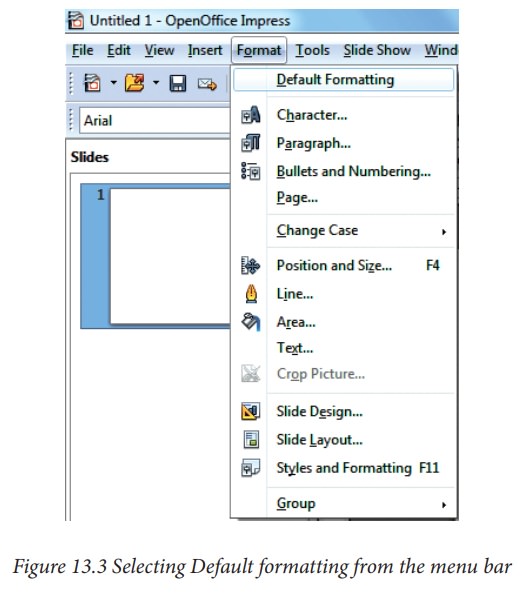
3.
Select Format → Default formatting
from the menu bar.(Figure 13.3)
4.
Use the four arrow buttons in the Text Formatting toolbar to move the text to
the appropriate position.
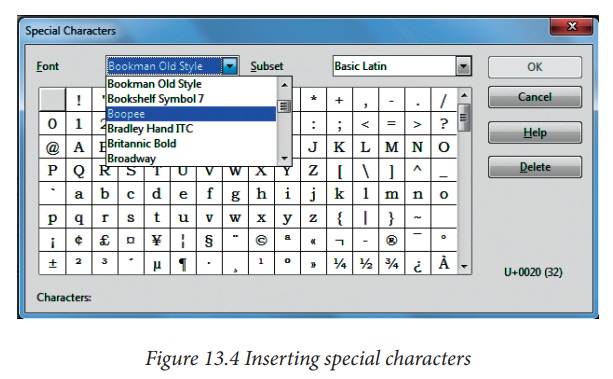
Inserting special characters
To
insert special characters, such as copyright, math, geometric, ormonetary
symbols, or characters from another language:
1.
Click in the place in the text where you want to insert the character.
2.
Choose Insert → Special Character. The
Special Characters dialog box appears. (Figure
13.4).
3.
Choose the font and character subset from the Font and Subset drop-down menus.
4.
Click the character you want to insert. You may have to scroll to find the one
you want.
5.
Click OK.
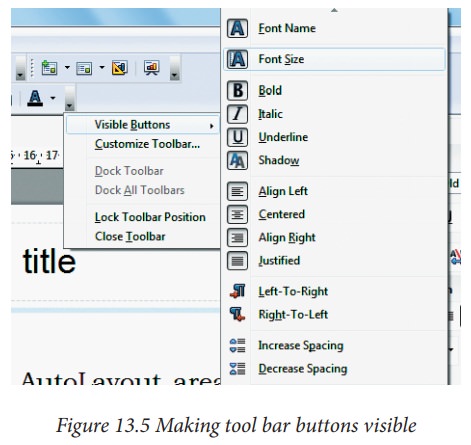
To
show toolbar buttons that are not visible, click on the small down-arrow on the
right end of the tool bar, move the cursor over Visible Buttons and then click
on the icon you wish to make visible (Figure
13.5).
Formatting text
Formatting
text can give a presentation a consistent look and a dynamic feel.
Modifying a style
In
Impress there are two categories of styles: presentation styles and graphics
styles. When inserting text in an Auto
Layout area, the presentation styles become available. When inserting text
in a text box or a graphic object it is possible to apply the graphic styles.
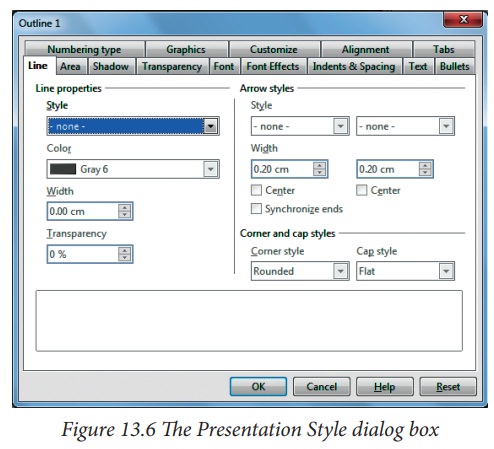
If
you have selected a presentation style, the dialog box in Figure 13.6 will appear. The Presentation Style dialog box
determines the formatting of the text.
The
dialog box for making modifications to a graphics style is shown in Figure 13.7.
Text
must be selected before it can be formatted manually.

Formatting characters
To
view the character formatting options, select Format → Characteror click the Character button on the Text Formatting
toolbar. (If a toolbar with the text icon is not visible, choose View→ Toolbars → Text Formatting.) The Character dialog box appears.
Font page
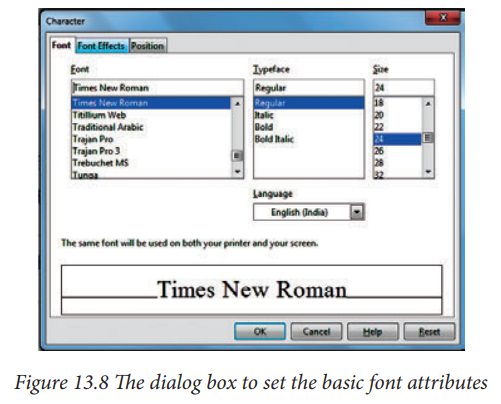
Use
the Font page, shown in Figure 13.8,
to select the desired font type, its base attributes (Italic, Bold, etc.) as
well as the size. A sample of the font is displayed in the lower part of the
dialog box. You can also specify the language of this style.This page is
available when creating or modifying a presentation style or a graphics style.
When
writing a presentation in multiple languages, you can make the best of the
language setting by creating two styles that only differ in the language but
are otherwise the same. This allows you to check the spelling of all of the
contents without affecting the appearance.
Font Effects page
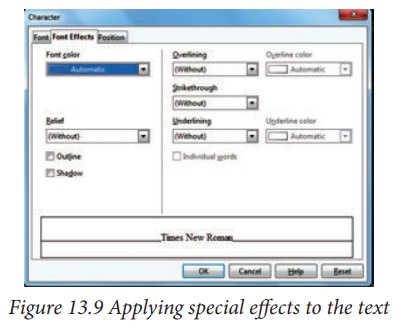
Use
the Font Effects page, shown in Figure
13.9, to apply special effects to the text, such as underlining, color,
shadow and so on. A sample of the text is displayed in the lower part of the
dialog box allowing a quick visual check of the effects applied. This page is
available when creating or modifying a presentation style or a graphics style.
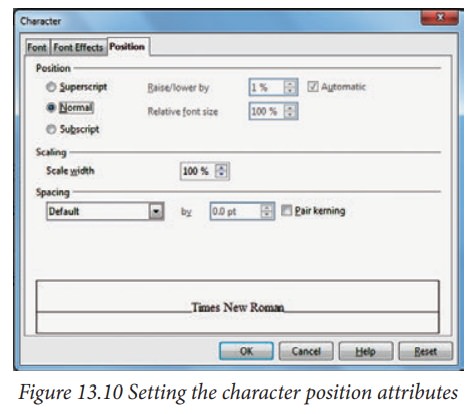
Position page
The
Position page, shown in Figure 13.10,
has advanced options to customize text. This page is not available when
creating or modifying a presentation style or a graphics style. Use this page
to set the text position relative to the baseline when you need to insert
subscripts or superscripts.
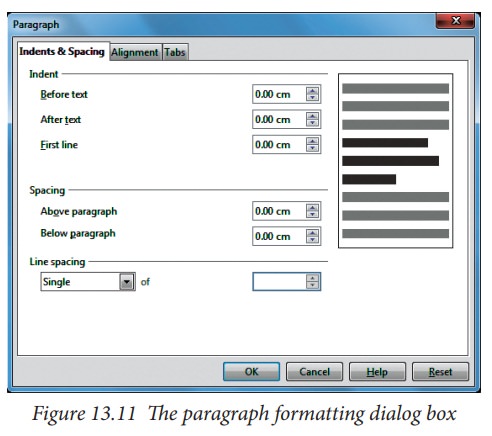
Formatting paragraphs
To
view the paragraph formatting options, select Format → Paragraph or click the Paragraph button on the Text Formatting
toolbar. If a toolbar with the text icon is not visible, choose View → Toolbars → Text Formatting. The Paragraph dialog box (Figure 13.11) is shown.
Indents and Spacing page
The
Indents and Spacing page, shown in Figure 13.12, has four sections:
•
Indent: modifies the indentation of
the text (before and after) as well as the indentation of the first line.
•
Spacing: defines the space before
and after each paragraph formatted with the style.
•
Line spacing: determines the spacing
between two lines
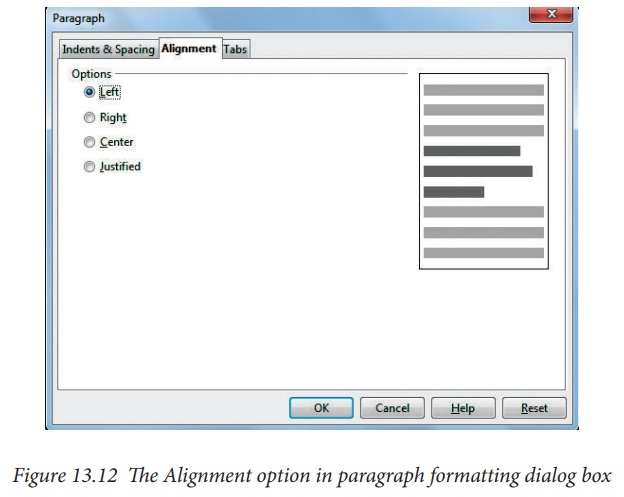
Alignment page
Use
the Alignment page to determine the text alignment: Left, Right,Center, or Justified.
A preview shows the effects of the changes. (Figure 13.12)
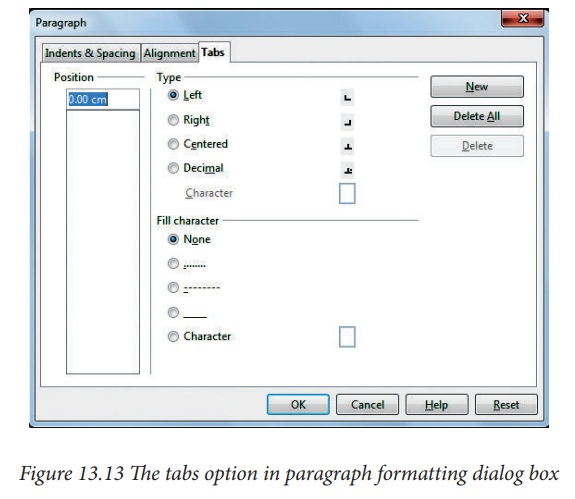
Tabs page
Use
the Tabs page, shown in Figure 13.13,
to set tab stops. To delete one existing tab stop, select it in the list and
click the Delete button. To delete all the tab stops, click the Delete All
button.
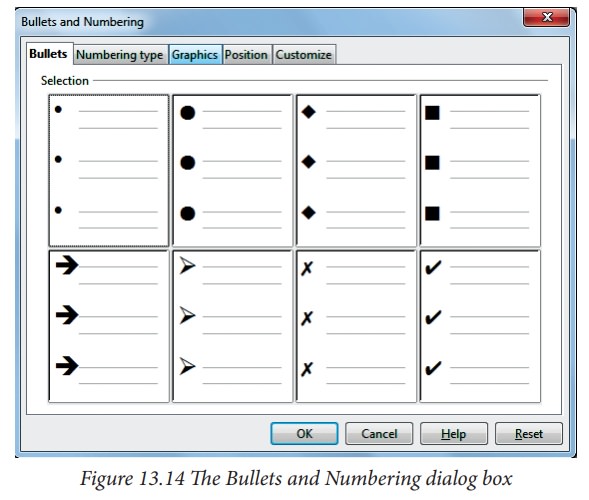
Creating bulleted and numbered lists
You
can customize the appearance of a list, changing the bullet type or numbering
for the entire list or for single entry. All the changes can be made using the
Bullets and Numbering dialog box. It is accessed by selecting Format → Bullets and Numbering or by clicking on the Bullets and Numbering
icon on the text formatting toolbar. (Figure
13.14)
![]()
![]()
![]()
![]()
![]()
Workshop -1
1.
Create a presentation using 8 slides and insert the following features in each
slide.
•
Pasting using unformatted text
•
Formatting the text pasted
•
Inserting special characters
•
Formatting text (Changing font attributes)
•
Formatting characters
•
Formatting paragraphs
•
Creating bulleted and numbered lists
Inserting and formatting shapes and pictures
In
order to insert an image in OpenOffice Impress, place the cursor in the place
where you want the image to be inserted. Then, Click Insert → Select Picture → From File option from the Insert menu. Refer Figure 13.15.

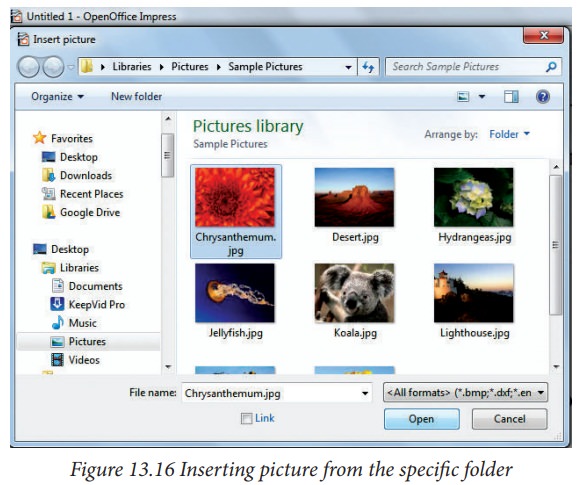
OpenOffice
Impress will display the dialog box, where you can select the image from the
specific location and select open. The image will be inserted in the specified
location. Refer Figure 13.16.
In
order to format pictures, right click on the picture and select the option you
want to do to that picture. Through the options, you can crop, resize, align,
arrange, flip and so on.

![]()
![]()
![]()
![]()
![]()
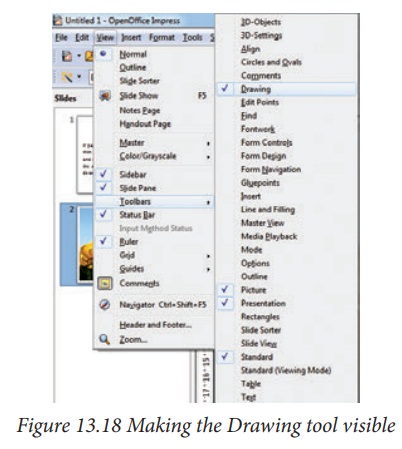
Inserting and formatting shapes
In
order to insert shapes, make the Drawing tools visible by choosing View → Toolbars→ Drawing
option as shown in Figure 13.18. If it is already
available, it will be in the bottom of
the screen as in Figure 13.19. You
can insert 2D as well 3D shapes. You can customise as per your need.

Inserting tables and charts
To
create a table proceed as follows:
1.
Position the slide which will contain the table in the workarea. If necessary
modify the slide layout in order to reserve the place for the table.
2.
If the task pane is already open select Table Design. If the task pane is not
visible, select View → Task pane, then select the Table Design task.
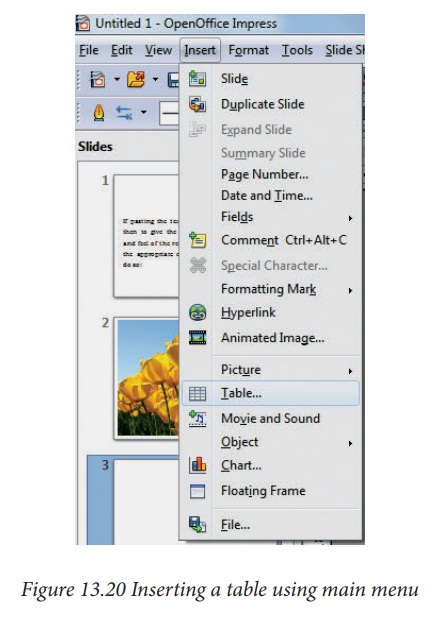
3.
You can create a table directly by selecting Insert → Table from the main menu: the default style and settings are
applied to the newly created table. (Figure
13.20)
4.
Select one of the predefined styles. You will be able to change the color
scheme.
5.
Selecting a style opens the dialog box of Figure
13.21, where you can specify the number of rows and columns.

The
table is placed at the center of the slide, but you can move it wherever it is
more convenient by selecting it then dragging it in the new position.
Table toolbar
When
a table is selected, the Table toolbar (Figure
13.22) should be displayed. If necessary, you can open the toolbar using View → Toolbars → Table. By default the toolbar will float, but you can fix it to the
side or top of the work area wherever you want.
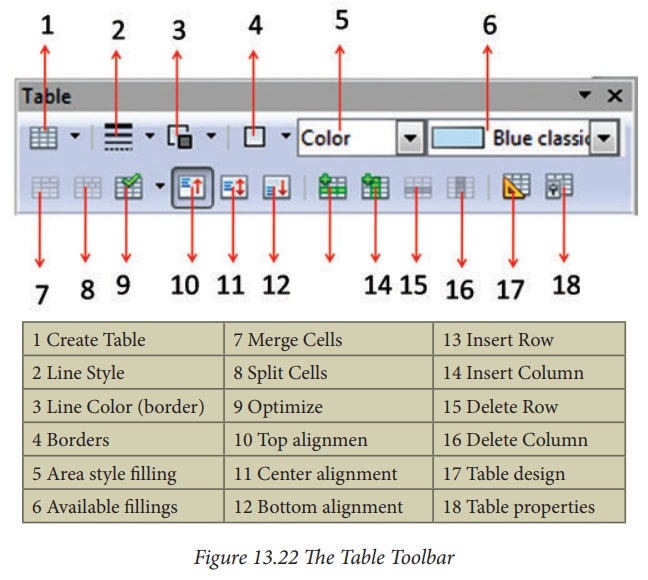
The
Table toolbar contains the majority of the tools you need to manipulate a
table.
Deleting a table
To
delete a table, select it and then press the Delete key on thekeyboard.
Inserting a chart
To
creating a chart using the Insert Chart feature do the following:
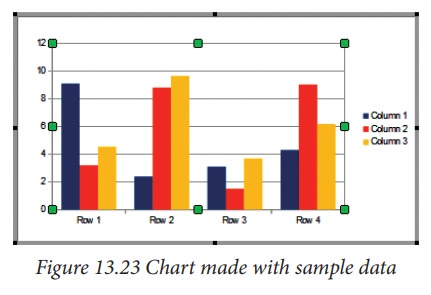
1.
Select Insert → Chart, or click
the Insert Chart icon on the Standard toolbar. A chart appears that has been
created using sample data. See Figure
13.23.
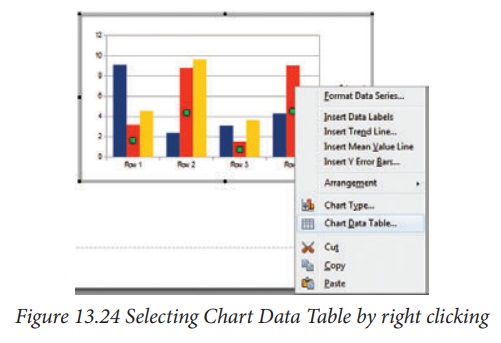
2.
To enter your own data in the chart, select Chart Data Table by right clicking the chart made with sample data.
(Figure 13.24)
3.
A table with predefined data’s will be seen. You can change the data as per
your need. (Figure 13.25)

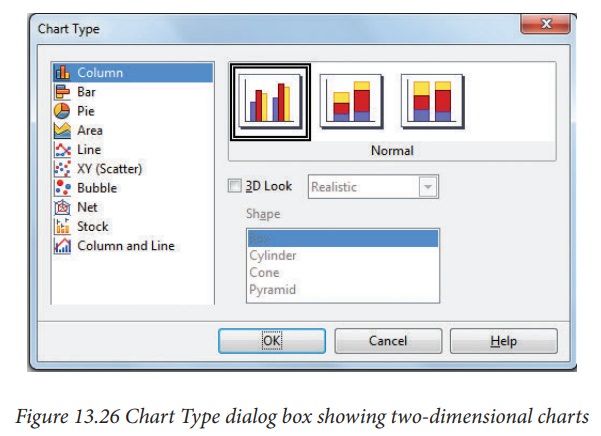
4.
A wide range of chart types and variations are available. You can choose any
chart. (Figure 13.26)
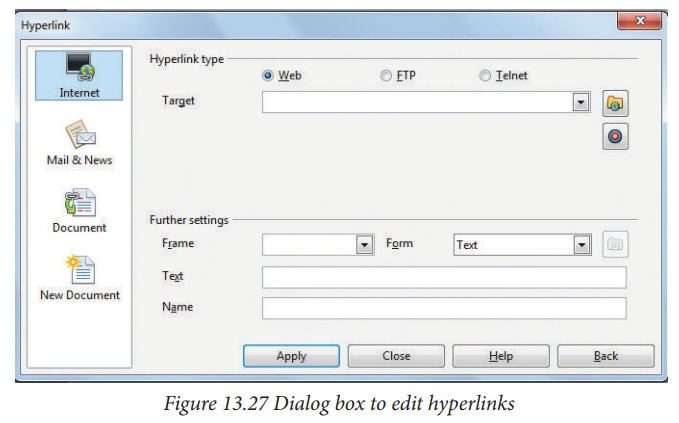
Inserting Hyperlinks
To
insert a hyperlink, or to customize the appearance of a hyperlink, select Insert → Hyperlinks from the menu bar. The dialog box shown in Figure 13.27 will appear
On
the left hand side, select one of the four types of hyperlinks:
• Internet: a web address, normally starting
with http://
• Mail & News: for example an email address.
• Document: the
hyperlink points to another document or to another place in the presentation.
• New document: the hyperlink creates a new
document.
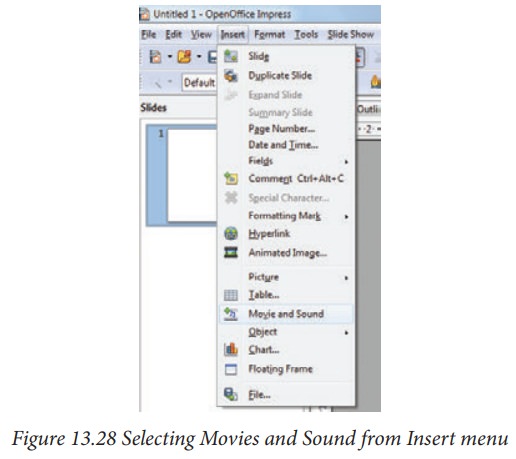
Inserting music and video
Open
Office Impress will let you insert audio files or movie files. The audio and
movie files can be inserted by clicking Insert
→ Movie and Sounds
option from the Insert menu. Refer Figure 13.28.
![]()
![]()
![]()
![]()
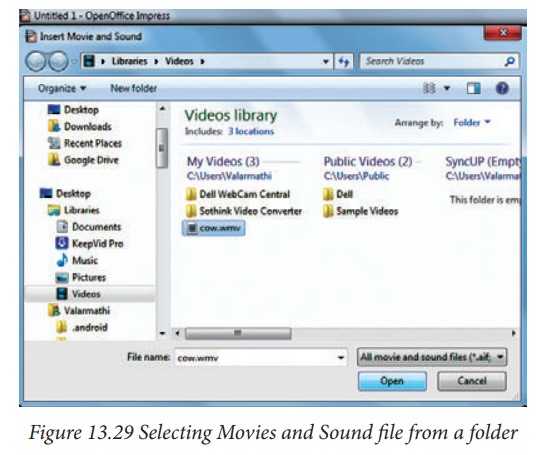
![]() Same as inserting images, a dialog box will be opened.
Select the audio or movie file from the specified location and open. It will be
opened in the slide as follows. Refer
Figure 13.29. The movie or audio
file inserted will be played during the slide show by clicking the mouse over it.
Same as inserting images, a dialog box will be opened.
Select the audio or movie file from the specified location and open. It will be
opened in the slide as follows. Refer
Figure 13.29. The movie or audio
file inserted will be played during the slide show by clicking the mouse over it.
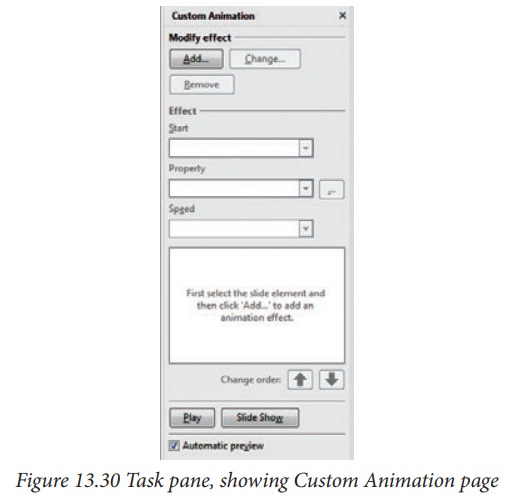
Inserting various animation effects to the inserted objects
Applying an animation effect
•
In Normal View, display the desired slide.
•
Select the text or object you want to animate.
•
In the Tasks pane, choose Custom Animation (Figure
12.30). Click Add. The Custom
Animation dialog box appears.
•
Choose an effect from one of the pages of this dialog box and choose the speed
or duration of that effect.
•
To choose the animation to be applied when the object is placed on the screen,
use an effect, for example Fly In or
Dissolve In.
•
Use the Emphasis page to apply an effect that changes the font color or applies
special effects to the text such as blinking text.
• To choose the effect to be applied when the object is leaving the page, use the Exit page.
•
If you want the object to move along a line or curve, select an animation from
the Motion Paths page.
•
Click OK to save the effect and return to the Custom Animation page on the Task
pane. Here you can choose how to start the animation, change the speed, and
apply some additional properties of the selected effect.
•
Choices may vary depending on the selected object; for example, pictures and
text have different Emphasis choices.
Starting an animation effect
You
have three choices for starting an
animation effect:
On click—the animation stops at this effect
until the next mouse click.
With previous—the animation runs at the same time
as the previous animation.
After previous—the animation runs as soon as the
previous animation ends.
Related Topics