Chapter: Java The Complete Reference : The Java Library : Introducing the AWT: Working with Windows, Graphics, and Text
Creating a Windowed Program
Creating a Windowed Program
Although creating applets is a common use for Java’s AWT, it is also possible to create stand-alone AWT-based applications. To do this, simply create an instance of the window or windows you need inside main( ). For example, the following program creates a frame window that responds to mouse clicks and keystrokes:
//Create an AWT-based application.
import java.awt.*;
import java.awt.event.*;
import java.applet.*;
//Create a frame window.
public class AppWindow extends Frame {
String keymsg = "This is a test."; String mousemsg = "";
int mouseX=30, mouseY=30;
public AppWindow() {
addKeyListener(new MyKeyAdapter(this));
addMouseListener(new MyMouseAdapter(this));
addWindowListener(new MyWindowAdapter());
}
public void paint(Graphics g) {
g.drawString(keymsg, 10, 40);
g.drawString(mousemsg, mouseX, mouseY);
}
// Create the window.
public static void main(String args[]) {
AppWindow appwin = new AppWindow();
appwin.setSize(new Dimension(300, 200));
appwin.setTitle("An AWT-Based Application");
appwin.setVisible(true);
}
}
class MyKeyAdapter extends KeyAdapter {
AppWindow appWindow;
public MyKeyAdapter(AppWindow appWindow) {
this.appWindow = appWindow;
}
public void keyTyped(KeyEvent ke) {
appWindow.keymsg += ke.getKeyChar(); appWindow.repaint();
};
}
class MyMouseAdapter extends MouseAdapter {
AppWindow appWindow;
public MyMouseAdapter(AppWindow appWindow) {
this.appWindow = appWindow;
}
public void mousePressed(MouseEvent me) {
appWindow.mouseX = me.getX(); appWindow.mouseY = me.getY();
appWindow.mousemsg = "Mouse Down at " + appWindow.mouseX + ", " + appWindow.mouseY;
appWindow.repaint();
}
}
class MyWindowAdapter extends WindowAdapter {
public void windowClosing(WindowEvent we) {
System.exit(0);
}
}
Sample output from this program is shown here:
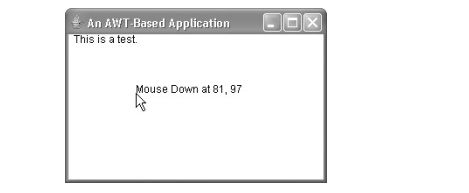
Once created, a frame window takes on a life of its own. Notice that main( ) ends with the call to appwin.setVisible(true). However, the program keeps running until you close the window. In essence, when creating a windowed application, you will use main( ) to launch its top-level window. After that, your program will function as a GUI-based application, not like the console-based programs used earlier.
Displaying Information Within a Window
In the most general sense, a window is a container for information.
Although we have already output small amounts of text to a window in the
preceding examples, we have not begun to take advantage of a window’s ability
to present high-quality text and graphics. Indeed, much of the power of the AWT
comes from its support for these items. For this reason, the remainder of this
chapter introduces the AWT’s text-, graphics-, and font-handling capabilities.
As you will see, they are both powerful and flexible.
Related Topics