Practical - AutoCAD-Drw a figure using Relative Polar Coordinates | 12th Computer Technology : Practical
Chapter: 12th Computer Technology : Practical
AutoCAD-Drw a figure using Relative Polar Coordinates
AutoCAD-Drw a figure using
Relative Polar Coordinates
AIM
To draw a figure using using Polar Coordinate system
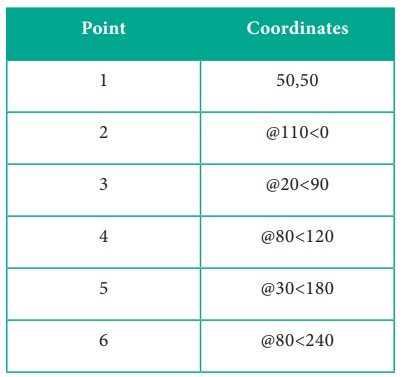
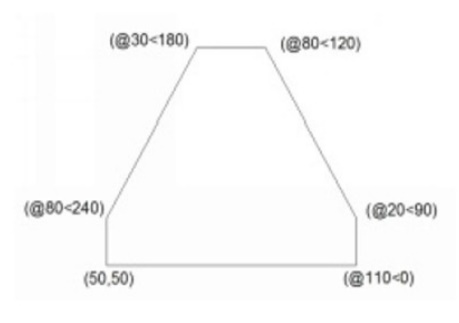
Draw a figure using Relative Polar Coordinates. The coordinates of
the points are given in the table below.
Procedure :
1.
To start AutoCAD 2016, double-click the AutoCAD 2016 - English
icon on your Desktop (or) click Start > All Programs > Autodesk >
AutoCAD 2016 > AutoCAD 2016-English.
2.
Start a new file with acad.dwt template in the Drafting &
Annotation workspace.
3.
Choose the Zoom All tool on the Navigation Bar.
4.
Turn OFF the Grid icon on the status bar.
5.
Turn OFF the Dynamic Input mode, if active.
6.
Click Home > Draw > Line on the ribbon, or enter LINE or L
in the command line. The prompt sequence is given below.
Command: LINE↵
Specify first point: 50,50↵
Specify next point or [Undo]: @110<0↵
Specify next point or [Undo]: @20<90↵
Specify next point or [Close/Undo]: @80<120↵
Specify next point or [Close/Undo]: @30<180↵
Specify next point or [Close/Undo]: @80<240↵
Specify next point or [Close/Undo]: C↵
7. Save the file as Line-example3.dwg.
Output
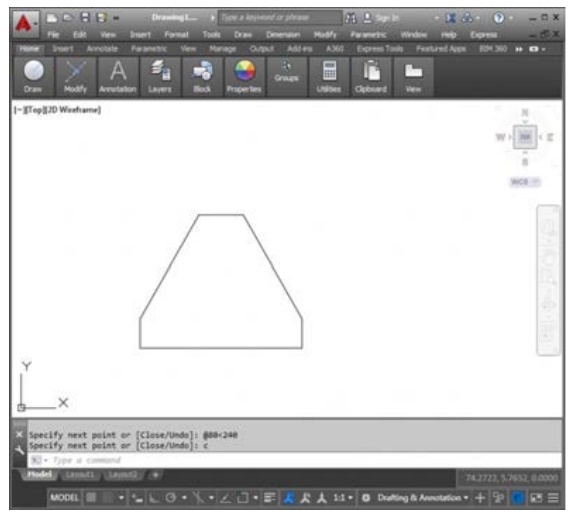
Conclusion :
The expected output is achieved.
Related Topics