Physics Laboratory Practical Experiment - Non - Uniform Bending - Verification of Relation Between Load and Depression Using Pin and Microscope | 11th Physics : Practical Experiment
Chapter: 11th Physics : Practical Experiment
Non - Uniform Bending - Verification of Relation Between Load and Depression Using Pin and Microscope
NON – UNIFORM BENDING –
VERIFICATION OF RELATION BETWEEN LOAD AND DEPRESSION USING PIN AND MICROSCOPE
AIM
To verify
the relation between the load and depression using non-uniform bending of a
beam.
APPARATUS REQUIRED
A long
uniform beam (usually a metre scale), two knife – edge supports, mass hanger,
slotted masses, pin, vernier microscope
FORMULA
M/s = a
constant
where
M → Load
applied (mass) (kg)
s →
depression for the applied load(metre)
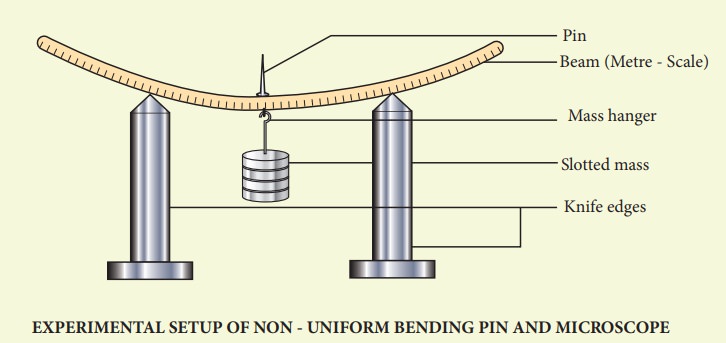
DIAGRAM

PROCEDURE
·
Place the
two knife – edges on the table.
·
Place the
uniform beam (metre scale) on top of the knife edges.
·
Suspend
the mass hanger at the centre. A pin is attached at the centre of the scale
where the hanger is hung.
·
Place a
vernier microscope in front of this arrangement
· Adjust the microscope to get a clear view of the pin
· Make the horizontal cross-wire on the microscope to coincide with the
tip of the pin. (Here mass hanger is the dead load M).
·
Note the
vertical scale reading of the vernier microscope
·
Add the
slotted masses one by one in steps of 0.05 kg (50 g) and take down the
readings.
·
Then start
unloading by removing masses one by one and note the readings.
·
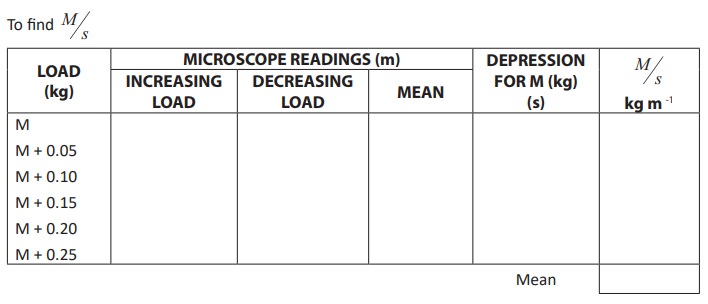
Subtract
the mean reading of each load from dead load reading. This gives the
depressions for the corresponding load M.
OBSERVATIONS
To find
M/s

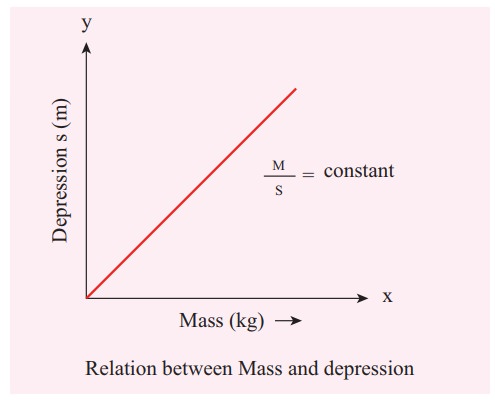
MODEL GRAPH
Load (M)
vs Depression (s)
A graph
between M and s can be drawn by taking M along X- axis and s along Y – axis.
This is a
straight line.

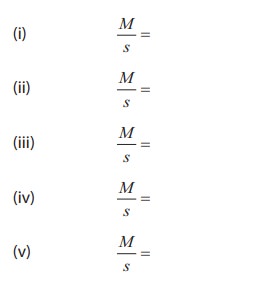
CALCULATION

RESULT
·
The ratio
between mass and depression for each load is calculated. This is found to be
constant.
·
Thus the
relation between load and depression is verified by the method of non-uniform
bending of a beam.
Related Topics