Chapter: 11th Computer Technology : Chapter 9 : Introduction to Spreadsheet
Inserting Columns, Rows and Cells - OpenOffice Calc
Editing
and Formatting Worksheet
Inserting
Columns, Rows and Cells
In
Calc, Columns, rows and cells can be inserted individually or in groups.
Inserting a Column:
When
you insert a new column, it is inserted to the left of the current column. The
location of the cell pointer present, is the Current column. In Calc, you can
insert a new column anywhere in the worksheet.
Step 1: Select the column where a new column
to be inserted.
Step 2: Right-click on the selected column
name that you selected. A pop-up menu appears.
![]()
![]()
![]()
![]()
![]() Step 3: click the “Insert Columns” option from the menu.
Step 3: click the “Insert Columns” option from the menu.
Now,
a new column will be inserted to the left of the current column.
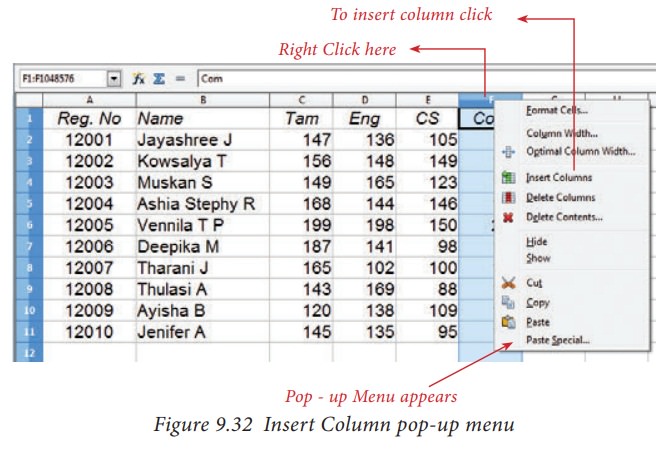
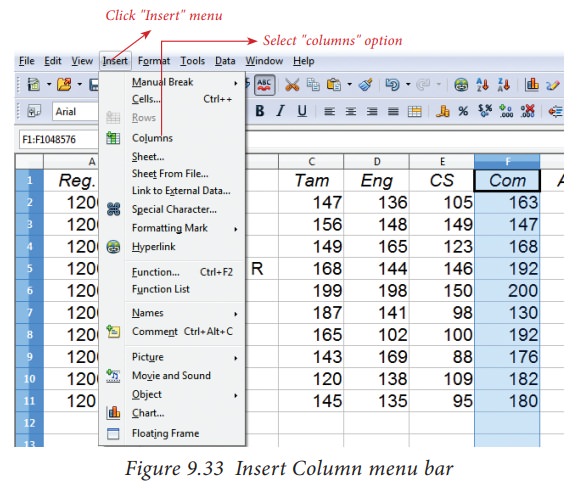
A
new column can also be inserted using Insert
→ Columns command.
(Refer Figure 9.32).
Inserting Rows
When
you insert a new row, it is inserted above the current row. The location of the
cell pointer present is the current row. In Calc, you can insert a new row
anywhere in the worksheet.
Step 1: Select the row where a new row to be
inserted.
Step 2: Right-click on the row number, a pop-up menu
appears
Step 3: click “Insert Rows” option from the menu.
Now,
a new row will be inserted to above the current row.
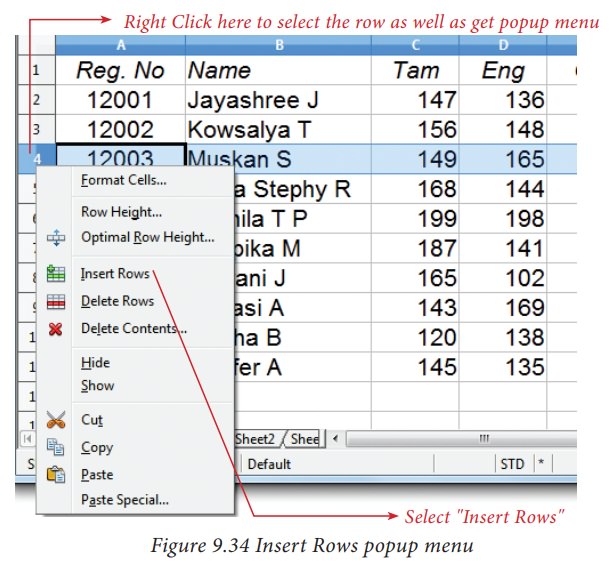
Insert → Rows command is used to insert a new row.
Refer Figure 9.35.
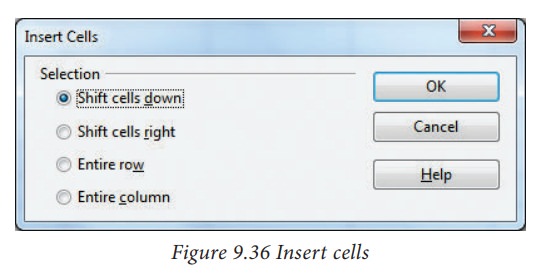
Inserting Cells
•
To insert a new cell between two existing cells, just right-click on any
existing cell
•
From the pop-up menu, select “Insert”
option Figure 7.36 Insert cells
•
The “Insert Cells” dialog box appear
with four options
i) Shift cells down ii) Shift
cells right iii) Entire row iv) Entire Column
•
Any one of the four options is
selected.
•
Selecting “Shift cells down”,
inserts a new cell in the present location and the existing cells are shifted
downwards.
•
Selecting “Shift cells right”,
inserts a new cell in the present location and the existing cells are shifted
towards right.
•
Selecting the “Entire Row” or “Entire Column” option, inserts a new
row or a new column.v
Inserting multiple columns or rows
Multiple
columns or rows can be inserted at once rather than inserting one at a time.
•
Select multiple rows or columns for insertion.
•
Follow steps as in 9.9.1 and 9.9.2
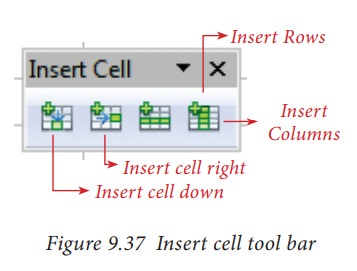
Inserting Columns, Rows and Cells using “Insert Cells” Toolbar
•
Insert Cells floating toolbar is also used to insert cells, rows and columns
•
Click View → Toolbars → Insert Cell
•
A tiny floating toolbar appears on the screen with four icons. Using these
icons, you can insert cells, rows and columns. Refer Figure 9.37.
Related Topics