Chapter: Modern Analytical Chemistry: Basic Tools of Analytical Chemistry
Basic Equipment and Instrumentation of Analytical Chemistry
Basic Equipment and
Instrumentation
Measurements are made
using appropriate equipment or instruments. The
array of equipment and
instrumentation used in analytical chemistry is impressive, ranging from the simple and
inexpensive, to the
complex and costly.
With two exceptions, we will postpone the discussion of equipment and instrumentation where they are used. The instrumentation used to measure
mass and much of
the equipment used to measure
volume are important
to all analytical techniques
and are therefore discussed in this section.
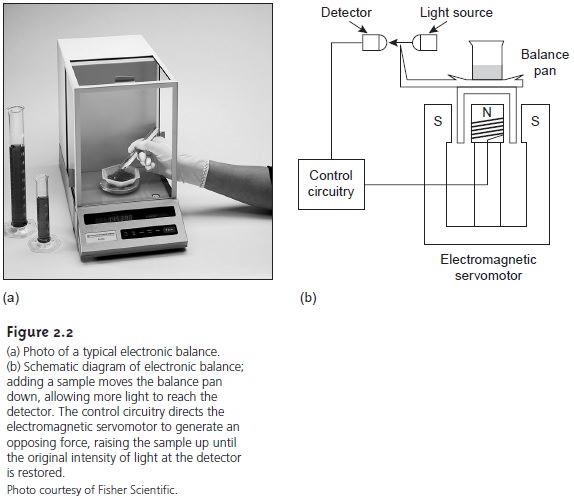
Instrumentation for Measuring Mass
An object’s mass is measured
using a balance. The
most common type of balance is an electronic balance
in which the balance pan is placed over an electromagnet
(Figure 2.2). The
sample to be weighed is placed on the sample
pan, displacing the pan
downward by a force equal
to the product of the sample’s mass and the acceler-
ation due to gravity. The balance detects
this downward movement
and generates a counterbalancing force using an electromagnet. The
current needed to produce this force is proportional to the object’s
mass. A typical
electronic balance has a capacity of 100–200 g and
can measure mass
to the nearest
±0.01 to ±1 mg.
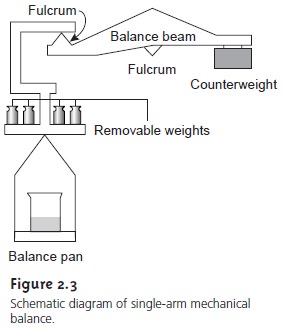
Another type of balance is the single-pan, unequal arm balance (Figure 2.3). In this mechanical balance the balance pan and a set of removable standard weights on one side of a beam are balanced against a fixed counterweight on the beam’s other side. The beam itself is balanced on a fulcrum consisting of a sharp knife edge. Adding a sample to the balance pan tilts the beam away from its balance point. Selected stan- dard weights are then removed until the beam is brought back into balance. The com- bined mass of the removed weights equals the sample’s mass. The capacities and mea- surement limits of these balances are comparable to an electronic balance.
The mass of a sample
is determined by difference. If the material
being weighed is not moisture-sensitive, a clean and dry container is placed on the balance.
The mass of this container is called the tare. Most balances allow
the tare to be automat- ically adjusted to read a mass of zero.
The sample is then transferred to the con- tainer, the new mass
is measured and
the sample’s mass
determined by subtracting the tare. Samples that absorb moisture
from the air are weighed
differently. The sample is placed in a covered
weighing bottle and their combined
mass is deter- mined. A portion of the sample
is removed, and
the weighing bottle
and remaining sample are reweighed. The difference between
the two masses
gives the mass of the transferred sample.
Several important precautions help to minimize
errors in measuring an object’s mass. Balances
should be placed
on heavy surfaces
to minimize the effect of vibra-
tions in the surrounding environment and should be maintained in a level
position. Analytical balances are sensitive enough
that they can measure the mass of a finger- print. For this reason,
materials placed on a balance
should normally be handled
using tongs or laboratory tissues.
Volatile liquid samples
should be weighed
in a covered container to avoid the
loss of sample
by evaporation. Air
currents can sig- nificantly affect a sample’s mass. To avoid
air currents, the
balance’s glass doors should be closed, or the balance’s wind shield should
be in place. A sample
that is cooler or warmer than the surrounding air will create
convective air currents
that adversely affect the
measurement of its
mass. Finally, samples
dried in an oven should be stored
in a desiccator to prevent
them from reabsorbing moisture from the atmosphere.
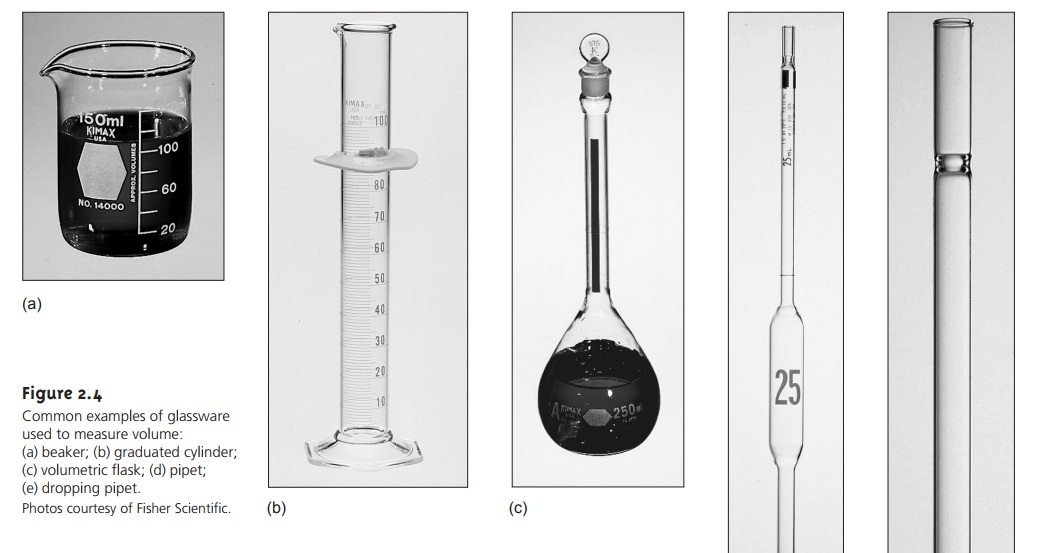
Equipment for Measuring Volume
Analytical chemists use
a variety of glassware to measure volume,
several examples of which
are shown in Figure 2.4. The type of glassware used depends on how exact the volume needs to be. Beakers,
dropping pipets, and graduated cylinders are used to measure
volumes approximately, typically with errors of several percent.
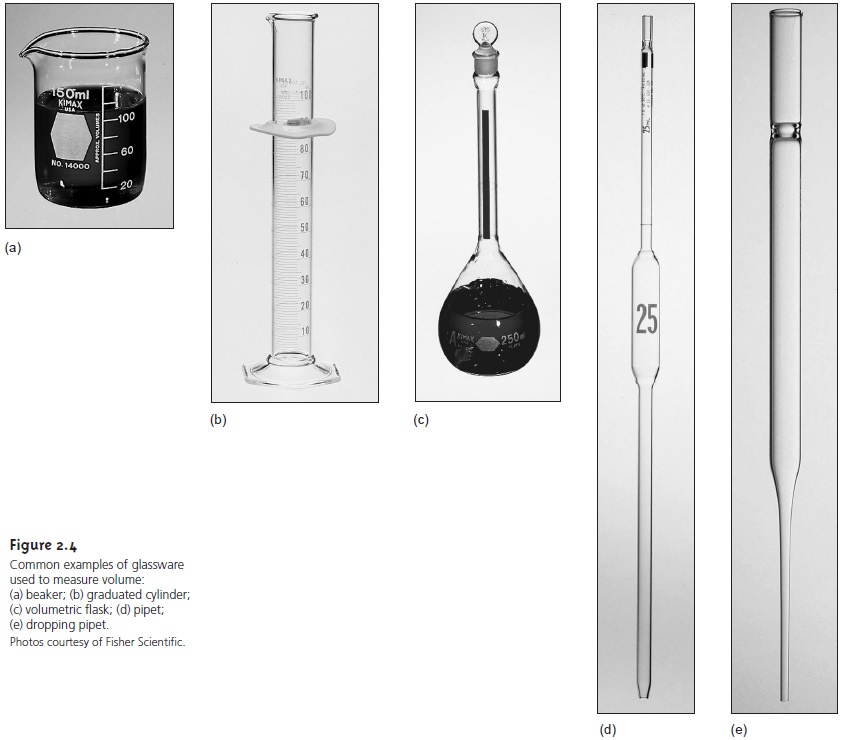
Pipets and volumetric flasks provide a more accurate means for measuring vol- ume. When filled to its calibration mark, a volumetric flask is designed to contain a specified volume of solution at a stated temperature, usually 20 °C.
The actual volume contained by the volumetric flask is usually
within 0.03–0.2% of the stated value. Volumetric flasks containing less than 100 mL generally measure volumes to the
hundredth of a milliliter, whereas
larger volumetric flasks
measure volumes to the
tenth of a milliliter. For example, a 10-mL volumetric flask contains 10.00
mL, but a 250-mL
volumetric flask holds
250.0 mL (this
is important when
keeping track of significant figures).
Because a volumetric flask contains a solution, it is useful in preparing
solu- tions with exact
concentrations. The reagent
is transferred to the volumetric flask, and enough solvent
is added to dissolve the reagent. After the reagent
is dissolved, additional solvent
is added in several portions, mixing the solution
after each addi- tion. The final adjustment of volume to the flask’s
calibration mark is made using a
dropping pipet. To complete the mixing process,
the volumetric flask
should be in- verted at least ten times.
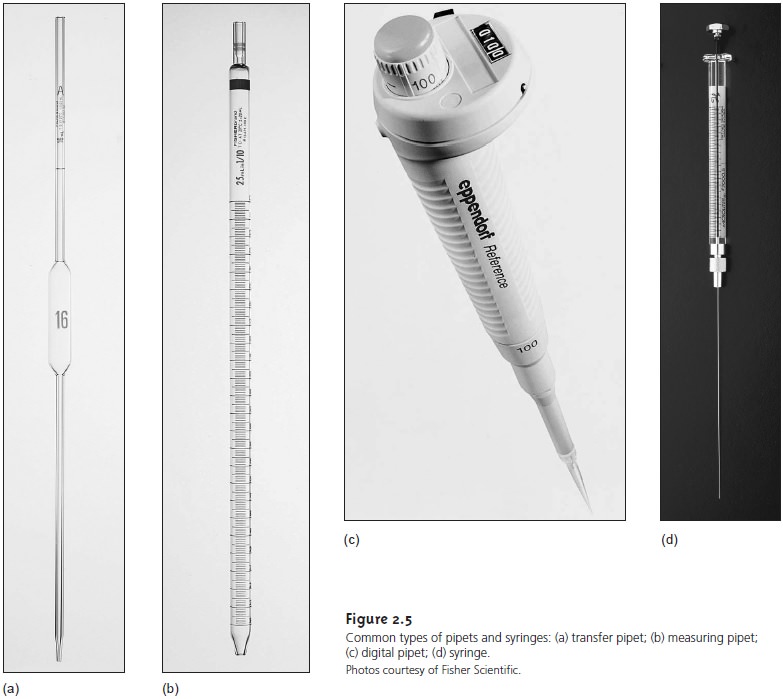
A pipet is used to deliver a specified volume of solution. Several different styles of pipets are available (Figure 2.5). Transfer pipets provide the most accurate means for delivering a known volume of solution; their volume error is similar to that from an equivalent volumetric flask. A 250-mL transfer pipet, for instance, will deliver 250.0 mL. To fill a transfer pipet, suction from a rubber bulb is used to pull the liquid up past the calibration mark (never use your mouth to suck a solu- tion into a pipet). After replacing the bulb with your finger, the liquid’s level is ad- justed to the calibration mark, and the outside of the pipet is wiped dry. The pipet’s contents are allowed to drain into the receiving container with the tip of the pipet touching the container walls. A small portion of the liquid remains in the pipet’s tip and should not be blown out. Measuring pipets are used to deliver vari- able volumes, but with less accuracy than transfer pipets. With some measuring pipets, delivery of the calibrated volume requires that any solution remaining in the tip be blown out. Digital pipets and syringes can be used to deliver volumes as small as a microliter.
Three important precautions are needed when working with pipets and
volumetric flasks. First,
the volume delivered by a pipet
or contained by a volu- metric flask assumes that the glassware
is clean. Dirt and grease on the inner glass surface
prevents liquids from draining evenly,
leaving droplets of the liquid
on the container’s walls. For a pipet this means that the delivered
volume is less than the calibrated volume, whereas drops of liquid above the calibration
mark mean that a volumetric flask contains more than its calibrated volume.
Commercially available cleaning solutions can be used to clean
pipets and volu- metric flasks.
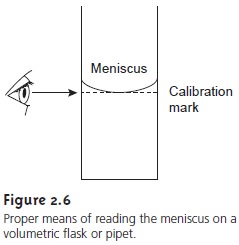
Second, when filling
a pipet or volumetric flask,
set the liquid’s
level exactly at the calibration mark. The liquid’s
top surface is curved into a meniscus, the
bottom of which should be exactly
even with the glassware’s calibration mark (Figure 2.6).
The meniscus should
be adjusted with the calibration mark at eye level to avoid parallax
errors. If your eye level is above the calibration mark the pipet
or volumetric flask will be overfilled. The pipet or volumetric flask will be underfilled if your eye level is below the calibration mark.
Finally, before using a pipet or volumetric flask you should rinse it with several small portions of the solution whose volume is being measured.
This ensures that any
residual liquid remaining in the pipet
or volumetric flask
is removed.
Equipment for Drying Samples
Many materials need to be dried prior
to their analysis
to remove residual
moisture. Depending on the material, heating
to a temperature of 110–140
°C is usually suffi- cient. Other
materials need to be heated
to much higher
temperatures to initiate thermal decomposition. Both processes can be accomplished using a laboratory oven capable of providing the required temperature.
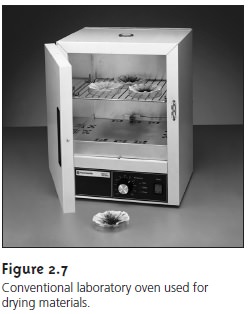
Commercial laboratory ovens
(Figure 2.7) are
used when the
maximum de- sired temperature is 160–325 °C (depending on the model).
Some ovens include
the ability to circulate
heated air, allowing
for a more efficient removal
of moisture and shorter drying times. Other
ovens provide a tight seal for the door, allowing
the oven to be evacuated. In some situations a conventional laboratory oven can be re-
placed with a microwave oven.
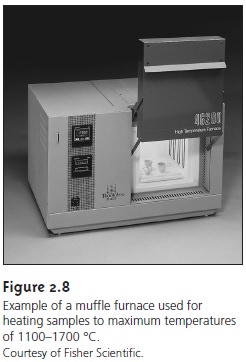
Higher temperatures, up to 1700°
C, can be achieved
using a muffle furnace (Figure
2.8).
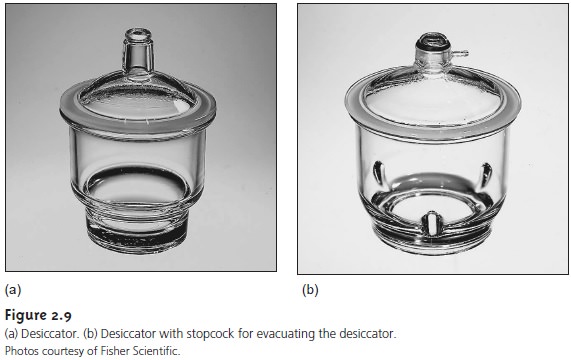
After drying or decomposing a sample, it should be cooled to room tempera- ture in a desiccator to avoid the readsorption of moisture. A desiccator (Figure 2.9) is a closed container that isolates the sample from the atmosphere. A drying agent, called a desiccant, is placed in the bottom of the container. Typical desiccants in- clude calcium chloride and silica gel. A perforated plate sits above the desiccant, providing a shelf for storing samples. Some desiccators are equipped with stopcocks that allow them to be evacuated.
Related Topics