Chapter: 11th Computer Technology : Chapter 13 : Presentation Advanced
Inserting and formatting shapes and pictures - OpenOffice presentation
Inserting
and formatting shapes and pictures
In
order to insert an image in OpenOffice Impress, place the cursor in the place
where you want the image to be inserted. Then, Click Insert → Select Picture → From File option from the Insert menu. Refer Figure 13.15.

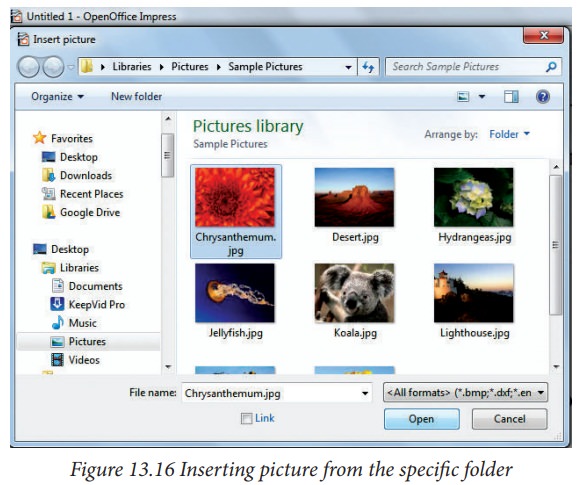
OpenOffice
Impress will display the dialog box, where you can select the image from the
specific location and select open. The image will be inserted in the specified
location. Refer Figure 13.16.
In
order to format pictures, right click on the picture and select the option you
want to do to that picture. Through the options, you can crop, resize, align,
arrange, flip and so on.

![]()
![]()
![]()
![]()
![]()
Inserting and formatting shapes
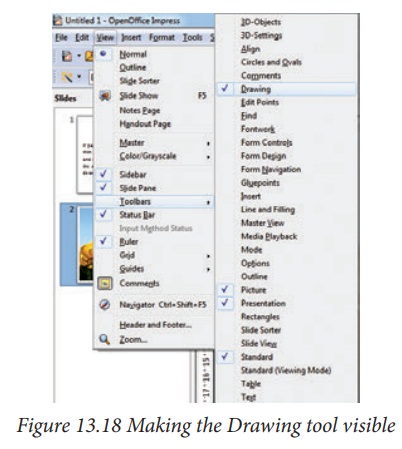
In
order to insert shapes, make the Drawing tools visible by choosing View → Toolbars→ Drawing
option as shown in Figure 13.18. If it is already
available, it will be in the bottom of
the screen as in Figure 13.19. You
can insert 2D as well 3D shapes. You can customise as per your need.

Related Topics