Chapter: Java The Complete Reference : Introducing GUI Programming with JavaFX : Introducing JavaFX GUI Programming
A Simple JavaFX Control: Label
A
Simple JavaFX Control: Label
The primary ingredient in
most user interfaces is the control because a control enables the user to
interact with the application. As you would expect, JavaFX supplies a rich
assortment of controls. The simplest control is the label because it just
displays a message, which, in this example, is text. Although quite easy to
use, the label is a good way to introduce the techniques needed to begin
building a scene graph.
The JavaFX label is an
instance of the Label class, which
is packaged in javafx.scene.control.
Label inherits Labeled and Control,
among other classes. The Labeled class
defines several features that are
common to all labeled elements (that is, those that can contain text), and Control defines features related to all
controls.
Label defines three constructors. The one we will use here is Label(String str)
Here, str is the string that is displayed.
Once you have created a label
(or any other control), it must be added to the scene’s content, which means
adding it to the scene graph. To do this, you will first call getChildren( )
on the root node of the scene
graph. It returns a list of the child nodes in the form of an
ObservableList<Node>.
ObservableList is packaged in
javafx.collections, and it inherits
java.util.List, which means that it supports all of the features available
to a list as defined by the
Collections Framework. Using the returned list of child nodes, you can add the
label to the list by calling add( ),
passing in a reference to the label.
The following program puts
the preceding discussion into action by creating a simple JavaFX application
that displays a label:
// Demonstrate a JavaFX label.
import javafx.application.*; import
javafx.scene.*;
import javafx.stage.*; import
javafx.scene.layout.*;
import javafx.scene.control.*;
public class JavaFXLabelDemo extends
Application {
public static void main(String[] args) {
// Start the JavaFX application by calling
launch().
launch(args);
}
// Override the start() method.
public void start(Stage myStage) {
//Give the stage a title.
myStage.setTitle("Demonstrate a JavaFX
label.");
//Use a FlowPane for the root node.
FlowPane rootNode = new FlowPane();
// Create a scene.
Scene myScene = new Scene(rootNode, 300, 200);
//Set the scene on the stage.
myStage.setScene(myScene);
//Create a label.
Label myLabel = new Label("This is a
JavaFX label");
//Add the label to the scene graph.
rootNode.getChildren().add(myLabel);
//Show the stage and its scene.
myStage.show();
}
}
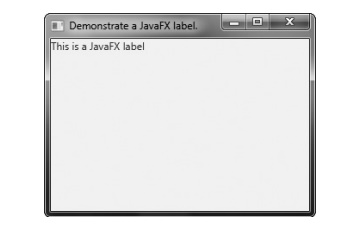
This program produces the
following window:

In the program, pay special
attention to this line:
rootNode.getChildren().add(myLabel);
It adds the label to the list
of children for which rootNode is
the parent. Although this line could be separated into its individual pieces if
necessary, you will often see it as shown here.
Before moving on, it is useful
to point out that ObservableList
provides a method called addAll( ) that
can be used to add two or more children to the scene graph in a single call. (You will see an example of this
shortly.) To remove a control from the scene graph, call remove( ) on the
ObservableList. For example,
rootNode.getChildren().remove(myLabel);
removes myLabel from the scene.
Related Topics