Chapter: Java The Complete Reference : Introducing GUI Programming with JavaFX : Introducing JavaFX GUI Programming
A JavaFX Application Skeleton
A
JavaFX Application Skeleton
All JavaFX applications share
the same basic skeleton. Therefore, before looking at any more JavaFX features,
it will be useful to see what that skeleton looks like. In addition to showing
the general form of a JavaFX application, the skeleton also illustrates how to
launch the application and demonstrates when the life-cycle methods are called.
A message noting when each life-cycle method is called is displayed on the
console. The complete skeleton is shown here:
// A JavaFX application skeleton.
import javafx.application.*;
import javafx.scene.*;
import javafx.stage.*;
import javafx.scene.layout.*;
public class JavaFXSkel extends Application {
public static void main(String[] args) {
System.out.println("Launching JavaFX
application.");
// Start the JavaFX application by calling
launch().
launch(args);
}
// Override the init() method.
public void init() {
System.out.println("Inside the init()
method.");
}
// Override the start() method.
public void start(Stage myStage) {
System.out.println("Inside the start()
method.");
//Give the stage a title.
myStage.setTitle("JavaFX Skeleton.");
//Create a root node. In this case, a flow
layout pane
//is used, but several alternatives exist.
FlowPane rootNode = new FlowPane();
// Create a scene.
Scene myScene = new Scene(rootNode, 300, 200);
//Set the scene on the stage.
myStage.setScene(myScene);
//Show the stage and its scene.
myStage.show();
}
// Override the stop() method.
public void stop() {
System.out.println("Inside the stop()
method.");
}
}
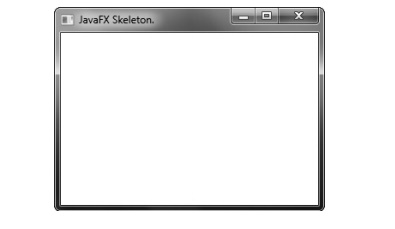
Although the skeleton is
quite short, it can be compiled and run. It produces the window shown here:
It also produces the
following output on the console:
Launching JavaFX application.
Inside the init() method.
Inside the start() method.
When you close the window,
this message is displayed on the console:
Inside the stop() method.
Of course, in a real program,
the life-cycle methods would not normally output anything to System.out. They do so here simply to
illustrate when each method is called. Furthermore, as explained earlier, you
will need to override the init( )
and stop( ) methods only if your
application must perform special startup or shutdown actions. Otherwise, you
can use the default implementations of these methods provided by the Application class.
Let’s examine this program in
detail. It begins by importing four packages. The first is javafx.application, which contains the Application class. The
Scene class is packaged in
javafx.scene, and Stage is
packaged in javafx.stage. The javafx.scene.layout package provides several layout panes. The one
used by the program is FlowPane.
Next, the application class JavaFXSkel is created. Notice that it
extends Application. As explained, Application is the class from which all
JavaFX applications are derived. JavaFXSkel
contains two methods. The first is main(
). It is used to launch the application via a call to launch( ). Notice that the
args parameter to main( ) is
passed to the launch( ) method. Although this is a common approach,
you can pass a different set of parameters to launch( ), or none at all. One other point: As explained earlier, launch( ) is required by a
free-standing application, but not in other cases. When it is not needed, main( ) is also not needed. However,
for reasons already explained, both main(
) and launch( ) are included in
the JavaFX programs in this book.
When the application begins,
the init( ) method is called first
by the JavaFX run-time system. For the sake of illustration, it simply displays
a message on System.out, but it
would normally be used to initialize some aspect of the application. Of course,
if no initialization is required, it is not necessary to override init( ) because an empty, default
implementation is provided. It is important to emphasize that init( ) cannot be used to create the
stage or scene portions of a GUI. Rather, these items should be constructed and
displayed by the start( ) method.
After init( ) finishes, the start(
) method executes. It is here that the initial scene is created and set to
the primary stage. Let’s look at this method line-by-line. First, notice that start( ) has a parameter of type Stage. When start( ) is called, this parameter will receive a reference to the primary stage of the
application. It is to this stage that you will set a scene for the application.
After displaying a message on
the console that start( ) has begun
execution, it sets the title of the stage using this call to setTitle( ):
myStage.setTitle("JavaFX Skeleton.");
Although this step is not
necessarily required, it is customary for stand-alone applications. This title
becomes the name of the main application window.
Next, a root node for a scene
is created. The root node is the only node in a scene graph that does not have
a parent. In this case, a FlowPane
is used for the root node, but there are several other classes that can be used
for the root.
FlowPane rootNode = new FlowPane();
As mentioned, a FlowPane is a layout manager that uses
a flow layout. This is a layout in which elements are positioned line-by-line,
with lines wrapping as needed. (Thus, it works much like the FlowLayout class used by the AWT and
Swing.) In this case, a horizontal flow is used, but it is possible to specify
a vertical flow. Although not needed by this skeletal application, it is also
possible to specify other layout properties, such as a vertical and horizontal
gap between elements, and an alignment. You will see an example of this later
in this chapter.
The following line uses the
root node to construct a Scene:
Scene myScene = new Scene(rootNode, 300, 200);
Scene provides several versions of its constructor. The one used here
creates a scene that has the
specified root with the specified width and height. It is shown here:
Scene(Parent rootnode, double width, double height)
Notice that the type of rootnode is Parent. It is a subclass of Node
and encapsulates nodes that can have children. Also notice that the width and
the height are double values. This
lets you pass fractional values, if needed. In the skeleton, the root is rootNode, the width is 300 and the height
is 200.
The next line in the program
sets myScene as the scene for myStage:
myStage.setScene(myScene);
Here, setScene( ) is a method defined by Stage that sets the scene to that specified by its argument.
In cases in which you don’t
make further use of the scene, you can combine the previous two steps, as shown
here:
myStage.setScene(new Scene(rootNode, 300,
200));
Because of its compactness,
this form will be used by most of the subsequent examples. The last line in start( ) displays the stage and its
scene:
myStage.show();
In essence, show( ) shows the window that was
created by the stage and screen.
When you close the
application, its window is removed from the screen and the stop( ) method is called by the JavaFX run-time system. In this
case, stop( ) simply displays a
message on the console, illustrating when it is called. However, stop( ) would not normally display
anything. Furthermore, if your application does not need to handle any shutdown
actions, there is no reason to override stop(
) because an empty, default implementation is provided.
Related Topics