Chapter: Java The Complete Reference : Introducing GUI Programming with JavaFX : Introducing JavaFX GUI Programming
Using Buttons and Events - JavaFX
Using
Buttons and Events
Although the program in the
preceding section presents a simple example of using a JavaFX control and
constructing a scene graph, it does not show how to handle events. As you know,
most GUI controls generate events that are handled by your program. For example,
buttons, check boxes, and lists all generate events when they are used. In many
ways, event handling in JavaFX is similar to event handling in Swing or the
AWT, but it’s more streamlined. Therefore, if you already are proficient at
handling events for these other two GUIs, you will have no trouble using the
event handling system provided by JavaFX.
One commonly used control is
the button. This makes button events one of the most frequently handled.
Therefore, a button is a good way to demonstrate the fundamentals of event
handling in JavaFX. For this reason, the fundamentals of event handling and the
button are introduced together.
Event
Basics
The base class for JavaFX
events is the Event class, which is
packaged in javafx.event. Event inherits java.util.EventObject, which means that JavaFX events share the
same basic functionality as other Java events. Several subclasses of Event are defined. The one that we will
use here is ActionEvent. It handles
action events generated by a button.
In general, JavaFX uses what
is, in essence, the delegation event model approach to event handling. To
handle an event, you must first register the handler that acts as a listener
for the event. When the event occurs, the listener is called. It must then
respond to the event and return. In this regard, JavaFX events are managed much
like Swing events, for example.
Events are handled by
implementing the EventHandler
interface, which is also in javafx.event.
It is a generic interface with the following form:
interface EventHandler<T
extends Event>
Here, T specifies the type of event that the handler will handle. It
defines one method, called handle( ),
which receives the event object as a parameter. It is shown here:
void handle(T eventObj)
Here, eventObj is the event that was generated. Typically, event handlers
are implemented through anonymous inner classes or lambda expressions, but you
can use stand-alone classes for this purpose if it is more appropriate to your
application (for example, if one event handler will handle events from more
than one source).
Although not required by the
examples in this chapter, it is sometimes useful to know the source of an
event. This is especially true if you are using one handler to handle events
from different sources. You can obtain the source of the event by calling getSource( ), which is inherited from java.util.EventObject. It is shown
here:
Object getSource( )
Other methods in Event let you obtain the event type,
determine if the event has been consumed, consume an event, fire an event, and
obtain the target of the event. When an event is consumed, it stops the event
from being passed to a parent handler.
One last point: In JavaFX,
events are processed via an event
dispatch chain. When an event is generated, it is passed to the root node
of the chain. The event is then passed down the chain to the target of the
event. After the target node processes the event, the event is passed back up
the chain, thus allowing parent nodes a chance to process the event, if
necessary. This is called event bubbling.
It is possible for a node in the chain to consume an event, which prevents it
from being further processed.
Introducing
the Button Control
In JavaFX, the push button
control is provided by the Button
class, which is in javafx.scene.-control. Button inherits a fairly long list of base classes that include ButtonBase, Labeled, Region, Control, Parent, and Node. If
you examine the API documentation for
Button, you will see that much of its functionality comes from its base classes.
Furthermore, it supports a wide array of options. However, here we will use its
default form. Buttons can contain text, graphics, or both. In this chapter, we
will use text-based buttons. An example of a graphics-based button is shown in
the next chapter.
Button defines three constructors. The one we will use is shown here: Button(String str)
In this case, str is the message that is displayed in
the button.
When a button is pressed, an ActionEvent is generated. ActionEvent is packaged in javafx.event. You can register a
listener for this event by using
setOnAction( ), which has this
general form:
final void
setOnAction(EventHandler<ActionEvent> handler)
Here, handler is the handler being registered. As mentioned, often you
will use an anonymous inner class or lambda expression for the handler. The setOnAction( ) method sets the property
onAction, which stores a reference
to the handler. As with all other Java event handling, your handler must
respond to the event as fast as possible and then return. If your handler
consumes too much time, it will noticeably slow down the application. For
lengthy operations, you must use a separate thread of execution.
Demonstrating
Event Handling and the Button
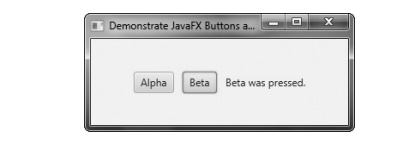
The following program
demonstrates event handling. It uses two buttons and a label. Each time a
button is pressed, the label is set to display which button was pressed.
// Demonstrate JavaFX events and buttons.
import javafx.application.*;
import javafx.scene.*;
import javafx.stage.*;
import javafx.scene.layout.*;
import javafx.scene.control.*;
import javafx.event.*;
import javafx.geometry.*;
public class JavaFXEventDemo extends
Application {
Label response;
public static void main(String[] args) {
// Start the JavaFX application by calling
launch().
launch(args);
}
// Override the start() method.
public void start(Stage myStage) {
// Give the stage a title.
myStage.setTitle("Demonstrate JavaFX
Buttons and Events.");
//Use a FlowPane for the root node. In this
case,
//vertical and horizontal gaps of 10.
FlowPane rootNode = new FlowPane(10, 10);
//Center the controls in the scene.
rootNode.setAlignment(Pos.CENTER);
//Create a scene.
Scene myScene = new Scene(rootNode, 300, 100);
//Set the scene on the stage.
myStage.setScene(myScene);
//Create a label.
response = new Label("Push a
Button");
// Create two push buttons.
Button btnAlpha = new
Button("Alpha");
Button btnBeta = new Button("Beta");
//Handle the action events for the Alpha
button.
btnAlpha.setOnAction(new
EventHandler<ActionEvent>() {
public void handle(ActionEvent ae) {
response.setText("Alpha was pressed.");
}
});
//Handle the action events for the Beta button.
btnBeta.setOnAction(new
EventHandler<ActionEvent>() {
public void handle(ActionEvent ae) {
response.setText("Beta was pressed.");
}
});
//Add the label and buttons to the scene graph.
rootNode.getChildren().addAll(btnAlpha,
btnBeta, response);
//Show the stage and its scene.
myStage.show();
}
}
Sample output from this
program is shown here:
Let’s examine a few key
portions of this program. First, notice how buttons are created by these two
lines:
Button btnAlpha = new
Button("Alpha");
Button btnBeta = new Button("Beta");
This creates two text-based
buttons. The first displays the string Alpha; the second displays Beta.
Next, an action event handler
is set for each of these buttons. The sequence for the Alpha button is shown
here:
// Handle the action events for the Alpha button.
btnAlpha.setOnAction(new
EventHandler<ActionEvent>() {
public void handle(ActionEvent ae) {
response.setText("Alpha was pressed.");
}
});
As explained, buttons respond
to events of type ActionEvent. To
register a handler for these events, the setOnAction(
) method is called on the button. It uses an anonymous inner class to
implement the EventHandler
interface. (Recall that EventHandler
defines only the handle( ) method.)
Inside handle( ), the text in the response label is set to reflect the
fact that the Alpha button was
pressed. Notice that this is done by calling the setText( ) method on the label. Events are handled by the Beta
button in the same way.
Note that response is declared as a field within FXEventDemo, rather than as a local
variable. This is because it is accessed within the button event handlers,
which are anonymous inner classes.
After the event handlers have
been set, the response label and the
buttons btnAlpha and btnBeta are added to the scene graph by
using a call to addAll( ):
rootNode.getChildren().addAll(btnAlpha,
btnBeta, response);
The addAll( ) method adds a list of nodes to the invoking parent node.
Of course, these nodes could have been added by three separate calls to add( ), but the addAll( ) method is more convenient to use in this situation.
There are two other things of
interest in this program that relate to the way the controls are displayed in
the window. First, when the root node is created, this statement is used:
FlowPane rootNode = new FlowPane(10, 10);
Here, the FlowPane constructor is passed two
values. These specify the horizontal and vertical gap that will be left around
elements in the scene. If these gaps are not specified, then two elements (such
as two buttons) would be positioned in such a way that no space is between
them. Thus, the controls would run together, creating a very unappealing user
interface. Specifying gaps prevents this.
The second point of interest
is the following line, which sets the alignment of the elements in the FlowPane:
rootNode.setAlignment(Pos.CENTER);
Here, the alignment of the
elements is centered. This is done by calling setAlignment( ) on the FlowPane.
The value Pos.CENTER specifies that
both a vertical and horizontal center will be used. Other alignments are possible.
Pos is an enumeration that specifies
alignment constants. It is packaged in javafx.geometry.
Before moving on, one more
point needs to be made. The preceding program used anonymous inner classes to
handle button events. However, because the EventHandler
interface defines only one abstract method, handle( ), a lambda expression could have passed to setOnAction( ), instead. In this case,
the parameter type of setOnAction( )
would supply the target context for the lambda expression. For example, here is
the handler for the Alpha button, rewritten to use a lambda:
btnAlpha.setOnAction( (ae) ->
response.setText("Alpha was
pressed.")
);
Notice that the lambda
expression is more compact than the anonymous inner class. Because lambda
expressions are a new feature just recently added to Java, but the anonymous
inner class is a widely used construct, readily understood by nearly all Java
programmers, the event handlers in subsequent examples will use anonymous inner
classes. This will also allow the examples to be compiled by readers using JDK
7 (which does not support lambdas). However, on your own, you might want to
experiment with converting them to lambda expressions. It is a good way to gain
experience using lambdas in your own code.
Related Topics