AutoCAD 2016 - Erasing objects | 12th Computer Technology : Chapter 6 : AutoCAD 2016
Chapter: 12th Computer Technology : Chapter 6 : AutoCAD 2016
Erasing objects
Erasing objects
Sometimes, you may need to erase the unwanted objects from the
objects drawn. You can do so by using the Erase tool. This tool is used exactly
the same way as an eraser is used in manual drafting to delete the unwanted
lines.
The Erase command removes objects from the drawing file.
To erase an object,
1. Start the ERASE command by choosing Home tab > Modify
panel > Erase tool. (or) Type ERASE (or) E in the
Command line.
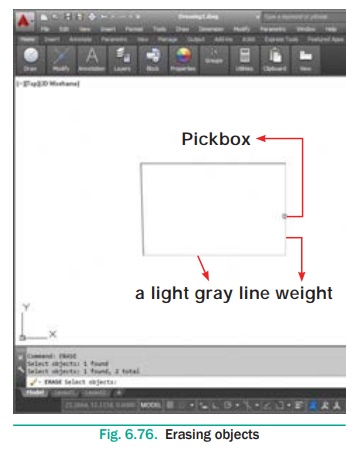
Now the cursor changes from the crosshairs to a little square.
This is called the pickbox. Its appearance indicates that AutoCAD is
ready for you to select objects on the screen. Also note the command line; it’s
prompting you to select objects.
2. Place the pickbox on one of the objects, and click that object
to be erased, and the object is faded in a light gray line weight.
3. Continue selecting all of the objects to be erased. The erased
objects remain in a light gray line weight until the command is completed.
4. Press <Enter> or right-click to erase the
objects. The objects are erased, and the ERASE command ends.
Three Types of Erasing Methods
There are three methods to erase (delete) objects from the
drawing.
Method 1
Select the Erase command first and then select the objects
to be erased.
Press Enter Key and the objects selected will disappear.
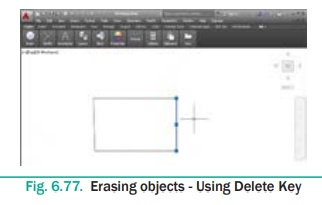
Method 2
Select the object to be erased.
Press the Delete Key.
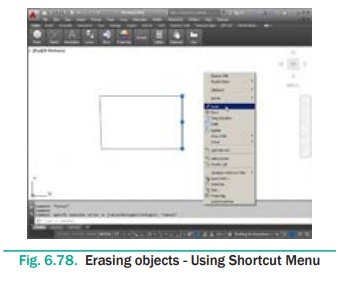
Method 3
1.
Select the object to be erased.
2.
Press the right Mouse button.
3.
Select Erase from the Shortcut Menu using the left mouse button.
Note: If you want the erased objects to return, select the Undo
tool from the Quick Access Toolbar. This will Undo the last command.
Plotting (Printing) the Drawing
Printing the drawing is done with the PLOT command.
1. Click the big red A, and then choose Print.
2. From the options lists, choose Plot. AutoCAD displays
the Plot dialog box with its many options.
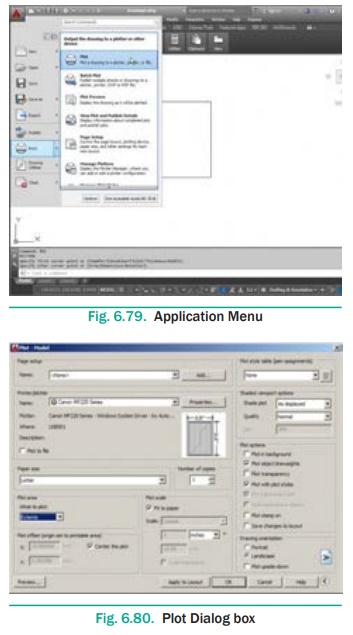
3. In the Printer/plotter area, select a printer from the
Name droplist.
4. In the Plot Area section, select Extents from the What
to Plot droplist. This option ensures the entire drawing is plotted.
5. In the Plot Offset section, select Center the plot to
center the drawing on the paper.
6. In the Plot Scale area, select Fit to Paper.
This ensures the drawing fits the paper, no matter the size of paper or
drawing.
7. At this point, the dialog box’s options should look like those
illustrated below.
To ensure the plot will work out correctly, click the Preview
button. This lets you check for errors before committing (or wasting) paper.
8. Press ESC to exit the print preview mode. (or) Click on
the Close(X) button.
9. Back in the Plot dialog box, choose OK to start the
plot.
Related Topics