Accountancy - Practical application of accounting software ŌĆō Tally | 12th Accountancy : Chapter 10 : Computerised Accounting System- Tally
Chapter: 12th Accountancy : Chapter 10 : Computerised Accounting System- Tally
Practical application of accounting software ŌĆō Tally
Practical
application of accounting software ŌĆō Tally.ERP 9
Practical on application
of accounting software - Tally
1. Starting Tally
Tally can be started in
either of the ways as given below:
Click on Start > All
Programs > Tally.ERP 9 > Tally.ERP 9 icon
(or)
Click on Tally.ERP 9
icon (shortcut) on the desktop
A newly installed Tally,
if opened, will appear as in figure 10.1.
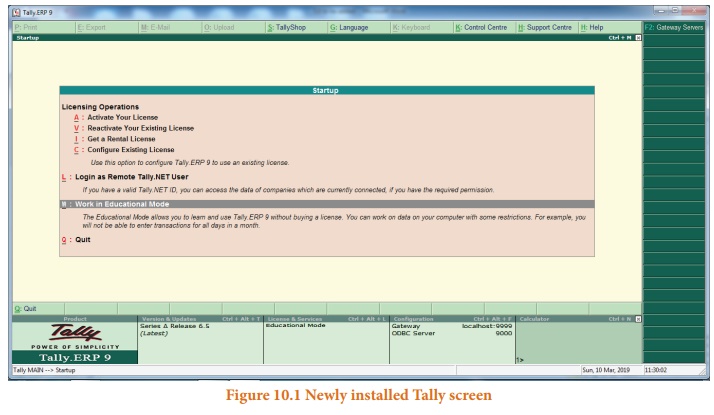
When Tally is started,
choose the mode of operation as per the options listed on the screen. If
license is available, choose ŌĆśActivate Your LicenseŌĆÖ. Otherwise choose ŌĆśWork in
Education ModeŌĆÖ.
For practice, ŌĆśWork in
Education ModeŌĆÖ is chosen. After the selection, the first screen appears as in
figure 10.2.
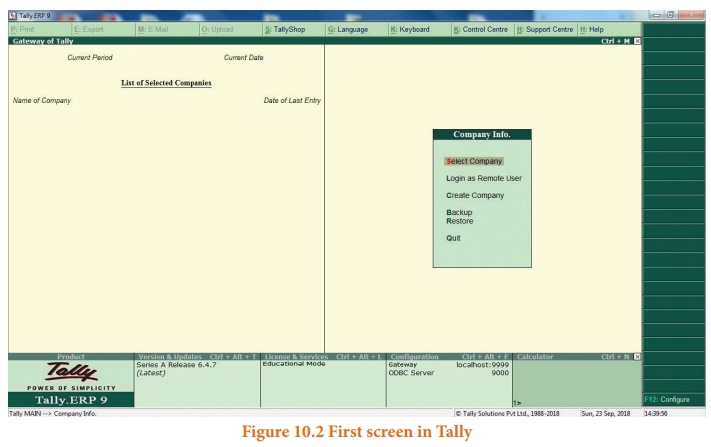
2. Creation of a company
It is essential to enter
the particulars of the company for which accounts are to be maintained in
Tally.
In order to create a
company, the following steps are to be followed:
Company Info > Create
Company
After selection of
Create Company from first screen in Tally, the Company Creation screen will
appear as in figure 10.3.
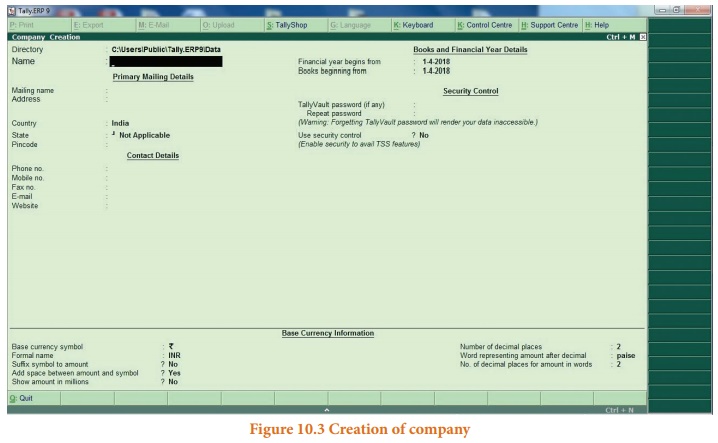
Tally asks for name,
address, books and financial year details, security control, base currency
information, etc. Now, provide all particulars of the company as required in
Tally. After completing all entries, choose ŌĆśYesŌĆÖ to accept data and create
company.
Tutorial note
For practice purpose,
enter only the name and keep all other fields as they are.
Following the above
procedure, multiple companies can be created.
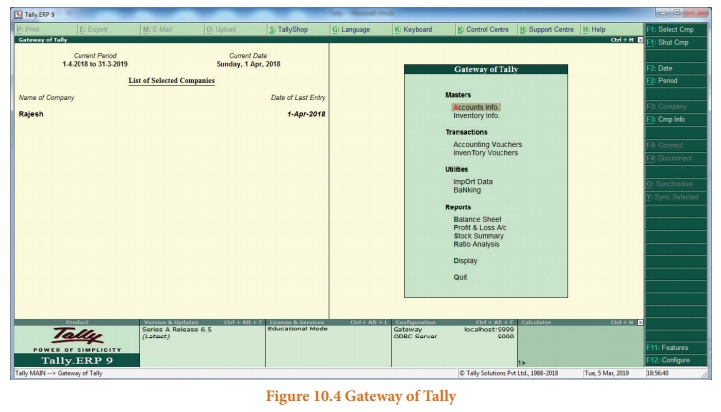
3. Gateway of Tally
Tally screen appears as
in figure 10.4 given below, after creation of a company and whenever Tally is
started. This screen is called Gateway of Tally. It shows the company selected
under List of Selected Companies on the left pane.
Gateway of Tally is
shown on the right pane which contains menu options such as Transactions and
Reports. The shortcut key for each menu option is a letter from the optionŌĆÖs
name, which will be highlighted in red.
Vertical button bar is
placed on the extreme right of the screen which contains buttons such as F1 and
F2 for quick interaction with Tally.ERP 9.
Bottom horizontal
information panel displays details of product, version, licence, configuration
and calculator.
The Gateway of Tally
screen will appear as below:
4.
Closing Tally
The following are the
two ways for closing Tally:
Press Esc Key > Press
Enter or Y
or
Click on Yes(or)Press
Ctrl + Q
5. Select a company
If multiple companies
are created, to choose a particular company, after opening Tally, click F1
(Select Cmp) on the vertical button bar. Tally.ERP 9 displays the Select
Company screen, with a list of companies that are already created. Select the
company for which accounting has to be done.
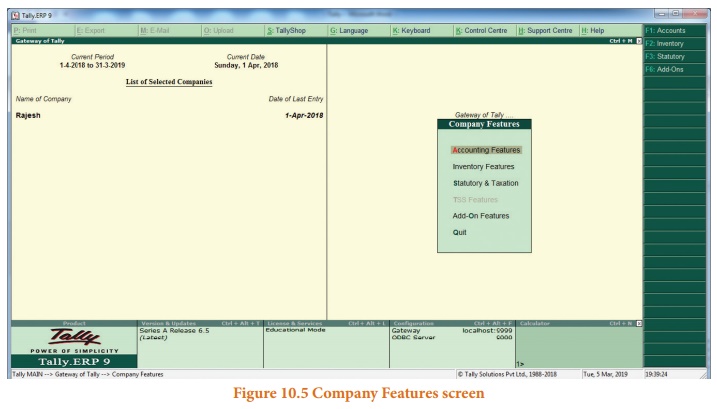
6. Company features
After creation of a
company, it is necessary to set up Tally.ERP 9ŌĆÖs features. The features in
Tally.ERP 9 are set of capabilities, provided as options, that enable
maintainenance of financial records as per the requirements of the users. Click
F11:Features, on the vertical button bar to go to Company Features menu. It
contains Accounting Features, Inventory Features, etc. The Company Features
screen will appear as shown in figure 10.5.
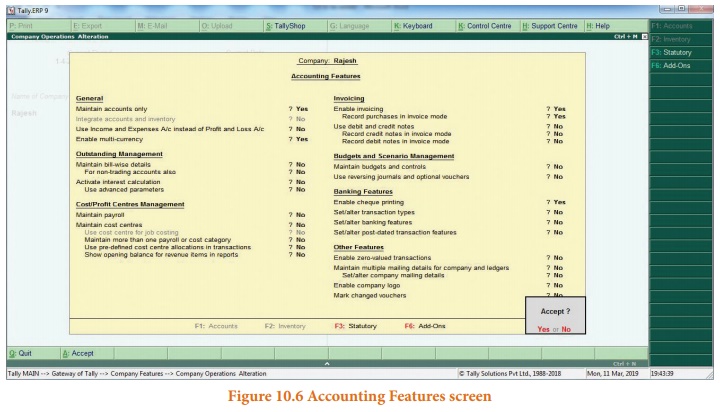
7. Accounting Features
The General Accounting
Features include ŌĆśMaintain accounts onlyŌĆÖ, ŌĆśIntegrate accounts and inventoryŌĆÖ
and use Income and Expenses A/c instead of Profit and Loss A/c. The other
Accounting Features include Invoicing, Banking Features, etc.
For practice purpose,
only the accounting aspects are considered and inventory features are not
considered.
Select Accounting
Features from the Company Features menu. Under General Accounting Features, set
ŌĆśYesŌĆÖ to ŌĆśMaintain accounts onlyŌĆÖ option. Leave all other features to default
values and accept ŌĆśYesŌĆÖ.
The Accounting Features
screen will appear as shown in figure 10.6. (see the next page)
8. Statutory and Taxation features
Statutory and Taxation
features include Goods and Services Tax (GST), Value Added Tax (VAT) and Tax
Deducted at Source (TDS). To enable Goods and Services Tax, set ŌĆśYesŌĆÖ to
ŌĆśEnable Goods and Services TaxŌĆÖ option. For practice purpose set to default
value of ŌĆśNoŌĆÖ.
9. Creating Accounting Groups
In Tally, a Group is a
collection of ledgers of the same nature. There are predefined groups of
accounts which are widely used in accounts of many organisations. These
predefined groups comply with the basic accounting principles of classifying
various account heads into Assets, Liabilities, Income and Expense as shown
below:
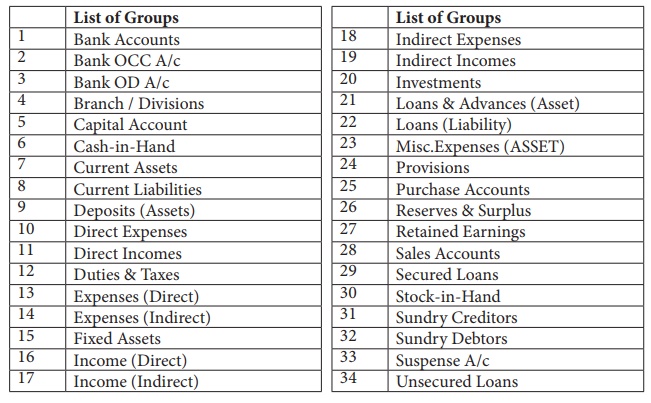
Groups are categorised
as Primary Groups and Sub-Groups. Primary group includes Capital Account,
Current Liabilities, Fixed Assets, Current Assets, etc. Sub-Group includes
Reserves Surplus, Sundry Creditors, Sundry Debtors, etc.
To view predefined
groups,
Gateway of Tally >
Masters > Accounts Info > Groups > Single Group > Display After
selection, Tally screen will appear as in Figure 10.7.
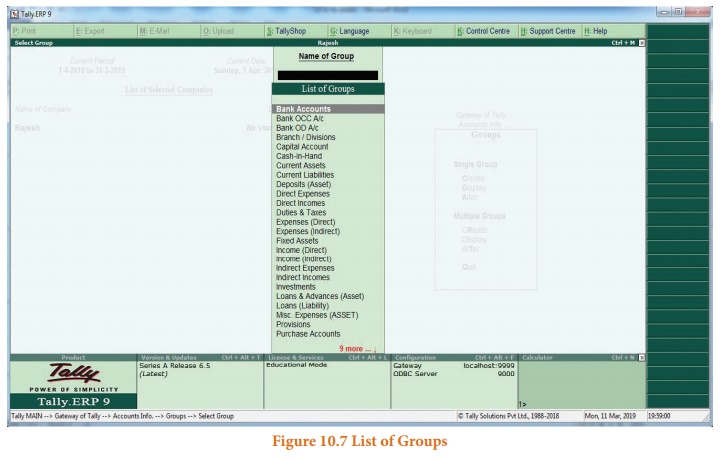
If any additional group
is required, it can be created as follows:
Gateway of Tally >
Masters > Accounts Info > Groups > Single Group > Create
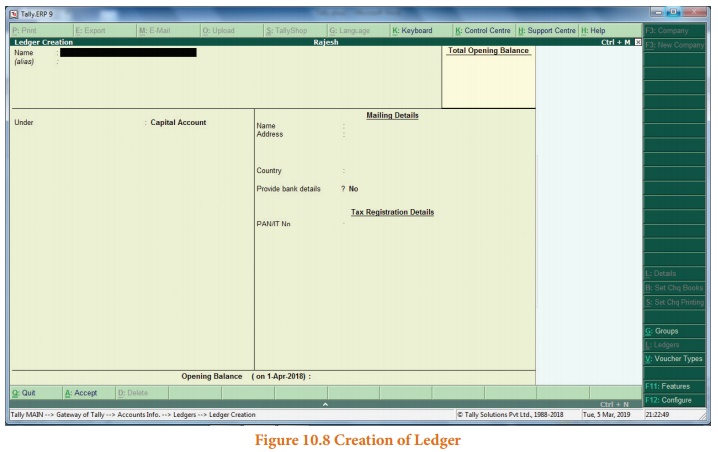
10. Ledger Accounts
In Tally, to record
transactions, the transactions are to be identified with the related ledger
accounts. Tally has two predefined ledgers, Cash and Profit & Loss A/c. The
user has to create various other ledgers based on their requirements.
To create ledger:
Gateway of Tally >
Masters > Accounts Info > Ledgers > Single Ledger > Create After
selection, Tally screen will appear as in Figure 10.8.
While creating a ledger,
name and the Group under which the ledger account is to be classified should be
provided. Leave all other features to default values and accept ŌĆśYesŌĆÖ.
11. Modification of group and ledger
Alteration or deletion
of group and ledger is possible. While details of user-defined group/ ledger
can be fully altered, only name can be altered for predefined group/ledger.
Predefined group/ledger cannot be deleted. However, user-defined group/ledger
can be deleted.
To delete a ledger: Gateway of Tally >
Masters > Accounts Info > Ledgers > Single Ledger > Alter
> Select the Ledger to be deleted > Alt D > Yes
12. Vouchers
Voucher is a document
which contains details of transactions. Transactions are to be recorded through
voucher entries. Tally has a set of predefined vouchers such as Purchase,
Sales, Payment, Receipt and Contra.
To view the list of
voucher types:
Gateway of Tally >
Masters > Accounts Info > Voucher Types > Display As per the
requirements of users, additional voucher type can be created. Following are
some of the major accounting vouchers used in an organisation:
i.
Receipt Voucher
ii.
Payment Voucher
iii.
Contra Voucher
iv.
Purchase Voucher
v.
Sales Voucher
vi.
Journal Voucher
(i) Receipt Voucher
All transactions related
to receipt either in cash or through bank are recorded using receipt voucher.
In this voucher, cash or bank account is debited and other ledger account is
credited. To record receipt:
Gateway of Tally >
Transactions > Accounting Vouchers > F6:Receipt
(ii) Payment Voucher
All transactions related
to payments either in cash or through bank are recorded using payment voucher.
In this voucher, cash or bank account is credited and other ledger account is
debited. To record payment:
Gateway of Tally >
Transactions > Accounting Vouchers > F5:Payment
(iii) Contra Voucher
A transaction involving
both cash account and bank account is recorded using contra voucher. The
transaction may be for deposit of cash into bank account or withdrawal of cash
from bank account.
To record contra:
Gateway of Tally >
Transactions > Accounting Vouchers > F4:Contra
(iv) Purchase Voucher
Purchase vouchers are
used for recording both cash and credit purchases of goods.
To record purchases:
Gateway of Tally >
Transactions > Accounting Vouchers > F9:Purchase
(v) Sales Voucher
Sales vouchers are used
for recording both cash and credit sales of goods.
To record sales:
Gateway of Tally >
Transactions > Accounting Vouchers > F8:Sales
(vi) Journal Voucher
Journal vouchers are
used for recording transactions involving other than cash, bank, purchases and
sales such as depreciation, provision for bad debts.
To record journal:
Gateway of Tally >
Transactions > Accounting Vouchers > F7:Journal
To record transactions
using voucher, Accounting Voucher Creation has to be used. Accounting Voucher
Creation contains Name and Number of the voucher, Date of voucher, Particulars,
Debit and Credit and Narration.
Related Topics