Magnetism | Chapter 7 | 8th Science - Magnetic Field | 8th Science : Chapter 7 : Magnetism
Chapter: 8th Science : Chapter 7 : Magnetism
Magnetic Field
Magnetic Field
Activity 4
Spread some iron
filings collected from the sand uniformly on a sheet of white paper placed on a
table. Place a bar magnet below the white sheet. Gently tap the table. What do
you see? You can see the pattern as shown in the figure.
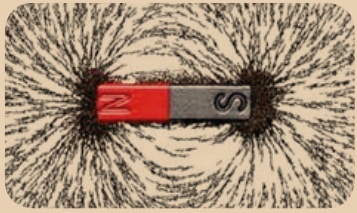
Answer: I can see the iron filings are arranged in the form of curved
patterns around the magnet.
The space around the bar magnet where the arrangement of iron
filings exists, represents the field of influence of the bar magnet. It is
called the magnetic field.
You can observe from this experiment
that the iron filings are arranged in the form of curved patterns around the
magnet. The space around the bar magnet where the arrangement of iron filings
exists, represents the field of influence of the bar magnet. It is called the
magnetic field. Magnetic field is defined as the space around a magnet in which
its magnetic effect or influence is observed. It is measured by the unit tesla
or gauss (1 tesla =10,000 gauss).
Tracing the magnetic
field
We can trace the magnetic field with
the help of a compass needle. A white sheet of paper is fastened on the drawing
board using the board pins or cello tape. A small plotting compass needle is
placed near the edge of the paper and the board is rotated until the edge of
the paper is parallel to the magnetic needle. The compass needle is then placed
at the centre of the paper and the ends of the needle, i.e., the new positions
of the north and south pole are marked when the needle comes to rest. These
points are joined and a straight line is obtained. This line represents the
magnetic meridian. Cardinal directions N-E-S-W are drawn near the corner of the
paper.
The bar magnet is placed on the line
at the centre of the paper with its north pole facing the geographic north. The
outline of the bar magnet is drawn. The plotting compass is placed near the
North Pole of the bar magnet and the end of the needle (north pole) is marked. Now
the compass is moved to a new position, such that its south pole occupies the
position previously occupied by its north pole. In this way it is proceded step
by step till the compass is placed near the south pole of the magnet.
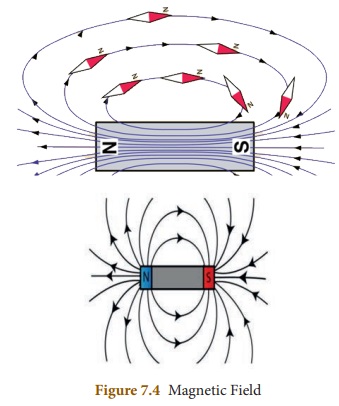
Deflecting points are marked. A curved line is then drawn by joining the
plotted points marked around the magnet. This represents the magnetic line of
force. In the same way several magnetic lines of force are drawn around the
magnet as shown in the Figure 7.4. These curved lines around the bar magnet
represent the magnetic field of the magnet. The direction of the lines is shown
by the arrow heads.
We can observe here that the compass
needle gets deflected to a large extent, when it is closer to the magnet. When
the distance is large, the deflection of the needle is gradually decreased. At
one particular position there is no deflection because there is no magnetic
force at this position. This shows that each magnet exhibits its magnetic
influence around a specific region.
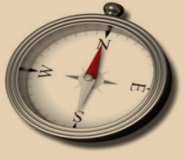
A compass needle, also
known as plotting compass or magnetic needle, consists of a tiny pivoted magnet
in the form of a pointer,which can rotate freely in the horizontal plane. The
ends of the compass needle point approximately towards the geographic north and
south direction.
Related Topics