Chapter:
Dress Designing : Pattern alternations for figure irregularities
Pattern alternations for figure irregularities
Pattern alternation plays a very important role in designing and constructing well fitted garments for individuals with varied figures irregularities. Some of the most common figure irregularities are big or small busts, flat chest, big or small hips, round neck, square shoulders, high abdomen and waist lines . Generally the basic patterns are modified to suit these figure irregularities.
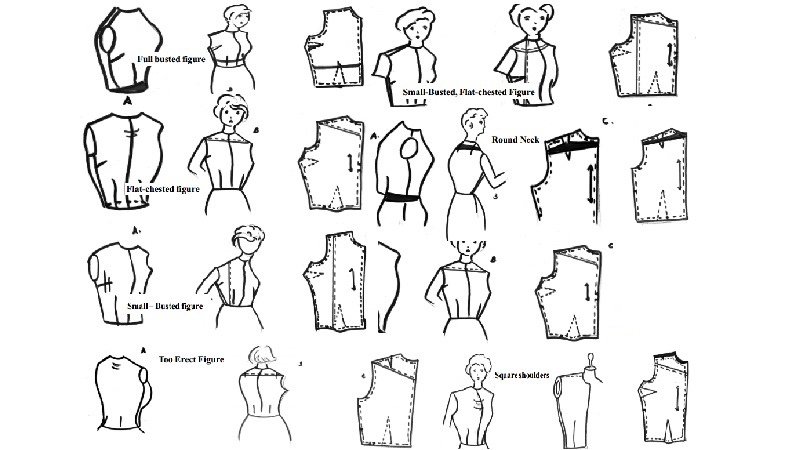
1. Full busted figure
If the waist line is the right length at the back and sides not short in front directly under the bust, the figure needs more cupping for the bust than the pattern allows (Fig.A)
Cut along the alternation line and lengthen the front waist the necessary amount. Pin a piece of fabric there. At the bust dart take in the amount added to the front length, making the dart (Fig.B). This will give more cupping for the full bust, and since nothing has been done to the back and sides, the seams will be even. The side seam dart should run directly toward the point of the bust, and must be not less than an inch from the bust (Fig.C).
Make the entire dart higher or lower if needed. Always be sure that the bust darts run upward to give a younger and more youthful lift to the bustline for the full-busted figure (Figure).
2. Flat-chested figure
Usually with this figure fault, the back length is correct, but the front waistline is too long and droops at the center front (Fig.A). Eliminate the extra length by taking a dart from under the neckline, tapering to nothing towards the armhole (Fig.B). Make the same adjustment in the pattern (Fig.C)
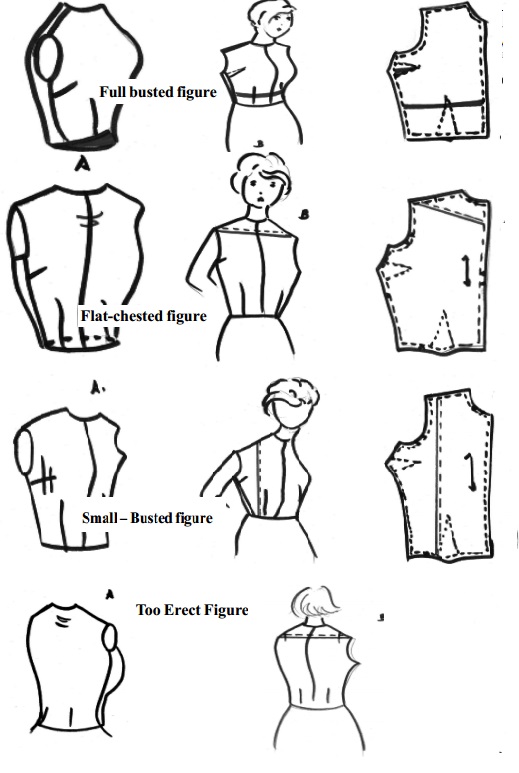
3. Small - Busted figure
For this figure the amount of fullness over the bust line is more than needed (Fig.A). If the shoulders are narrow as well, take a tuck from the top of the shoulder straight down towards the waistline, eliminating the extra fullness (Fig.B). If the shoulders are normal, and only the bustline has to be made smaller, a dart can be fitted from the waist line upto the notch at the front armhole of your basic muslin. Transfer these same alterations to your pattern (Fig.C) (Figure).
4. Small-Busted, Flat-chested Figure
This figure requires a combination of alterations (Fig.A). Fit the same dart used to adjust for the flat - chested figure to eliminate the extra length at the front waist line. Follow the instructions at left to correct for the small bust (Fig.B). Make the same corrections in the pattern (Fig.C) (Figure ).
5. Full-Busted, Flat-Chested figure
As the full-busted figure becomes round-shouldered, the chest becomes flat (Fig.A). Follow instructions for full-busted figure, lengthening the front and take up the dart. Then alter as for flat - chested figure (Fig.B). Transfer the directions to the pattern at the same points (Fig. C) (Figure).
6. Round Neck
The back waistline will sum too short at the center back (Fig.A). Slash the back from under the back neck across toward each arm hole. Open the necessary amount, insert a piece of fabric and pin into place (Fig.B). When more than one and a half inch is needed, the figure is generally very round - shouldered and needs more fitting.
Slash as before then slash through the center of the shoulder dart and spread as shown (Fig.C). This makes the back longer, and gives a deeper dart which shapes the shoulders to take care of a more rounded back (Figure ).
7. Too Erect Figure
The back waistline is too long at the center back (Fig. A). To eliminate this length, pin a dart under the back neckline tapering to nothing toward the armholes (Fig.B). Make the same adjustment in the pattern (Fig.C). Take care in altering the basic pattern at points below the neck and towards the armhole is also necessary for other types of figure faults. For instance; sloping shoulders, square shoulders or round shoulders all require variations of this same adjustment. For this, clothes must hang from the shoulders. When you put on a garment, the slope of the shoulder must be the same as your own (Figure).
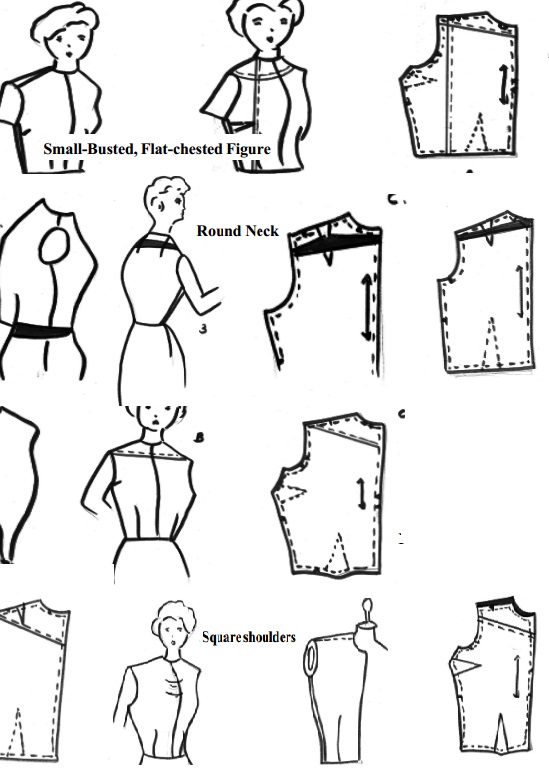
8. Square shoulders
If your shoulders are more square than the pattern allows, you will find that when you put on your pattern, the top of the armholes will hit your shoulder first and the neck will be too high (Fig.A). This extra fabric will drop and the front of the dress will seem to sag (Fig B). The dart used across the front will change the slope of the shoulders to fit yours, and the dress will hang correctly (Fig.C). If a fold forms under the back neckline, use the same adjustment there (Figure).
9. Sloping shoulders
If the shoulder of your garment fits at the neck, but not at the top of the arm (Fig.A), if the fabric drops, raising folds to form under the arm, and along the armhole seams (Fig.B), slash from under the neck toward the armhole to correct this (Fig.C). Notice that all adjustments are done within the basic pattern of the shoulder. To make back and front shoulder fit, it is usually necessary to make a dart at the back shoulder. This takes up the extra fabric, so front and back shoulder seams are even (Fig.C) and give a better fit to the rounded back.If the entire back is too broad, the pattern can be slashed from the waistline to shoulder and spread (Figure).
Related Topics