Textiles and Dress Designing - Method of Pattern Making | 11th Textiles and Dress Designing : Chapter 10 : Patterns
Chapter: 11th Textiles and Dress Designing : Chapter 10 : Patterns
Method of Pattern Making
METHOD OF PATTERN MAKING
Pattern making is art to learn and should be
followed carefully. Pattern can be made by three main methods namely
·
Drafting method
·
Draping method
·
Commercial patterns
Drafting Method
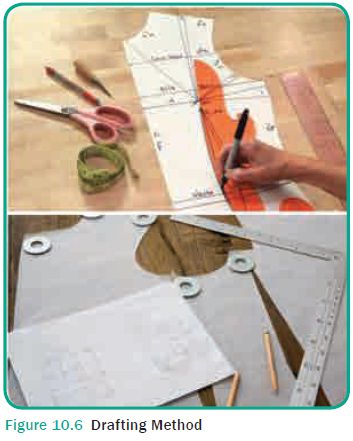
Drafting is the system of drawing patterns on
paper with mechanical precision on the basis of body measurements. A basic
pattern should have a minimum number of darts and should fit the body
comfortably without being tight or loose. Drafting can be done on ordinary
brown paper which is not too thin. It can be done on thicker paper to be
preserved for future use. Sometimes this is made on card board and used for
many years. A sharp pencil, ruler, ‘L’ scale or set squares are needed to make
a pattern with straight lines and smooth curves. The fol-lowing principles
should be understood before starting to attempt drafting. This method is easy
but requires some calcu-lation. Drafting has a set of instructions like “Draw a
line AB measuring half waist round” which has to be followed to get the paper
pattern (Figure 10.6).
Important Points to Remember while Drafting Patterns
·
Patterns should be made larger than the body size
by adding ease allowance to the actual measurement. This gives the garment
freedom of movement, ease, and comfort in wearing. Normally 5 cm allowance is
given around the chest and 1 to 2.5 cm for other measurements.
·
For identical designs where the right and left
side of the garment are same, only one side is needed to be made in paper. It
can be reserved and copied for the opposite side.
·
It is better to draft the basic pattern block
first then while cutting, seam allowances should be added to the pattern and
markings should be made on the fabric.
The following construction detailed infor-mation
should be recorded and marked clearly (Figure 10.7).
a.
Name of each piece of pattern.
b.
Number of pieces to be cut with each pattern
piece.
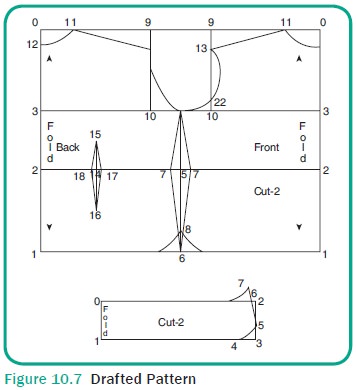
c.
If seam allowance is included in the draft. Seam
lines and cutting lines should be clearly shown using blue and red pencil
respectively.
d.
Straight grain or lengthwise line should be drawn
on all patterns with a red pencil as shown (← →). This line indicates the
direction in which the pattern has to be kept on the cloth so that it is
parallel to the selvedge.
e.
Matching notches or balance marks should be
provided along seams to show which seams are to be joined together.
f.
It is advantageous to cut outward notches at
centre front and centre back of pattern pieces as it helps at the time of
assembling the garment and stitching collars.
g.
Folding lines, dart marking, pleat markings etc.
should be clearly shown.
h.
Draping technique can be mastered by carefully
following the instruc-tion and drawing the patterns in a systematic manner.
Draping Method
Toils and modeling are another common terms used
to describe draping. Draping is the manipulation of fabric on a three
dimensional form by a designer to obtain perfect fit and harmony between the
fab-rics and design of the garment and the sil-houette of the individual. The
material is modeled around a dress stand or human body to see the fit. It is
checked, marked and then cut and finally stitched. There are several types of
dress forms available in the market but the most commonly used ones are:
·
Adhesive Paper Dress Form
·
Muslin Padded Dress Form
·
Paper Mache or Plastic Molded Dress Forms
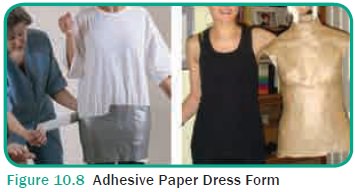
Adhesive Paper Dress Form
Adhesive paper dress forms are pre-pared for
individual body measurements by pasting adhesive tapes over a correct fitting
garment (Bannian) worn by the individual. The centre front, back, neck armscye,
waist and hip lines are marked. The adhesive form is cut through care-fully
without hurting the individual and rejoined and the edges are finished neatly
with help of adhesive tapes. The dress form should be allowed to dry completely
before use (Figure 10.8).
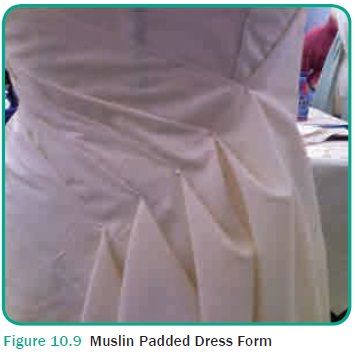
Muslin Padded Dress Form
Muslin padded dress forms are similar to adhesive
paper dress forms but they are made with muslin materials. The inner side of
the dress form is padded, hence its stiffer. Padding helps to increase the
usage and life of the dress form. This can be placed on a stand while draping
and preparing the paper patterns. Later it is covered with a neat fabric and
used when needed (Figure 10.9).
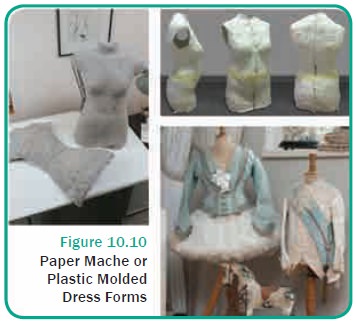
Paper Mache or Plastic Molded Dress Forms
Paper mache or plastic molded dress forms are
commercially made and sold for standard sizes. Even separate hand, leg dress
form are available. It is costly but can be used for many years. These dress
forms will not suit individual with figure irregularities (Figure 10.10).
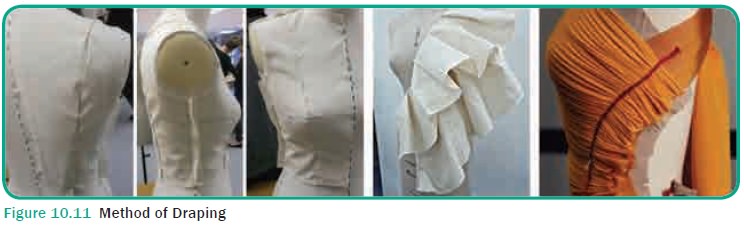
Draping Method
The method of preparing a pattern fol-lowing
draping method is discussed below (Figure 10.11):
·
Place the dress form on to a stand or table and
ensure it is steady.
·
Select the fabric, which has to be cut and
stitched. Drape the fabric on the individual, look of design and colour to
match the individual’s structure and complexion.
·
Beginners can first drape with fabric which is of
similar texture and weight to the fabric, which is to be cut and sewed.
·
Drape the fabric on the dress form allow it to
fall naturally. Check the grain of the fabric (lengthwise grain should match
the centre front line). A number of experimental folds have to be made. Check
for best design and drape. Pin the extra fabric. Do not cut.
·
Ensure the design and drape once again, so as to
avoid cutting on wrong size or designs.
·
Draping should be done on a continu-ous line to
give the best effect. This is possible only through practice. Hence before
finalizing the design and pat-tern try draping in a number of ways.
·
Special care should be taken in case of checks
and stripes. These fabrics can be draped on cross grain also for cre-ating
design variation, especially for yoke or collar.
·
To decide on fullness, try 2 to 3 styles.
Example, pin tucks, box pleats and gathers can be draped on the dress form and
the best can be selected.
·
Once the design of the garment is final-ized pin
the fabric on the dress form, match the centre front, back, shoulder, chest
round lines to that in the dress form. Pin along the line.
·
Move the fingers slowly and make the dart and
fullness needed and pin it. Care should be taken to maintain grain.
·
Mark the line, cut and keep the pieces ready for
sewing.
·
Name the pieces to avoid confussion. Fold the
piece and keep them in a neat cover, if stitching is not being done
immediately.
·
For identical design one side can be draped,
marked and cut. The reverse of the cut patterns can be used for pre-paring the
pattern for the other side.
·
Care should be taken to use minimum or fine pins
especially for delicate fab-rics like silk.
·
Based upon the type of design, dart can be
converted to create fullness.
·
Place weights or tape while draping design which
requires more quantity of fabric. Examples: Wide neckline or side panels which
are cut and gathered. Since the fabric drops down, weights can be placed inside
these drapes or tapes should be used.
·
Trimming, buttons and other accesso-ries can be
placed on draped fabrics to check its suitability with the fabric.
In spite of the cost, the method helps one to
view the look of the finished garment; hence correction can be made even before
cutting the patterns. It also involves more time and practices.
Commercial Patterns
Commercial patterns were first developed in
U.S.A. in 1950’s. Later patterns were developed for all age groups of both
sexes. Commercial paper is made out of tissue butter papers for standard body
mea-surements. Generally these patterns are marked for 5 sizes and packed in an
enve-lope. Commercial patterns are produced by companies and sold. It is very
popular in foreign countries. The pattern names, num-ber of pieces to be cut,
grain, notches, cut-ting lines, stitching lines, darts and fullness are also
marked. On the cover, a picture of the dress is shown. The size, cutting,
sewing instructions are also mentioned. The body measurements are mentioned on
the cover. This helps one to select the correct size. Dress modifications are
given by some com-panies. The materials required, like buttons and accessories
are also printed on the cover.
The major advantages of commer-cial patterns are
good designs, with simple instructions. The pattern will have good fit when
compared to other patterns but will need modification in case of irregular body
structures. In India commercial pat-terns are not popular.
Related Topics