Chapter: Java The Complete Reference : The Java Library : Images
ImageFilter
ImageFilter
Given the ImageProducer and ImageConsumer interface pair—and their concrete classes MemoryImageSource and PixelGrabber—you can create an
arbitrary set of translation filters that
takes a source of pixels, modifies them, and passes them on to an arbitrary
consumer. This mechanism is analogous to the way concrete classes are created
from the abstract I/O classes InputStream, OutputStream, Reader, and Writer (described
in Chapter 20). This stream model
for images is completed by the introduction of the ImageFilter class. Some subclasses of ImageFilter in the java.awt.image
package are AreaAveragingScaleFilter,
CropImageFilter, ReplicateScaleFilter, and RGBImageFilter. There is also an
implementation of ImageProducer called
FilteredImageSource, which takes an
arbitrary ImageFilter and wraps it
around an ImageProducer to filter
the pixels it produces. An instance of FilteredImageSource
can be used as an ImageProducer in calls to createImage( ), in much the same way
that
BufferedInputStreams can be passed off as InputStreams.
In this chapter, we examine
two filters: CropImageFilter and RGBImageFilter.
CropImageFilter
CropImageFilter filters an image source to extract a
rectangular region. One situation in which
this filter is valuable is where you want to use several small images from a
single, larger source image. Loading twenty 2K images takes much longer than
loading a single 40K image that has many frames of an animation tiled into it.
If every subimage is the same size, then you can easily extract these images by
using CropImageFilter to disassemble
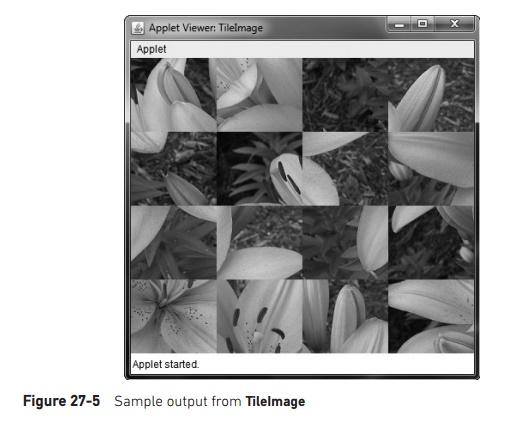
the block once your program starts. Here is an example that creates 16 images
taken from a single image. The tiles are then scrambled by swapping a random
pair from the 16 images 32 times.
/*
<applet code=TileImage width=400
height=345>
<param name=img value=Lilies.jpg>
</applet>
*/
import java.applet.*; import java.awt.*; import
java.awt.image.*;
public class TileImage extends Applet { Image
img;
Image cell[] = new Image[4*4]; int iw, ih;
int tw, th;
public void init() { try {
img = getImage(getDocumentBase(),
getParameter("img")); MediaTracker t = new MediaTracker(this);
t.addImage(img, 0);
t.waitForID(0);
iw = img.getWidth(null); ih =
img.getHeight(null); tw = iw / 4;
th = ih / 4; CropImageFilter f;
FilteredImageSource fis;
t = new MediaTracker(this); for (int y=0;
y<4; y++) { for (int x=0; x<4; x++) {
f = new CropImageFilter(tw*x, th*y, tw, th);
fis = new FilteredImageSource(img.getSource(),
f); int i = y*4+x;
cell[i] = createImage(fis); t.addImage(cell[i],
i);
}
}
t.waitForAll();
for (int i=0; i<32; i++) {
int si = (int)(Math.random() * 16); int di =
(int)(Math.random() * 16); Image tmp = cell[si];
cell[si] = cell[di]; cell[di] = tmp;
}
} catch (InterruptedException e) { System.out.println("Interrupted");
}
}
public void update(Graphics g) { paint(g);
}
public void paint(Graphics g) { for (int y=0;
y<4; y++) {
for (int x=0; x<4; x++) {
g.drawImage(cell[y*4+x], x * tw, y * th, null);
}
}
}
}
Figure 27-5 shows the flowers image scrambled by the TileImage applet.
RGBImageFilter
The RGBImageFilter is used to convert one image to another, pixel by
pixel, transforming the colors along the way. This filter could be used to
brighten an image, to increase its contrast, or even to convert it to
grayscale.
To demonstrate RGBImageFilter, we have developed a
somewhat complicated example that employs a dynamic plug-in strategy for
image-processing filters. We’ve created an interface for generalized image
filtering so that an applet can simply load these filters based on <param> tags without having to
know about all of the ImageFilters
in advance. This example consists of the main applet class called ImageFilterDemo, the interface called PlugInFilter, and a utility class
called LoadedImage, which
encapsulates some of the MediaTracker methods
we’ve been using in this chapter. Also included are three filters— Grayscale, Invert, and Contrast—which
simply manipulate the color space of the source image using RGBImageFilters,
and two more classes—Blur and Sharpen—which do more complicated "convolution"
filters that change pixel data based on the pixels surrounding each pixel of
source data. Blur and Sharpen are subclasses of an abstract
helper class called Convolver. Let’s
look at each part of our example.
ImageFilterDemo.java
The ImageFilterDemo class is the applet framework for our sample image
filters. It employs a simple BorderLayout,
with a Panel at the South position to hold the buttons that
will represent each filter. A Label
object occupies the North slot for
informational messages about filter progress. The Center is where the image (which is encapsulated in the LoadedImage Canvas subclass, described
later) is put. We parse the buttons/filters
out of the filters <param> tag, separating
them with +’s using a StringTokenizer.
The actionPerformed( ) method is interesting because it uses the label
from a button as the name of a filter class that it tries to load with (PlugInFilter)
Class.forName(a).newInstance( ). This method is robust and takes
appropriate action if the button does not correspond to
a proper class that
implements PlugInFilter.
/*
<applet code=ImageFilterDemo width=400
height=345>
<param name=img value=Lilies.jpg>
<param name=filters
value="Grayscale+Invert+Contrast+Blur+Sharpen">
</applet>
*/
import java.applet.*; import java.awt.*; import
java.awt.event.*; import java.util.*;
public class ImageFilterDemo extends Applet
implements ActionListener { Image img;
PlugInFilter pif; Image fimg; Image curImg;
LoadedImage lim; Label lab; Button reset;
public void init() { setLayout(new
BorderLayout()); Panel p = new Panel();
add(p, BorderLayout.SOUTH); reset = new
Button("Reset"); reset.addActionListener(this); p.add(reset);
StringTokenizer st = new
StringTokenizer(getParameter("filters"), "+");
while(st.hasMoreTokens()) {
Button b = new Button(st.nextToken());
b.addActionListener(this);
p.add(b);
}
lab = new Label(""); add(lab,
BorderLayout.NORTH);
img = getImage(getDocumentBase(),
getParameter("img")); lim = new LoadedImage(img);
add(lim, BorderLayout.CENTER);
}
public void actionPerformed(ActionEvent ae) {
String a = "";
try {
a = ae.getActionCommand(); if
(a.equals("Reset")) {
lim.set(img);
lab.setText("Normal");
}
else {
pif = (PlugInFilter)
Class.forName(a).newInstance(); fimg = pif.filter(this, img);
lim.set(fimg); lab.setText("Filtered:
" + a);
}
repaint();
} catch (ClassNotFoundException e) {
lab.setText(a + " not found"); lim.set(img);
repaint();
} catch (InstantiationException e) {
lab.setText("couldn’t new " + a);
} catch (IllegalAccessException e) {
lab.setText("no access: " + a);
}
}
}
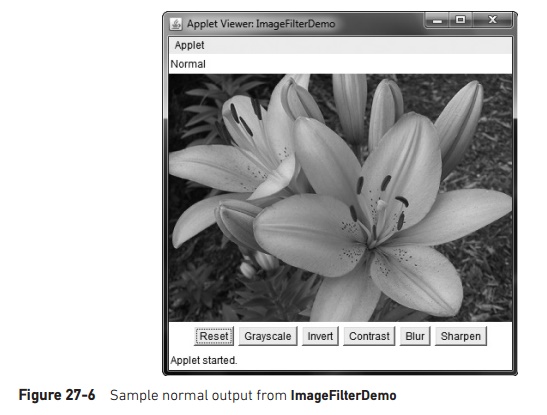
Figure 27-6 shows what the
applet looks like when it is first loaded using the applet tag shown at the top
of this source file.
PlugInFilter.java
PlugInFilter is a simple interface used to abstract image filtering. It has only
one method, filter( ), which takes
the applet and the source image and returns a new image that has been filtered in some way.
interface PlugInFilter {
java.awt.Image filter(java.applet.Applet a,
java.awt.Image in);
}
LoadedImage.java
LoadedImage is a convenient subclass of
Canvas, which takes an image at construction time and synchronously loads it using MediaTracker. LoadedImage
then behaves properly inside of
LayoutManager control, because it overrides the getPreferredSize( ) and
getMinimumSize( ) methods. Also, it has a method called set( ) that can be used to set a new Image to be displayed in this Canvas. That is how the filtered image
is displayed after the plug-in is finished.
import java.awt.*;
public class LoadedImage extends Canvas { Image
img;
public LoadedImage(Image i) { set(i);
}
void set(Image i) {
MediaTracker mt = new MediaTracker(this);
mt.addImage(i, 0); try {
mt.waitForAll();
} catch (InterruptedException e) {
System.out.println("Interrupted"); return;
}
img = i; repaint();
}
public void paint(Graphics g) { if (img ==
null) {
g.drawString("no image", 10, 30);
} else {
g.drawImage(img, 0, 0, this);
}
}
public Dimension getPreferredSize() {
return new Dimension(img.getWidth(this),
img.getHeight(this));
}
public Dimension getMinimumSize() { return
getPreferredSize();
}
}
Grayscale.java
The Grayscale filter is a subclass of RGBImageFilter, which means that Grayscale can use itself as the ImageFilter parameter to FilteredImageSource’s
constructor. Then all it needs to do is override filterRGB( ) to change the incoming color values. It takes the red,
green, and blue values and computes the brightness of the pixel, using the NTSC
(National Television Standards Committee) color-to-brightness conversion
factor. It then simply returns a gray pixel that is the same brightness as the
color source.
import java.applet.*; import java.awt.*; import
java.awt.image.*;
class Grayscale extends RGBImageFilter
implements PlugInFilter { public Image filter(Applet a, Image in) {
return a.createImage(new
FilteredImageSource(in.getSource(), this));
}
public int filterRGB(int x, int y, int rgb) {
int r = (rgb >> 16) & 0xff;
int g = (rgb >> 8) & 0xff;
int b = rgb & 0xff;
int k = (int) (.56 * g + .33 * r + .11 * b);
return (0xff000000 | k << 16 | k <<
8 | k);
Invert.java
The Invert filter is also quite simple. It takes apart the red, green,
and blue channels and then inverts them by subtracting them from 255. These
inverted values are packed back into a pixel value and returned.
import java.applet.*; import java.awt.*; import
java.awt.image.*;
class Invert extends RGBImageFilter implements
PlugInFilter { public Image filter(Applet a, Image in) {
return a.createImage(new FilteredImageSource(in.getSource(),
this));
}
public int filterRGB(int x, int y, int rgb) {
int r = 0xff - (rgb >> 16) & 0xff;
int g = 0xff - (rgb >> 8) & 0xff; int
b = 0xff - rgb & 0xff;
return (0xff000000 | r << 16 | g <<
8 | b);
}
}
Figure 27-7 shows the image
after it has been run through the Invert
filter.

Contrast.java
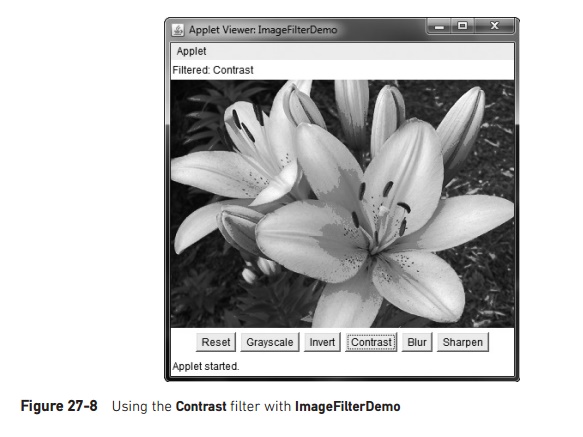
The Contrast filter is very similar to Grayscale, except its override of filterRGB( ) is slightly more complicated. The algorithm it uses
for contrast enhancement takes the red, green, and blue values separately and
boosts them by 1.2 times if they are already brighter than 128. If they are
below 128, then they are divided by 1.2. The boosted values are properly
clamped at 255 by the multclamp( )
method.
import java.applet.*; import java.awt.*; import
java.awt.image.*;
public class Contrast extends RGBImageFilter
implements PlugInFilter {
public Image filter(Applet a, Image in) {
return a.createImage(new
FilteredImageSource(in.getSource(), this));
}
private int multclamp(int in, double factor) {
in = (int) (in * factor);
return in > 255 ? 255 : in;
}
double gain = 1.2; private int cont(int in) {
return (in < 128) ? (int)(in/gain) :
multclamp(in, gain);
}
public int filterRGB(int x, int y, int rgb) {
int r = cont((rgb >> 16) & 0xff);
int g = cont((rgb >> 8) & 0xff); int
b = cont(rgb & 0xff);
return (0xff000000 | r << 16 | g <<
8 | b);
}
}
Figure 27-8 shows the image
after Contrast is pressed.
Convolver.java
The abstract class Convolver handles the basics of a
convolution filter by implementing the ImageConsumer
interface to move the source pixels into an array called imgpixels. It also creates a second array called newimgpixels
for the filtered data. Convolution filters sample a small rectangle of pixels
around each pixel in an image, called the convolution
kernel. This area, 3 x 3 pixels in this demo, is
used to decide how to change the center pixel in the area.
The two concrete subclasses,
shown in the next section, simply implement the convolve( ) method, using imgpixels
for source data and newimgpixels to
store the result.
import java.applet.*; import java.awt.*; import
java.awt.image.*;
abstract class Convolver implements
ImageConsumer, PlugInFilter { int width, height;
int imgpixels[], newimgpixels[]; boolean
imageReady = false;
abstract void convolve(); // filter goes
here...
public Image filter(Applet a, Image in) {
imageReady = false; in.getSource().startProduction(this);
waitForImage();
newimgpixels = new int[width*height];
try { convolve();
} catch (Exception e) {
System.out.println("Convolver failed: " + e); e.printStackTrace();
}
return a.createImage(
new MemoryImageSource(width, height,
newimgpixels, 0, width));
}
synchronized void waitForImage() { try {
while(!imageReady) wait();
} catch (Exception e) {
System.out.println("Interrupted");
}
}
public void
setProperties(java.util.Hashtable<?,?> dummy) { } public void
setColorModel(ColorModel dummy) { }
public void setHints(int dummy) { }
public synchronized void imageComplete(int
dummy) { imageReady = true;
notifyAll();
}
public void setDimensions(int x, int y) { width
= x;
height = y;
imgpixels = new int[x*y];
}
public void setPixels(int x1, int y1, int w,
int h, ColorModel model, byte pixels[], int off, int scansize) { int pix, x, y,
x2, y2, sx, sy;
x2 = x1+w;
y2 = y1+h; sy = off;
for(y=y1; y<y2; y++) { sx = sy;
for(x=x1; x<x2; x++) {
pix = model.getRGB(pixels[sx++]); if((pix &
0xff000000) == 0)
pix = 0x00ffffff; imgpixels[y*width+x] = pix;
}
sy += scansize;
}
}
public void setPixels(int x1, int y1, int w,
int h, ColorModel model, int pixels[], int off, int scansize) {
int pix, x, y, x2, y2, sx, sy;
x2 = x1+w;
y2 = y1+h; sy = off;
for(y=y1; y<y2; y++) { sx = sy;
for(x=x1; x<x2; x++) {
pix = model.getRGB(pixels[sx++]); if((pix &
0xff000000) == 0)
pix = 0x00ffffff; imgpixels[y*width+x] = pix;
}
sy += scansize;
}
}
}
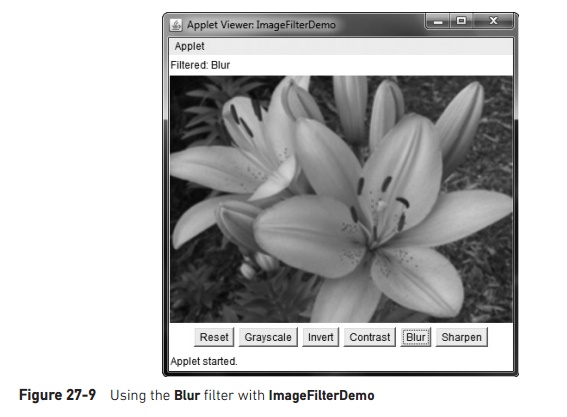
Blur.java
The Blur filter is a subclass of Convolver
and simply runs through every pixel in the source image array, imgpixels, and computes the average of
the 3 x 3 box surrounding it. The
corresponding output pixel in newimgpixels
is that average value.
public class Blur extends Convolver { public
void convolve() {
for(int y=1; y<height-1; y++) { for(int x=1;
x<width-1; x++) {
int rs = 0; int gs = 0; int bs = 0;
for(int k=-1; k<=1; k++) { for(int j=-1;
j<=1; j++) {
int rgb = imgpixels[(y+k)*width+x+j]; int r =
(rgb >> 16) & 0xff;
int g = (rgb >> 8) & 0xff; int b =
rgb & 0xff;
rs += r; gs += g; bs += b;
}
}
rs /= 9; gs /= 9; bs /= 9;
newimgpixels[y*width+x] = (0xff000000 |
rs << 16 | gs << 8 | bs);
}
}
}
}
Figure 27-9 shows the applet
after Blur.
Sharpen.java
The Sharpen filter is also a subclass of Convolver and is (more or less) the inverse of Blur. It runs through every pixel in the source image array, imgpixels, and computes the average of
the 3 x 3 box surrounding it, not
counting the center. The corresponding output pixel in newimgpixels has the difference between the center pixel and the
surrounding average added to it.
This basically says that if a pixel is 30 brighter than its surroundings, make
it another 30 brighter. If, however, it is 10 darker, then make it another 10
darker. This tends to accentuate edges while leaving smooth areas unchanged.
public class Sharpen extends Convolver {
private final int clamp(int c) {
return (c > 255 ? 255 : (c < 0 ? 0 : c));
}
public void convolve() { int r0=0, g0=0, b0=0;
for(int y=1; y<height-1; y++) { for(int x=1;
x<width-1; x++) {
int rs = 0; int gs = 0; int bs = 0;
for(int k=-1; k<=1; k++) { for(int j=-1;
j<=1; j++) {
int rgb = imgpixels[(y+k)*width+x+j]; int r =
(rgb >> 16) & 0xff;
int g = (rgb >> 8) & 0xff; int b =
rgb & 0xff;
if (j == 0 && k == 0) { r0 = r;
g0 = g;
b0 = b;
} else { rs += r;
gs += g; bs += b;
}
}
}
rs >>= 3; gs >>= 3; bs >>= 3;
newimgpixels[y*width+x] =
(0xff000000 | clamp(r0+r0-rs) << 16 | clamp(g0+g0-gs) << 8 |
clamp(b0+b0-bs));
}
}
}
}
Figure 27-10 shows the applet
after Sharpen.

Additional
Imaging Classes
In addition to the imaging
classes described in this chapter, java.awt.image
supplies several others that offer enhanced control over the imaging process
and that support advanced imaging techniques. Also available is the imaging
package called javax.imageio. This
package supports plug-ins that handle various image formats. If sophisticated
graphical output is of special interest to you, then you will want to explore
the additional classes found in java.awt.image
and javax.imageio.
Related Topics