Adobe InDesign CC 2019 - Printing the Document | 12th Computer Technology : Chapter 2 : Adobe InDesign CC 2019
Chapter: 12th Computer Technology : Chapter 2 : Adobe InDesign CC 2019
Printing the Document
Printing the Document
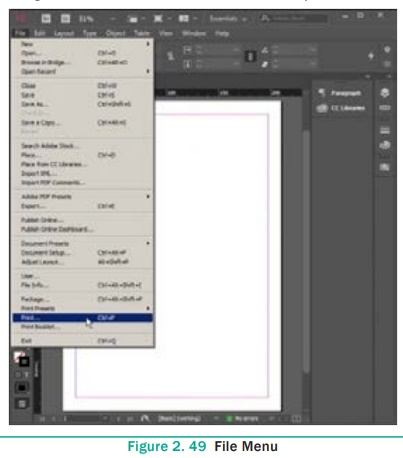
When you press Ctrl-P, InDesign displays the Print
dialog box. There are so many features packed into this dialog box that Adobe
had to break it up into eight different panes, each listed along the left side
of the dialog box: General, Setup, Marks and Bleeds, Output, Graphics,
Color Management, Advanced, and Summary.
Printers
Before you go anywhere in the Print dialog box, you’ve got to make
one or two important decisions. First, you must choose from the options on the
Printer pop- up menu, which lists the printers you have installed on your
computer. When you choose a printer, InDesign looks to the printer driver to
see what PPD (PostScript Printer Description) file is associated with
that printer, and it displays it—grayed out—in the PPD pop-up menu. In the case
of a non-PostScript device, InDesign leaves this pop-up menu blank.
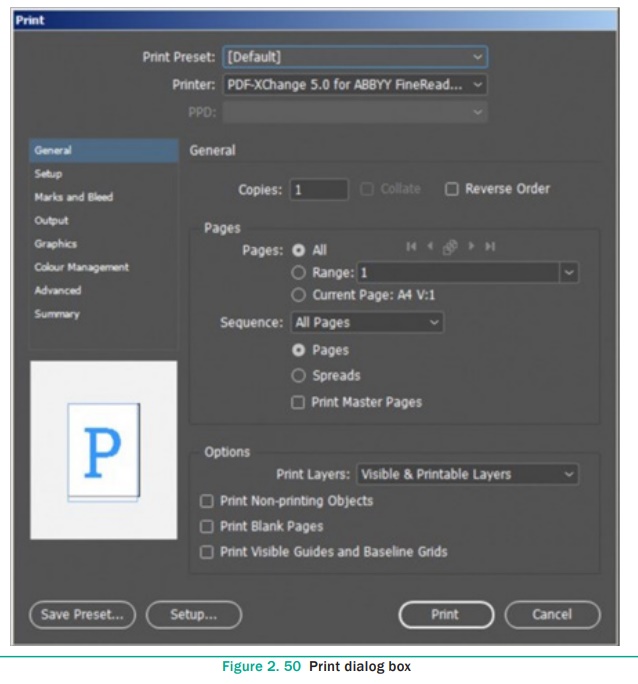
General
The General pane of the Print dialog box contains basic
printing features: which pages do you want to print, how many copies do you
want, and how do you want them to come out of the printer (see Figure 2. 50).
Copies
Enter the number of copies of the page you want to print in the Copies
field. You can print up to 9999 copies of your publication.
Collate
When you turn on the Collate option, InDesign prints the range of
pages you’ve specified, in order, for each copy of the publication you print.
This makes for much slower printing. When you print multiple copies of a page,
your printer only needs to process each page once (and then prints multiple
copies of the page using the same image); when you turn on the Collate option,
your printer must process each page once for every copy of the print job.
Reverse Order
When you print a multipage document, do you want the first page to
come out first or last? Turning on the Reverse Order check box tells InDesign
to print the last page first, then print “backwards” to the first page. You’ll
want to turn this on if your pages come out of the laser printer face up.
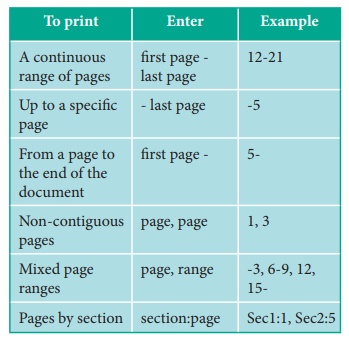
Page Ranges
Turn on the All Pages option to print all of the pages in the
publication. To print a range of pages, turn on the Range option. Enter the
page range in the Range field as shown in the following Table.
Sequence
To print even and odd pages, select the All Pages option from the
Sequence pop-up menu; to print even pages, select Even Pages Only; and to print
odd pages select Odd Pages Only. These choices affect all page ranges,
including page ranges you’ve entered in the Range field.
Print Master Pages
Sometimes you need to print your master pages instead of your
document pages. No problem: Just turn on the Print Master Pages check box. When
you do this, you cannot specify page ranges—InDesign prints all the master
pages in the document.
Print Blank Pages
What happens when you print a three-page document that has nothing
on page 2? By default, only pages 1 and 3 print out. If you want the blank page
2 to print, too, you’d better turn on the Print Blank Pages check box.
Print
Finally press the Print button to print the document
Related Topics