OpenOffice Impress - Formatting a presentation | 11th Computer Science : Chapter 8 : Presentation-Basics (OpenOffice Impress)
Chapter: 11th Computer Science : Chapter 8 : Presentation-Basics (OpenOffice Impress)
Formatting a presentation
Formatting a presentation
1. Inserting, deleting and rearranging slides
Tip Note: Remember to save
frequently while working on the presentation, to prevent any loss of
information. You might also want to activate the AutoRecovery function (Tools
-> Options -> Load/Save -> General). Make sure that Save AutoRecovery
information every is selected and that you have entered a suitable recovery
frequency.
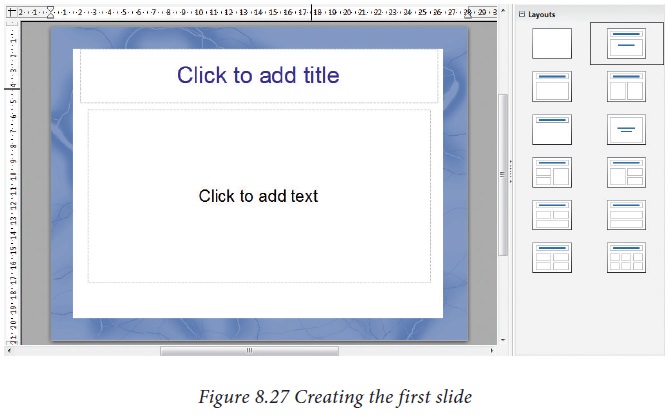
2. Creating the first slide
The first slide is normally a title slide. Decide the layout as per its purpose of presentation. You can use the pre-packaged layouts available in the Layout section of the Tasks pane. Suitable layouts are Title Slide (which also contains a section for a subtitle) or Title Only, Title and Content, Title and two content and so on.
Select a layout in the Layout
section of the Tasks pane by clicking on it: it appears in the Workspace. To
create the title, click on Click to add title (assuming the Blank Slide layout
was not used) and then type the title text.
Adjustments to the formatting of
the title can be done by pressing the F11
key, right-clicking the Title presentation style entry, and selecting
Modify from the pop-up menu.
If you are using the Title Slide
layout, click on “Click to add text”
to add a subtitle. Proceed as above to make adjustments to the formatting if
required. (Figure 8.27)
3. Inserting additional slides
The steps for inserting additional
slides are basically the same as for selecting the title page. It is a process
that has to be repeated for each slide.
Unless you are using more than one
slide master, your only concern is the Layouts section of the Tasks pane
(Figure 8.28).
First insert all the slides that are needed as per your outline. Only after this, you should begin adding special effects such as custom animation and slide transitions.
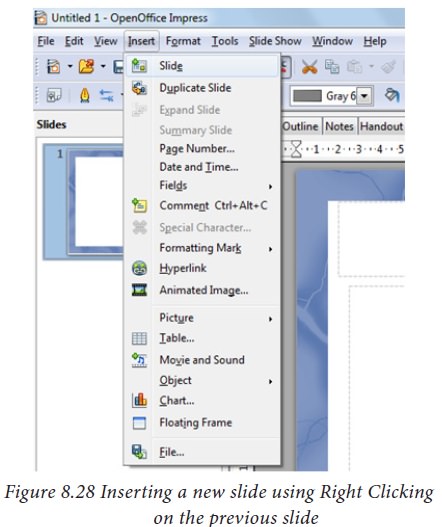
Step
1: Insert a new slide.
This can be done in a variety of ways.
·
Insert -> Slide.
·
Right-click on the present slide, and select Slide -> New
Slide from the pop-up menu. (Figure 8.28).
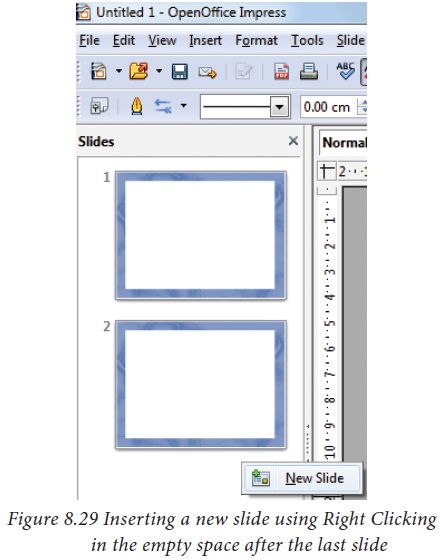
·
Click the empty space after the last slide also to create a new
slide by right clicking New Slide. (Figure 8.29)
·
Click the Slide icon in the Presentation toolbar.
Step 2: Select the
layout slide that best fits your needs. (Figure 8.28).
Step 3: Modify the
elements of the slide like removing unneeded elements, adding needed elements
(such as pictures), and inserting text.
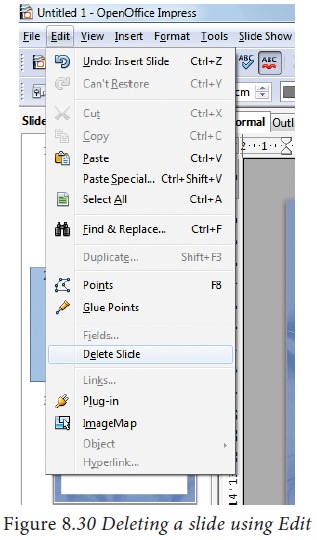
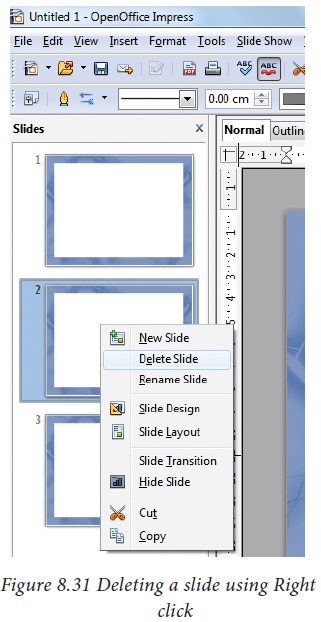
4. Deleting a Slide
You can delete a slide
at any time using the following pro c e du re .
·
Select the slide you want to delete
·
Click Edit • Delete slide (Refer Figure
8.30)
·
Or else, right click the slide and choose Delete slide from the
pop-up menu. (Figure 8.31)
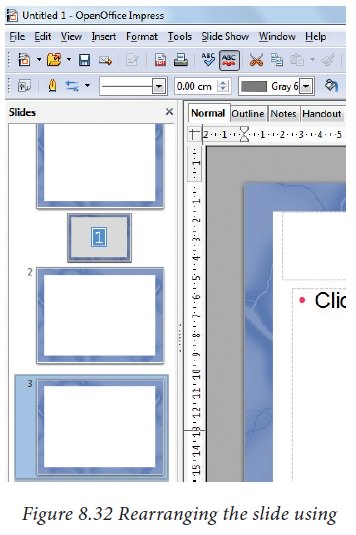
5. Rearranging slides
If you want to
rearrange the slides , you need to follow the procedure below.
• Select the slide that you want to rearrange
.
·
Drag that slide to the desired position by holding the mouse
using left click.
·
Release the mouse once you drag the slide to the desired place.
(Figure 8.32)
Related Topics