Word Processor Basics ( OpenOffice Writer) - Enhancing a Document | 11th Computer Science : Chapter 6 : Word Processor Basics ( OpenOffice Writer)
Chapter: 11th Computer Science : Chapter 6 : Word Processor Basics ( OpenOffice Writer)
Enhancing a Document
Enhancing a Document
1. Inserting pictures
Open office Writer has the ability
to insert and edit images in a more simple way. The picture gallery of the
writer consists of a collection of images from which the desired image can be
selected and inserted into the document. To insert an image from a file, the
steps are as follows:
· Place the insertion pointer where
you want the image to appear
· Select Insert -> Picture -> From file
· The insert picture dialog box
appears where the picture gallery opens from which the desired picture can be
selected.
· If the picture is not in the
gallery, then browse the pictures from the folder, choose the desired one and
· Click on the Open button
· The selected picture is inserted
into the document
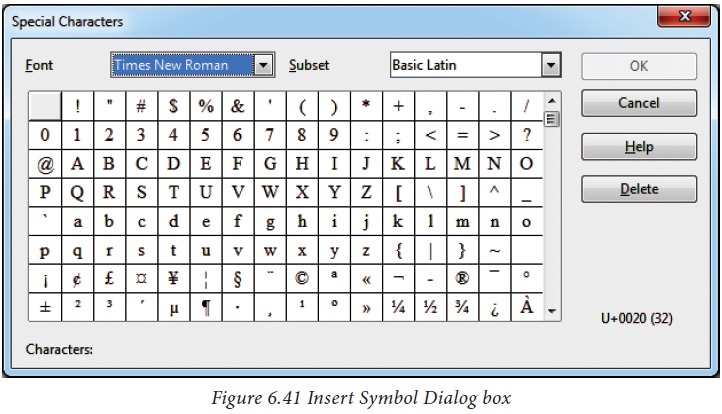
2. Inserting Special Characters
Many symbols which are used in a
mathematical equation like alpha(∞), beta(β), pi(π) etc., are not available on
the standard keyboard. However, representing these characters are very much
essential in mathematical equations. To insert such characters, the procedure
given below is followed:
· Place the insertion pointer in
your document where you want the character to appear
· Click on the Insert -> Special characters
· The Special characters dialog box
appears from which the desired symbol can be selected by clicking on the character.
· As you select each character, it
is shown on the lower right, along with the numerical code for that character
· If you do not find a particular
special character you want, try changing the font selection.
· Click the OK button and the character is inserted at the current location.
The insert special characters dialog box is displayed in Figure 6.41.
3. Inserting Shapes
OpenOffice writer uses the drawing
tools, to create various shapes by using the Drawing toolbar. To use the
drawing tools repeatedly, you can move this toolbar to a convenient place on
the window. The drawing tool bar can be obtained by clicking View -> Toolbars -> Drawing as displayed on Figure 6.42.

To use a drawing tool, the steps
are as given below:
· Click in the document where you
want the drawing to be anchored.
· Select the tool from the Drawing
toolbar as shown in Figure The mouse pointer changes to a
drawing-functions pointer.
· Move the cross-hair pointer to the place in the document where you want the
graphic to appear and then click-and-drag to create the drawing object.
· Release the mouse button. The
selected drawing function remains active, so you can draw another object of the
same type.
· To cancel the selected drawing
function, press the Esc key or click
on the Select icon on the Drawing toolbar.
· You can now change the properties
(fill color, line type and weight, anchoring, and others) of the drawing object
using either the Drawing Object
Properties toolbar or the choices in the dialog box.
4. Inserting AutoText
AutoText allows you to assign
text, tables, graphics and other items to a key or key combination. For
example, rather than typing "TamilNadu" every time you use that
phrase, you might just type "tn"
and press F3. You can also save a
formatted Tip as AutoText and then insert a copy by typing "tip" and
pressing F3.
To assign AutoText shortcut to
some text, the steps are as follows :
1. Type the text into your document.
2. Select the text so that it is
highlighted.
3. Select Edit -> AutoText (or
press Ctrl+F3) .
4. Enter a name for your shortcut.
Writer will suggest a one-letter shortcut, which you can change.
5. Click on the inverted arrow of the
AutoText button on the right and select New (text only) from the menu.
6. Click Close to return to your document.
7. Once the entry is created, to
insert the auto text into the document, place the cursor where the text is to
be inserted and click Ctrl+F3,
8. Select the name from the list of
entries and click Insert button.
9.
The
auto text is inserted into your text.
Related Topics